Please note that the full access to this content needs a "Year at the table" subscription: please sign up.
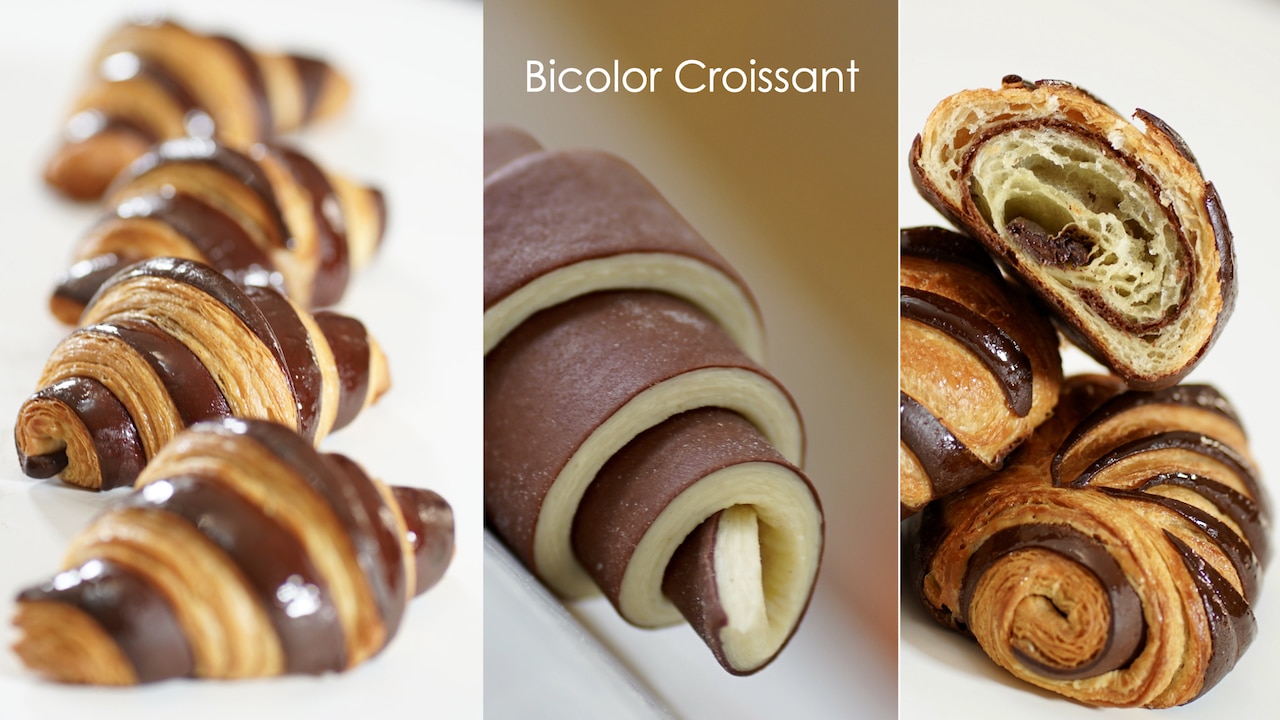
A touch of elegance
This recipe is a protected and only available for paid members. To obtain the full step by step recipe and detailed ingredients list, please sign up.
Preview the recipe
Before You Start
- Croissant dough requires a delicate balance of ingredients and environmental factors to achieve the perfect consistency and flavor. When preparing croissant dough, it's important to consider the impact of atmospheric pressure, humidity, and temperature on the dough. These factors can influence the fermentation process and the final texture of the croissants. To ensure optimal results, it is recommended to work in a kitchen with stable temperature. Furthermore, having enough free space in the freezer is essential when making croissant dough. Chilling the dough at various stages of the process is crucial to relax the gluten. Remember, the secret to a perfect croissant lies not only in the ingredients but also in the precision and care you put into every step of the process. Achieving the perfect temperature when working with croissant dough is crucial for obtaining those wonderfully flaky and buttery pastries we all love. The ideal temperature for mixing croissant dough should be around 70ºF/21ºC. The day after step is to laminate it, which involves incorporating layers of butter through a process of folding and rolling. For this step, the ideal temperature should be slightly lower, around 64ºF/18ºC. This lower temperature helps prevent the butter from softening up too quickly during the lamination process, and shaping.
- In a typical croissant recipe, you would use 1kg/2.2lb of flour to create a total dough weight of 1.9kg/4.2lb. When you add the butter block (500g), the total weight increases to 2400g/5.3lb. In a professional kitchen, skip the step of dividing the croissant dough after the first fermentation when using a dough sheeter/pastry sheeter. If you follow this recipe, you can expect to yield about 36 croissants, each weighing around 65g/2.2 ounces. However, keep in mind that you will lose some dough when cutting out the croissant shapes, resulting in about 32 items. While you could incorporate these scraps into the next batch of croissant dough, it is worth noting that they may affect the final proofing of the croissants. Instead of using the scraps for more croissants, you can save them to make Galette Bresanne, a delicious pastry that originally utilizes brioche. This way, you can minimize waste while still creating a delightful treat. At home, whether you choose to make croissants by hand or using a stand mixer, one crucial step in the process is dividing the fermented croissant dough into two portions before laminating using 250g butter block for each dough. Each laminated croissant dough paton gives you 16 croissants (2X8).


Croissant Dough Matrix
- The Total Temperature Factor (TTF) also known as Basic Temperature ''temperature de base'' was determined by professional bakers to ensure consistent fermentation results every day. It takes into consideration the temperature of the fournil, lab or kitchen, the temperature of the dry main ingredient (flour), and the friction factor according to the machine in use. The liquid temperature is then adjusted in order. Yeasty doughs after mixing, should end up with an internal temperature of 77ºF/25ºC, which is known as desired dough temperature (DDT), this will ensure a proper fermentation process. If internal temperature reads 22/23ºC, leave the dough out for an hour, and then place in the refrigerator. If above 26ºC, place the dough in freezer in order to slow down the fermentation process. After 30 minutes spent in the freezer, transfer dough to the refrigerator. Therefore, kneading by hand or using a mixer or kneading machine will increase dough temperature by approximately 6 degrees celsius which is known as friction factor. Most croissant recipe calls for a TTF sets at 52ºC.For example: if the room temperature is at 22/23ºC and the flour is at 22/23ºC as well. The calculated liquid temperature is at 6ºC. 23+23+6=52. Take this fifty two number and divide it by three: 52÷3=17. Now, add the friction factor number to the equation: +6 degrees celsius. 17+6=23.5ºC/25ºC.Note that during the Winter season, the liquid shall be warmer; around 15ºC.


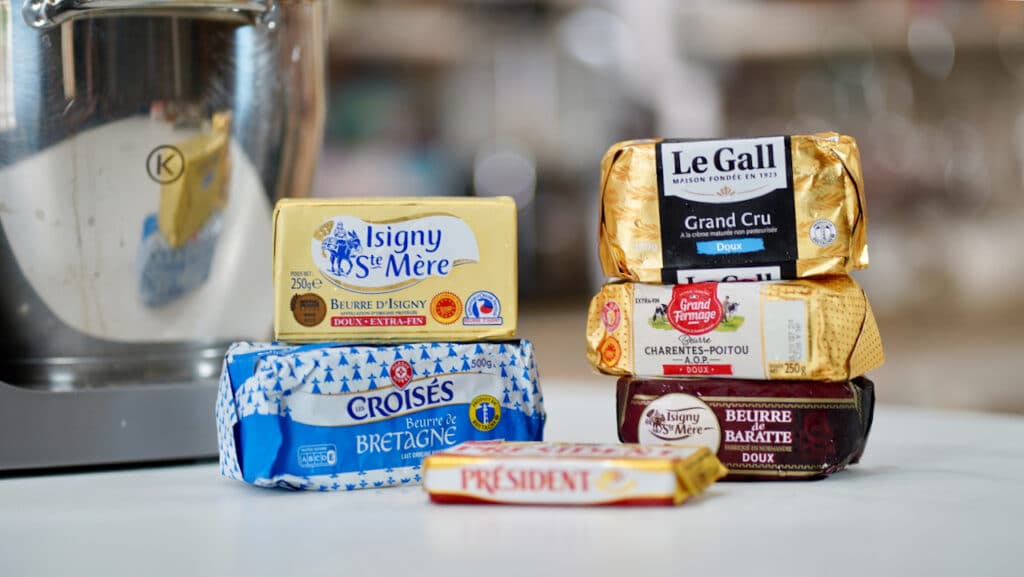
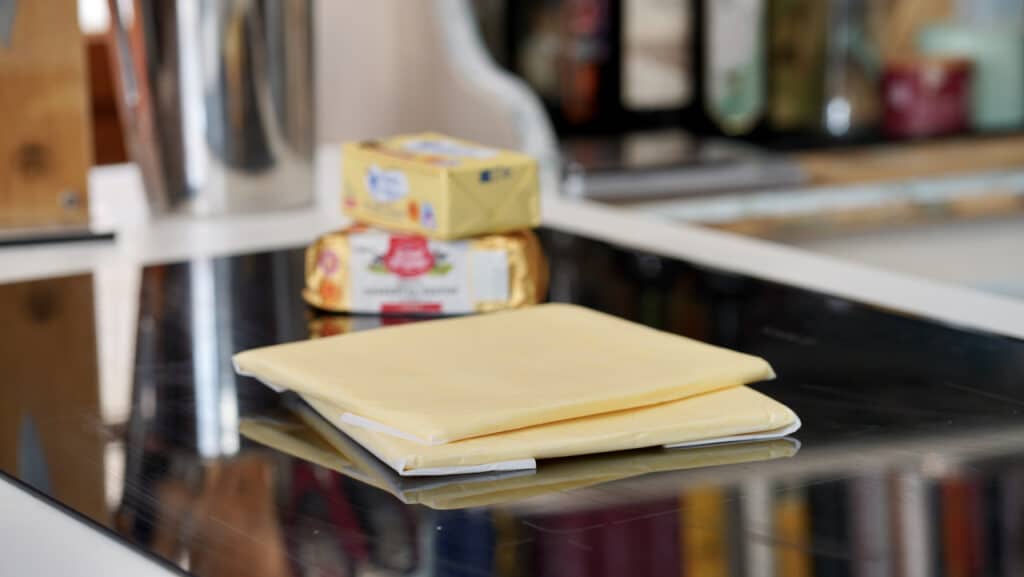
Which Butter To Choose For Croissant
- European-style butters are favored for their rich taste and saturated yellow hue — a direct result of the higher butterfat content 82/84%, and less water. The brand Kerrygold available in the U.S is a good choice. In France, we are fortunate to have access to a wide variety of high-quality butter such as: beurre d'Isigny, Le Gall, Président etc.. In addition and among other brands, Elle & Vire offers extra dry butter (84% fat) into plates for professionnels. This increased fat content makes these butters richer in flavor and more supple, or able to bend while cold without breaking. When making croissants, the quality and handling of butter are crucial to achieving the desired flaky, layered texture. Avoid butter that has previously been frozen, it can develop a marbled appearance when incorporated into the dough. This marbling occurs because freezing can alter the butter's fat and water content distribution, leading to uneven layers.

What Flour To Choose For Croissant
- For a more manageable and ultimately superior croissant dough, consider incorporating a mixture of 1:1 ratio of bread and unbleached all-purpose flour. The key to this winning combination lies in the unique properties of each type of flour. Unbleached bread flour, with its higher protein content, adds structure and stability to the dough. On the other hand, unbleached all-purpose flour helps to create a lighter and more tender crumb in the final product, ensuring that your croissants maintain their shape and rise beautifully in the oven. By blending these two flours together, you strike the perfect balance between tenderness and structure, resulting in croissants that are delightfully flaky yet hold their shape beautifully. Additionally, this flour mixture is easier to work with, making the rolling out process a breeze and allowing you to achieve those perfect thin layers that are characteristic of a great croissant.
Egg Wash
- Mix eggs with the immersion blender. Keep it refrigerated for up to 3 days.
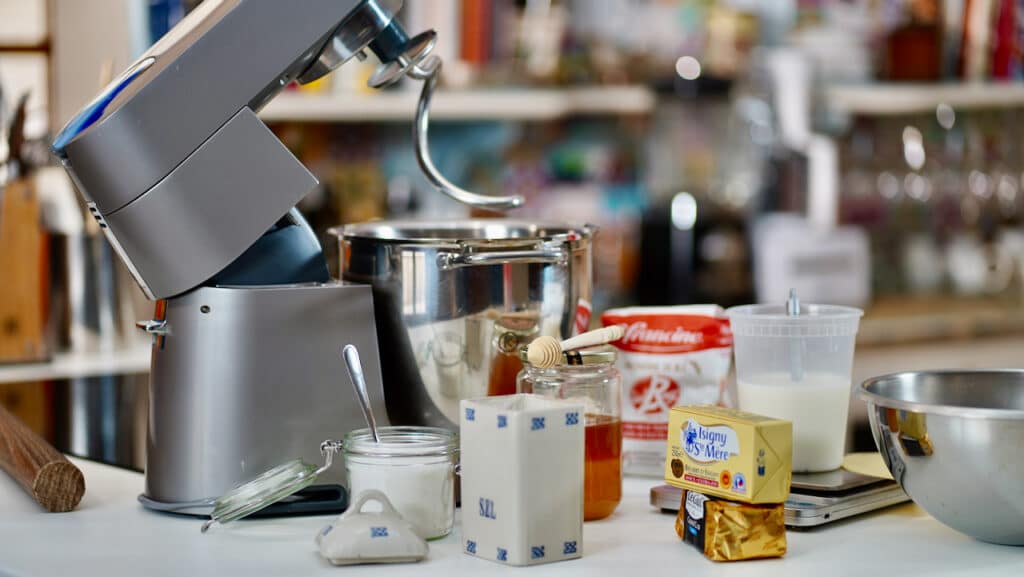
Make The Butter Block
- This can be made ahead of time. Leave butter out for 2 hours to soften but not too much. In the mean time, mark a 6-inchX6-inch/15X15cm square in the middle of a piece of parchment paper or heavy plastic wrap and then flip over so the marked side is facedown. Place the room temp butter in the center of the marked square.

- Fold the parchment or plastic over to completely encase the butter. Flip and press down butter with the rolling pin to spread it out evenly. Keep refrigerated.


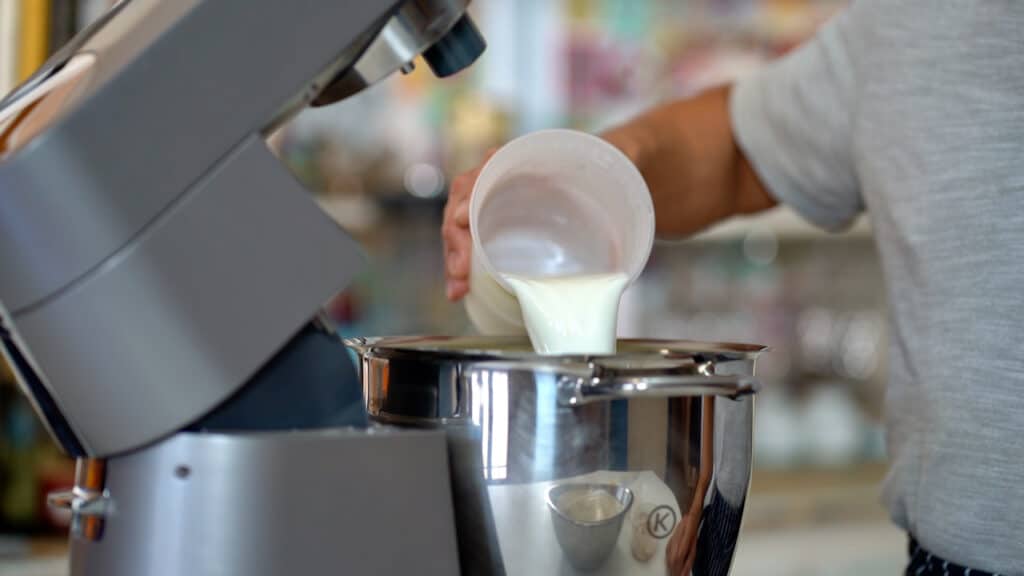
Croissant Dough
- At home, whether you prefer the tactile experience of kneading croissant dough by hand or the convenience of a stand mixer, the end result will be the same.

- If using fresh yeast: pour the liquid in the mixing bowl first, add yeast along with sugar and honey – stir with a whisk. Add flours, salt and room temp butter. If using instant yeast: Mix dry ingredients all together first. Then, add the cubed butter and roughly sand the mixture by hand or use a stand mixer fitted with the hook attachment. Add liquid and continue mixing until a cohesive dough forms. If you are kneading by hand, transfer the dough onto a work surface and knead using the palm of your hand. This process helps develop the gluten and create a smooth, elastic dough. It should take approximately 10 minutes of kneading by hand.
- With the stand mixer fitted with the whisk attachment: mix all ingredient on low speed for 5 minutes. Scrape down the sides of the mixing bowl twice during mixing.
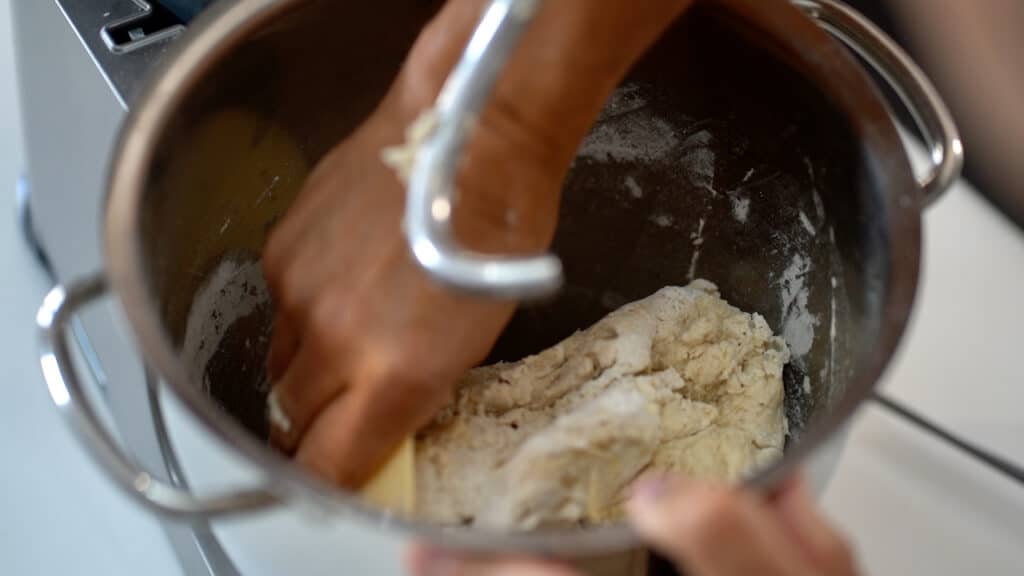
- Increase mixer speed to medium-high, and mix for 6 minutes or until the dough pulls away from the sides of the bowl. Do the windowpane test: Gently stretch a small portion of the dough into a square. Keep on stretching until it becomes a thin film in the middle without breaking. That means the gluten is well-developed and your dough is ready to rise. Transfer dough on the countertop without the use of any extra flour. Shape dough into a tight round and transfer to a lightly oiled pastry bowl. This helps prevent the dough from sticking and allows for easier removal later on.

- Cover the container with plastic wrap to seal. Poke a hole in the center (this allows some of the carbon dioxyde to escape during the fermentation). Place the dough in the refrigerator overnight. The slow fermentation process that occurs in the refrigerator enhances the taste and texture of the final baked goods. Additionally, the cold temperature helps control the yeast activity, leading to a more flavorful and tender dough.

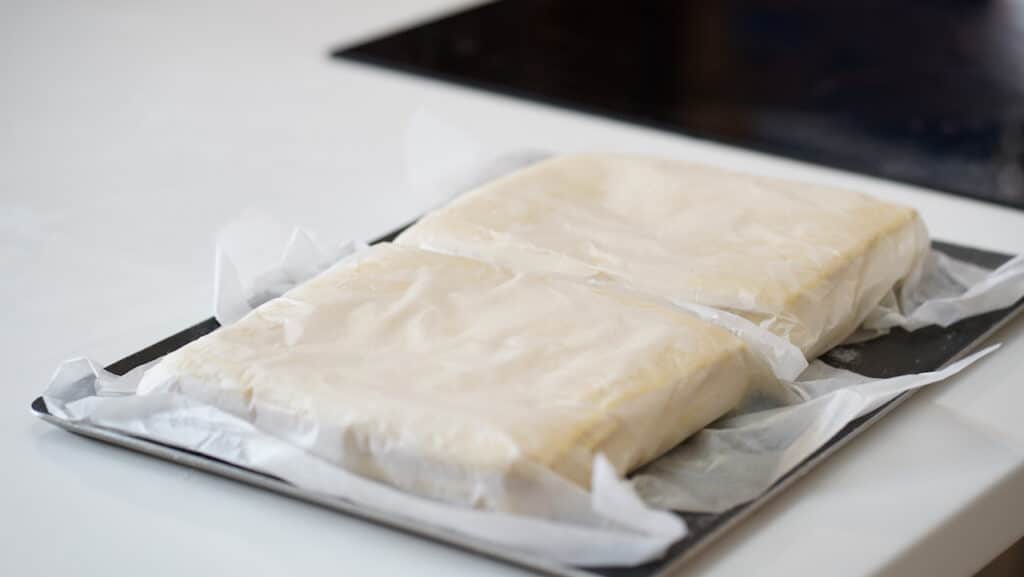
- Place 2 baking trays in the freezer.

- Take the fermented croissant dough out of the refrigerator, and turn it out onto the work surface. No flour needed.

- Take out 300g of fermented dough for the colored dough. Cut it into pieces and set it aside for now. Split remaining dough in half: 2X630g.
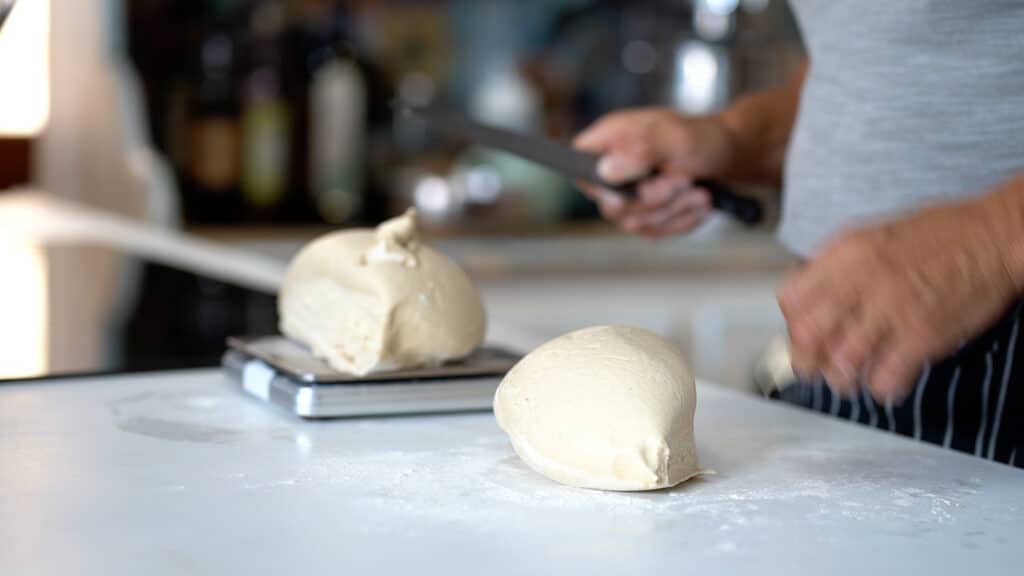
- Deflate/degas dough, and shape into 2 tight ovales. Let rest 10 minutes.

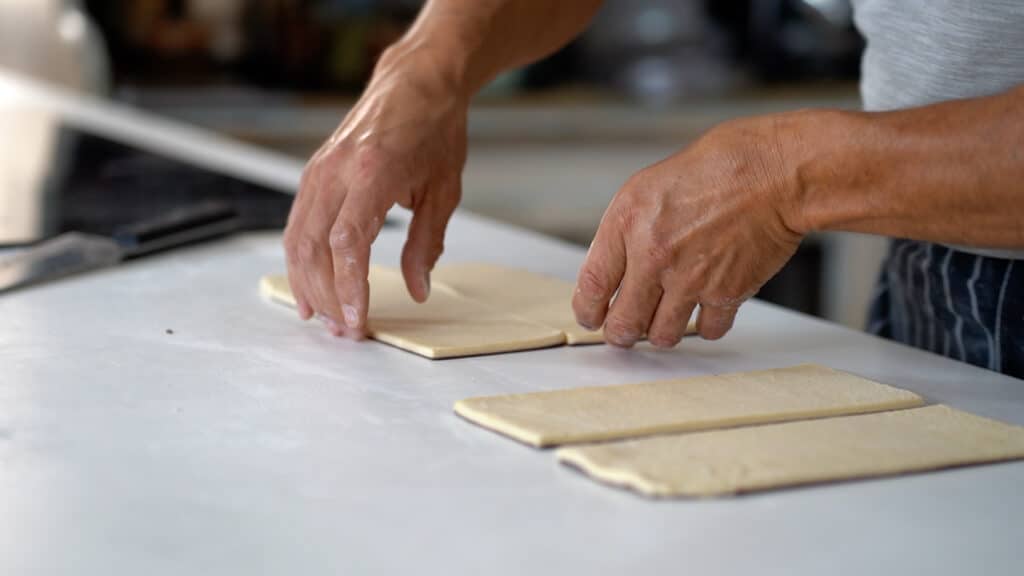
- Flatten each ovale, and form 2 evenly distributed narrow rectangles.

- Place dough onto a frozen tray (seam side down), and freeze for 20 minutes; uncovered. Flip dough, and freeze for another 20 minutes. This step helps to firm up the dough, making it easier to laminate.


Colored Dough
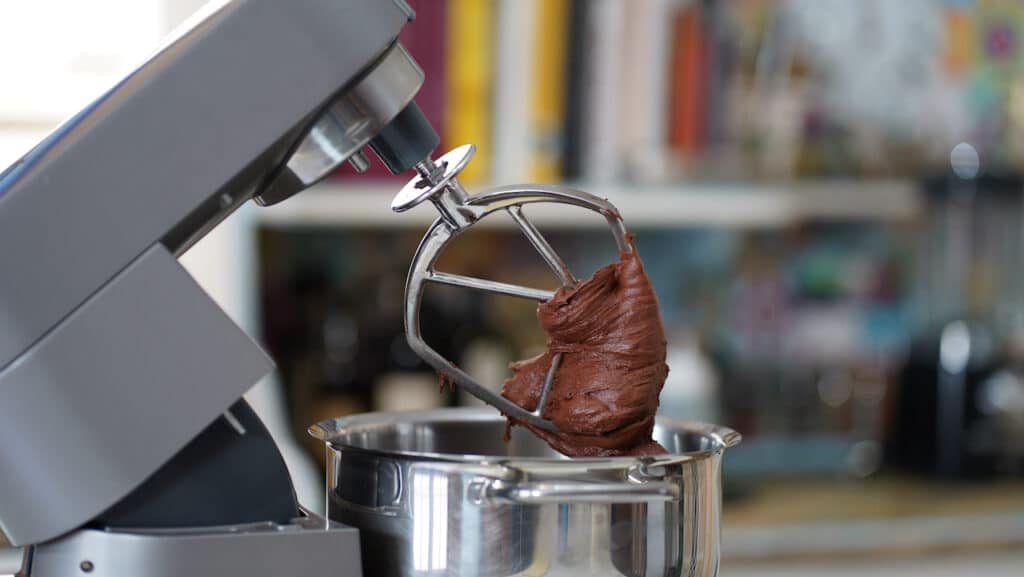
- Using a stand mixer fitted with the paddle attachment, gather the pieces of the 300g saved croissant dough along with water, cocoa powder, and butter to the mixing bowl. Turn the mixer on to medium speed and let the ingredients combine for approximately 3 minutes or until well combined and smooth. The paddle attachment will work to knead the dough thoroughly, ensuring that all components are evenly distributed. It will gradually become homogenized and elastic. This is crucial for creating a stretchable and ultimately thin layer of colored crust.
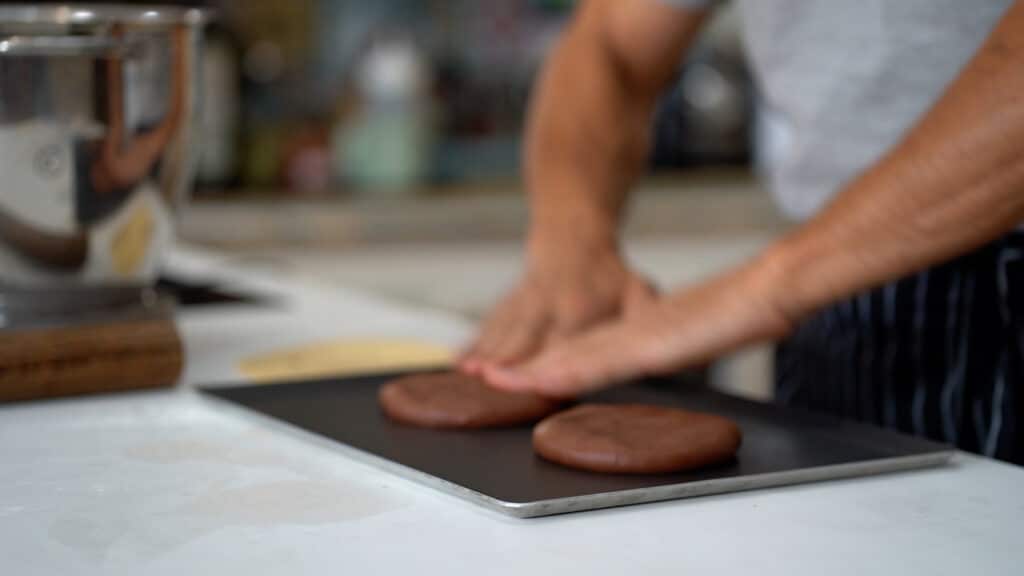
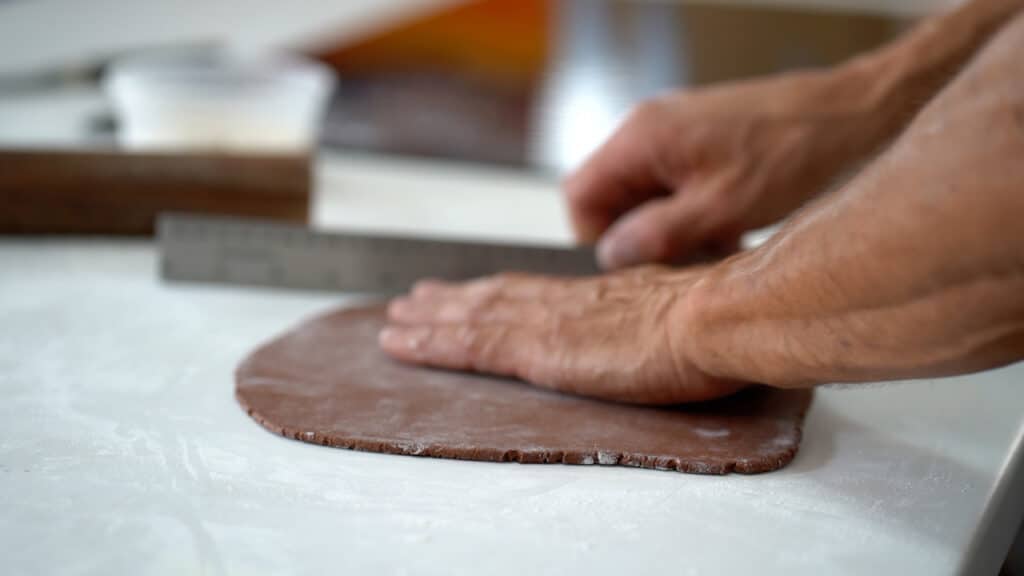
- Shape colored dough into 2 rounds. Let rest 5 mins, and flatten with the palm of your hand and freeze for 10 minutes. No extra flour is needed at this juncture.
- Now, flour work surface. Roll out each round into a 8.5-inch/22cm sheet. Use the freezer back and forth during the rolling procedure. Gently trim the sides to square if off. Do not re-incorporate scraps to the dough.


Laminating Process
- One of the key techniques in making croissants is the process of lamination, known as tourage in French. This technique involves layering butter between the dough to create those signature airy layers. The dough temperature should be around 36°F/2°C, and the butter block 53/59°F (12/15°C). Leave it out for about 5 minutes during the Summer season and 15 mins during the Winter. It should be malleable (like clay) but not soft.

Lock-in The Butter Block
- The lock-in is the initial encasing of the butter in the dough. Lightly flour the countertop. Readjust the cold and firm croissant dough to a 6X16 inch/15X40cm rectangle (about twice the length of the butter block). Keep refrigerated.

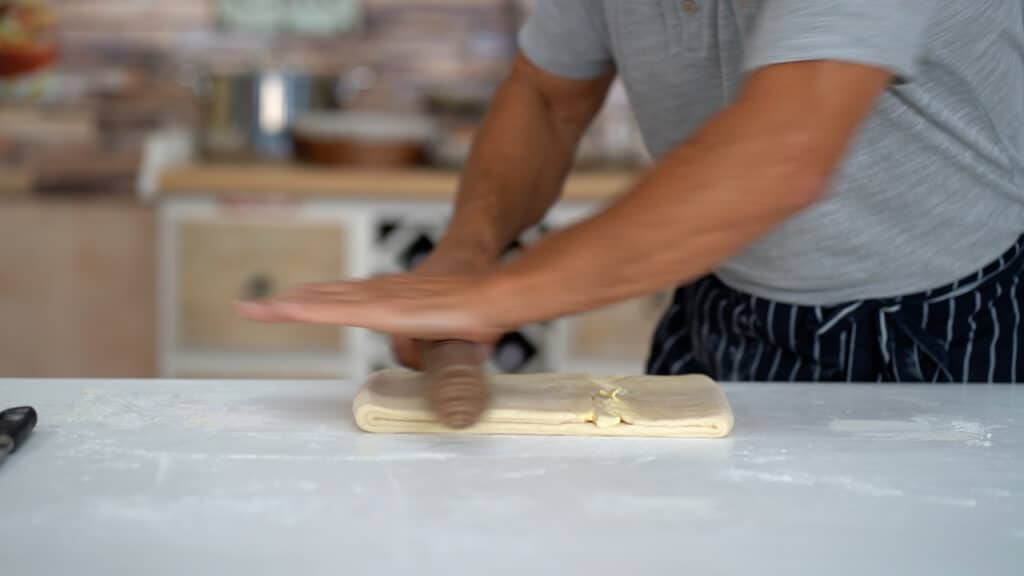
- Place butter on top of the dough, and fold over the butter, encasing it in dough. You may want to gently pinch the sides.

- Rotate to a quarter turn, and gently press down with the rolling pin.

- With a cutter, make a deep straight cut on each side. This trick helps the butter to get evenly distributed throughout the dough, and right from the beginning. Gently flatten and let rest in the refrigerator for 10 minutes before you give the turns.


Double Turn/Fold (Tour Double)
- Do not use the pasta machine yet to make the turns. Roll out dough into a long strip that should measure 6x27-inch/15X70cm. Keep all edges as straight as possible, starting rolling it out from the center of the dough towards the edges, and not from one side of the dough all the way to the other side. This technique helps to keep the dough at an even thickness. Do not hesitate to chill the dough 10 minutes or so to relax if it resists.

- Brush out any excess flour. Fold in approximately 1/6 of the dough from the left edge inward. Trim the ends if necessary, and redistribute the dough prior to fold.

- Bring the other edge of the dough to meet the folded edge. Then the right third is folded in. Roll out to seal.
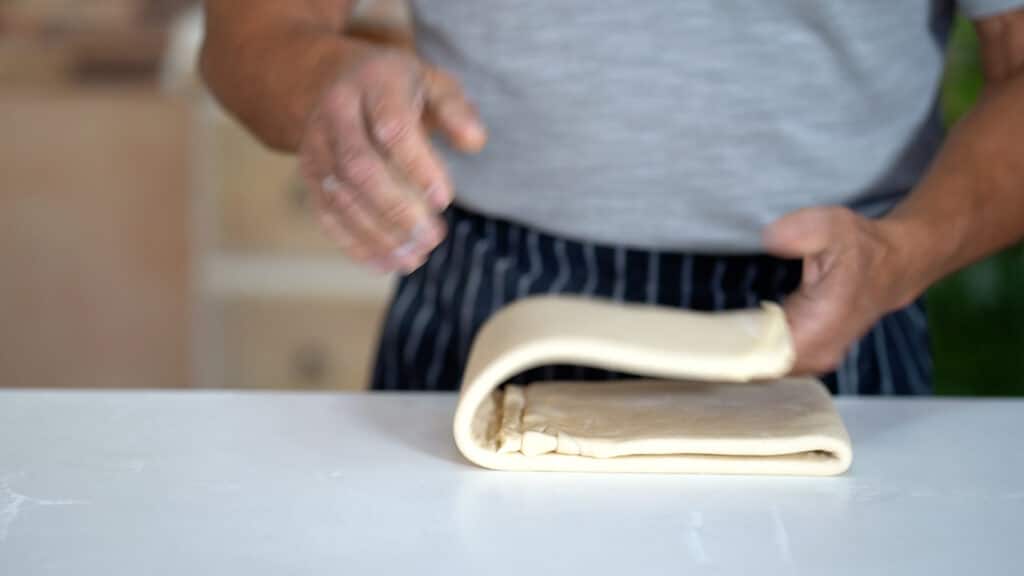
- Then, fold this entire folded dough in half like you would a book.

- Roll out into a long and thick rectangle, and cover the dough with plastic film or parchment. Let rest in the refrigerator for 30 minutes. Resting croissant dough is a crucial step to ensure the dough relaxes and becomes easier to work with.


Single Turn (Tour Simple)
- Roll out dough into a 6x27-inch/15X70cm rectangle. Brush off remaining flour as often as it needs it.

- In order to create straight, clean edges, the edges may be trimmed prior folding.

- Then, the dough is folded in thirds, like a business letter.
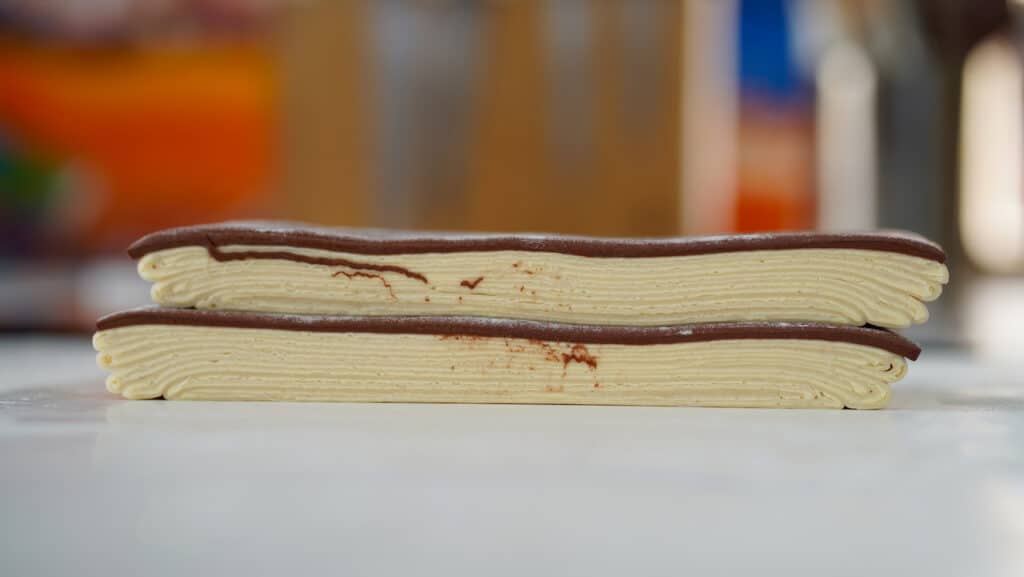
- Flatten the laminated croissant dough into a 8.5-inch/22cm squared slab. Cover with plastic wrap, and place in the refrigerator an hour to rest.


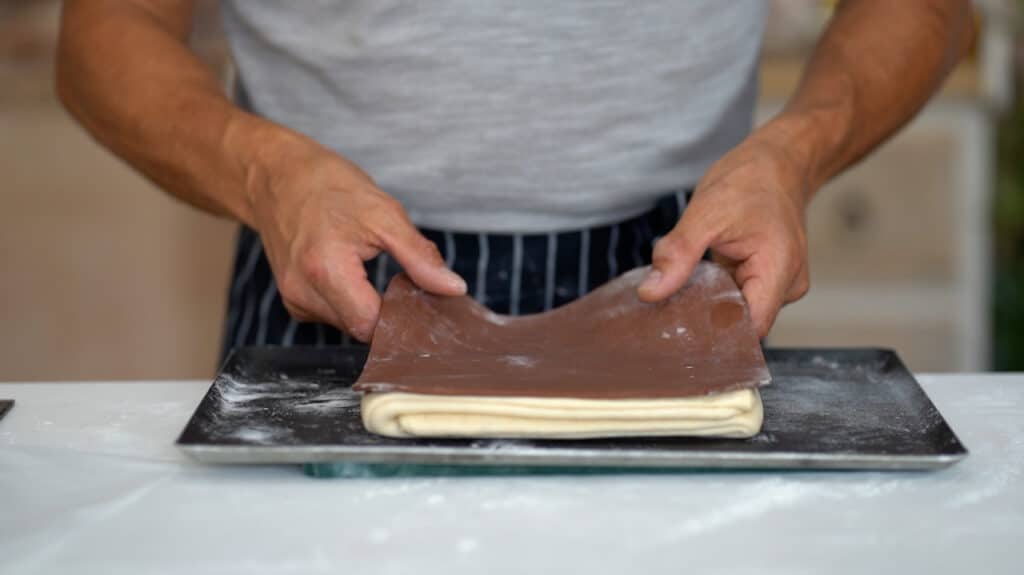
Adding Colored Dough
- Dip a pastry brush in a small bowl of water. Shake off any excess water to avoid over-moisturizing. Gently brush the surface of the croissant dough, and cover it with the frozen colored dough sheet. Flatten to seal and refrigerate.

If Using The Dough Sheeter
- By automating the process of rolling and folding the dough with the help of a dough sheeter can help you achieve consistent results with less manual labor. One of the key benefits of using a dough sheeter is the reduction of resting time required during the lamination process. As a result, you can bypass the resting time in between turns and proceed with the lamination process more efficiently. Proceed to make the double and single turn as explained above. Shaping croissants: Start by setting the sheeter to its widest setting to begin the rolling process. Gently feed the dough through the sheeter (seams set from noon to 6 o'clock) taking care to support the dough as it passes through. Keep the work surface lightly floured to prevent sticking. As the dough becomes thinner, gradually decrease the thickness setting on the sheeter and continue to pass the dough through until it reaches 5 millimeters thickness. Brush off excess flour. Cut into 32 croissants.


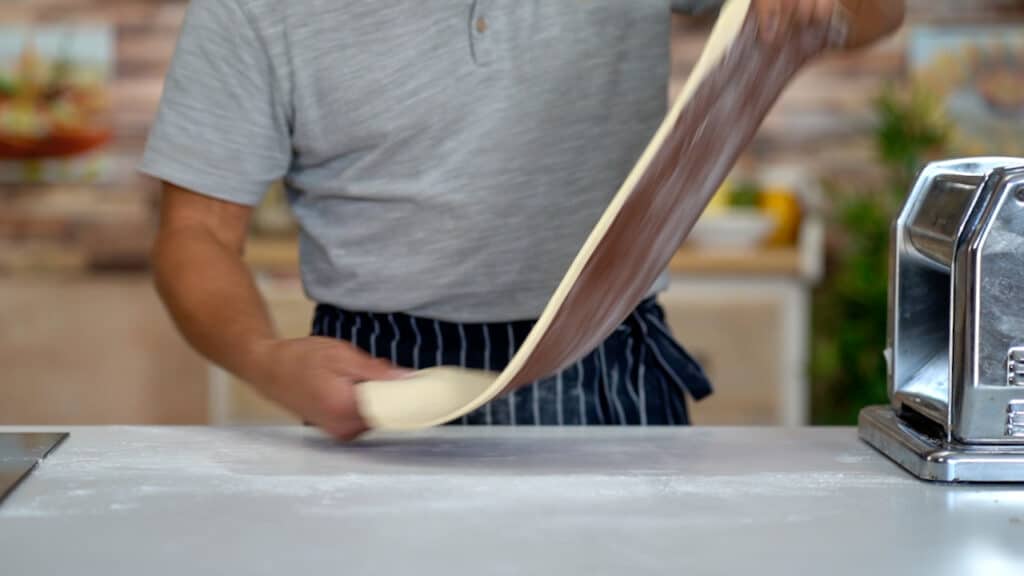
If Using A Pasta Machine
- Cut the laminated croissant dough paton into 2 equal portions otherwise it won't go through the machine. Flatten out dough into evenly distributed rectangles, place on frozen tray and freeze for 10/15 minutes before getting to the next step. Lightly dust flour over the pasta machine and dough. Roll out dough again so that it fits in the widest sitting of the rollers. Then towards the end, set the adjustment nob of the pasta machine at #9 to reach the final proper thickness: 5mm. Pass through the pasta machine twice. You should end up with a 8X18-inch/20X46cm rectangle. Brush off any remaining flour left on the surface and countertop.

Rolling Croissant Dough By Hand
- If rolling croissant by hand, one essential technique that should not be overlooked is the process of refrigerating the dough during and after folding. By taking the time to chill the dough at various stages, you are allowing the gluten to relax, which in turn makes it much easier to roll out the dough without it springing back.

Cutting Croissants
- Split the croissant dough sheet in half. Then make a lengthwise cut creating 4 equal rectangles.
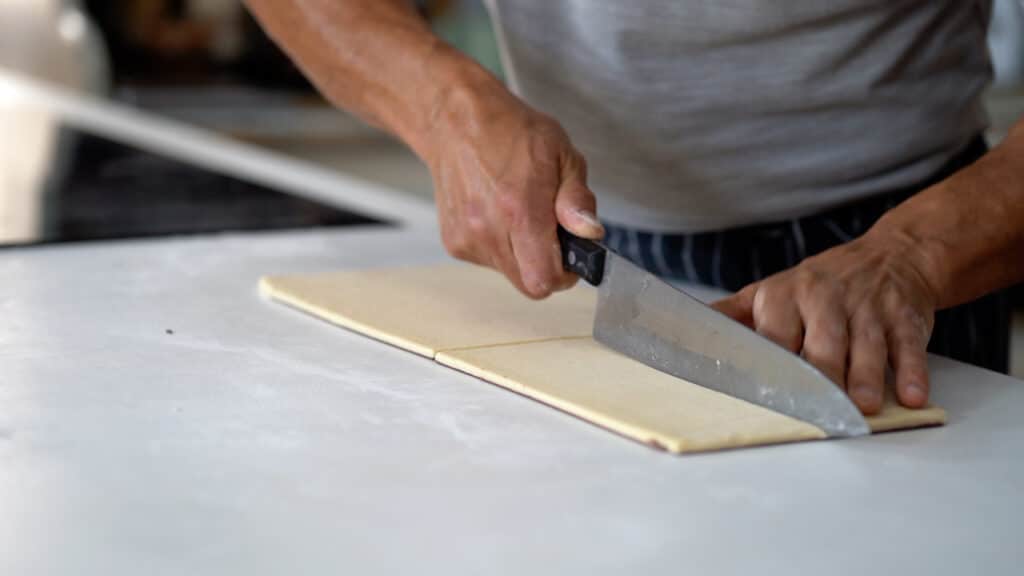
- Rotate them upward.
- Make 2 triangles out of each rectangle make 8 croissants. Now, here's where things get interesting. Some chefs choose to make an inch/2.5/3cm incisions from the base of each triangle before rolling them up to form croissants. This additional step increases the width of the croissant, resulting in a slightly different appearance. However, it's important to note that this may compromise the visual height of the croissant. Whether you choose to cut the base of the croissant triangles or not, the most important thing is to handle the dough with care and precision throughout the process.


Shaping Croissants
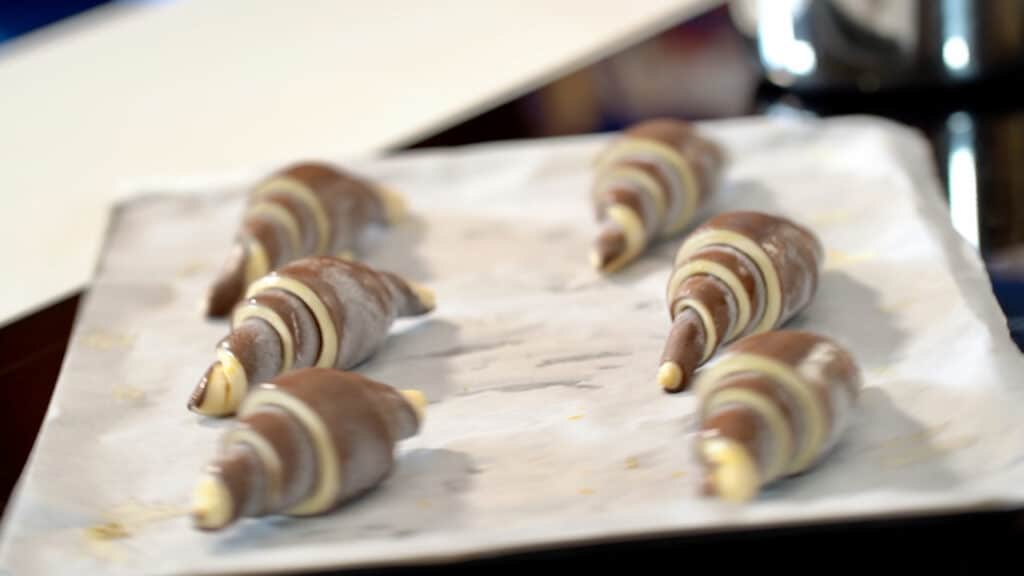
- With the base of the triangle held in one hand, elongate the dough by very gently stretching from the base and continuing all the way to the tip of the triangle. Starting at the base of the triangle, roll toward the tip. Press down the tip to seal the rolled croissant.
- Arrange croissants next to each other onto a frozen tray, egg wash and freeze. Freezing croissants overnight strengthen the gluten improving final results.


Chocolate Croissant/Chocolatine
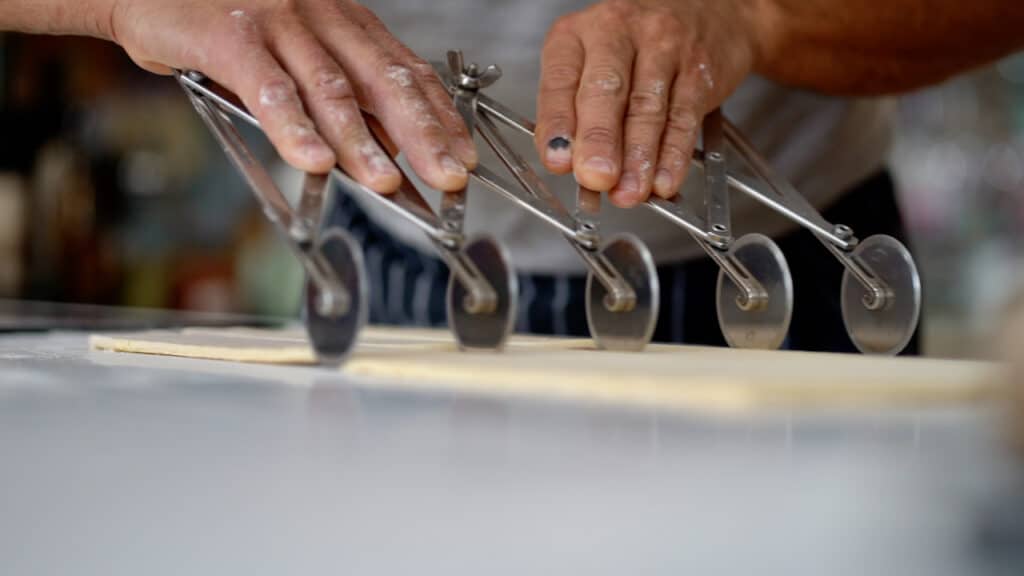
- Roll out croissant dough into a 7X20-inch/18X50cm rectangle. Make 3 cuts lengthwise, and share in 4 portions creating 12 rectangles.
- Rotate dough upward giving more length to the chocolatine.

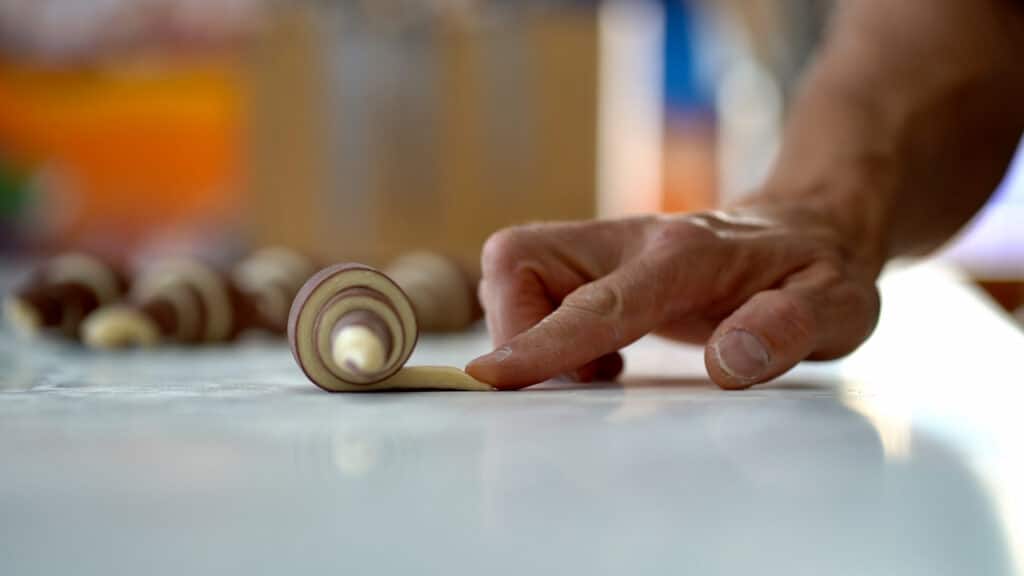
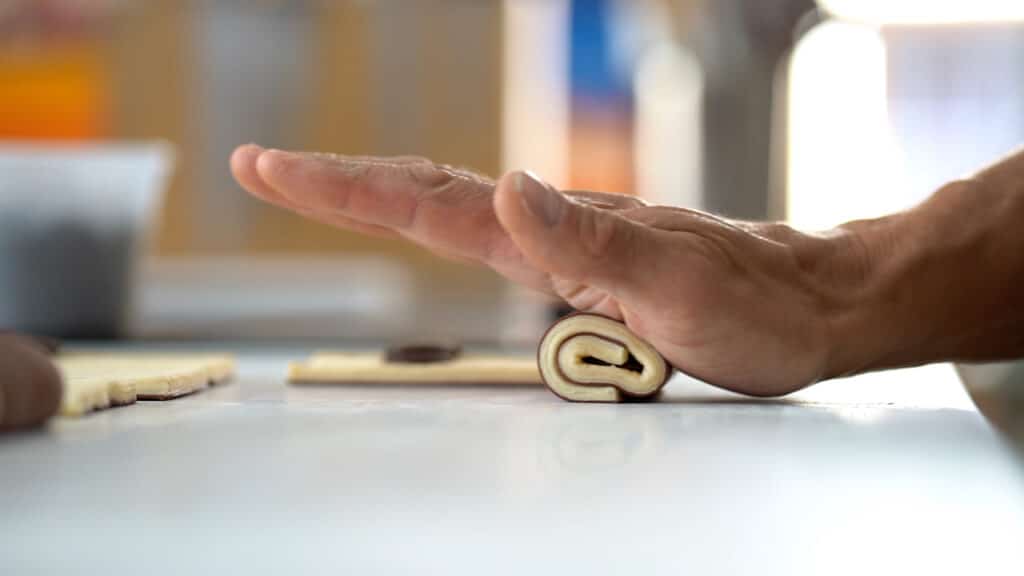
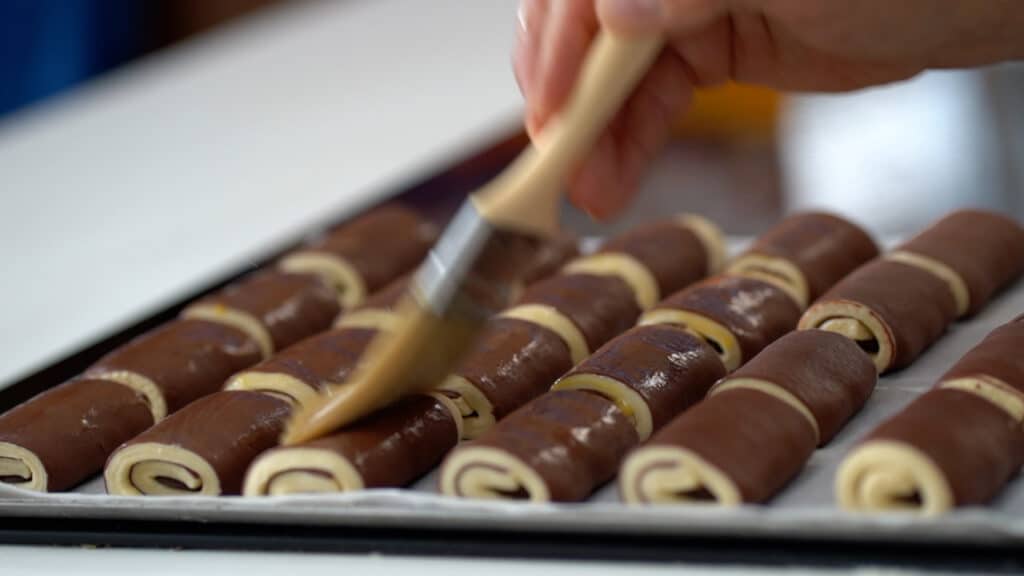
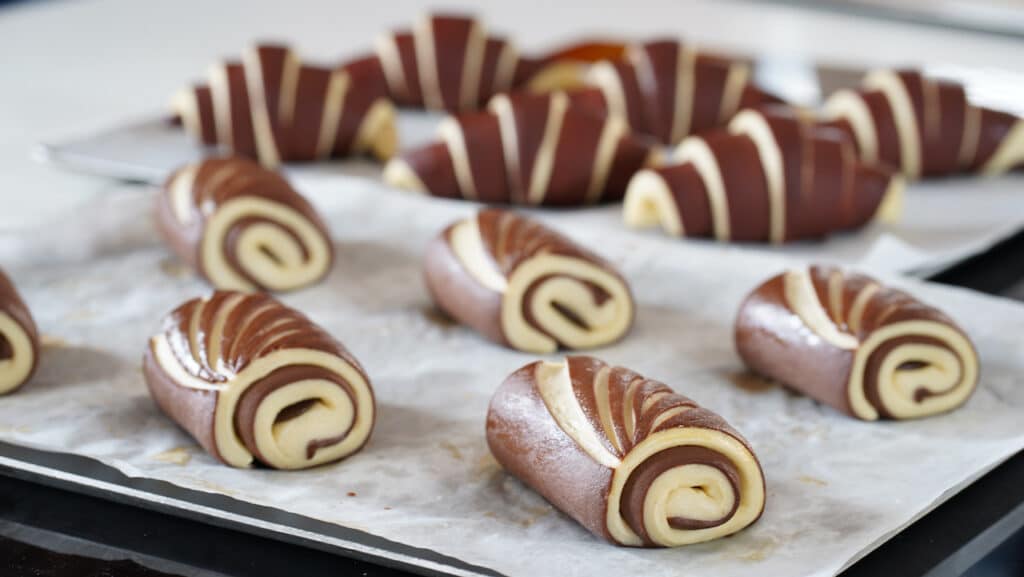
- Overlap about 7 chocolate disks or place 2 chocolate sticks on each, and roll into logs. Arrange bicolor chocolatine on a frozen baking tray. Repeat with remaining dough.
- Egg wash chocolatine and freeze for 15 minutes prior to score.
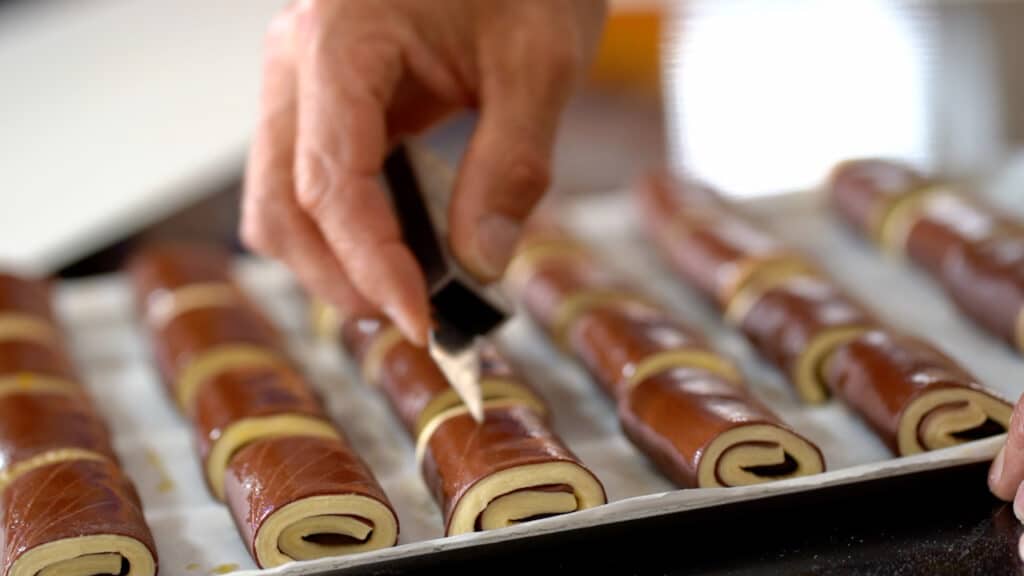
- Score chocolate croissants using the tip of a cutter. Go easy and carve in light motions the outer colored part only. Freeze.


Gum Arabic Syrup
- The addition of gum Arabic in simple syrup is utilized to give petits fours and other pastries a beautiful glossy finish. Gather all ingredients in a small saucepan. Bring to boil and cook for 2 minutes. This syrup can last days in the refrigerator or kept frozen for months. Lightly brush hot gum Arabic syrup over hot croissants. Pass syrup through a sieve. Keep refrigerated for up to a month.


Proofing Method 1
- Place six frozen croissants/chocolatine per baking sheet (do nine if croissants weight less than 55g each). Make sure the tip of the rolled croissant stays tucked under as it is placed on the pan. Let croissants thaw in the refrigerator overnight first, and then place in the warm place that should not exceed ≈78ºF/26ºC. Let proof for 2 hours or until croissants have doubled. Egg wash with care and bake.

Proofing Method 2
- Arrange frozen croissants on frozen baking trays. Let proof at room temperature that should not exceed 70ºF/21ºC; uncovered for approximately 6 hours. Egg wash with care and bake.

Baking Croissant
- Two trays of croissants can be placed in the oven at the same time. Preheat fan oven to 350ºF/180ºC. Bake your croissants for 20 minutes. Rotate the trays halfway through the baking process. This simple step helps to ensure that all the croissants bake evenly, with a uniform golden brown color on all sides. Hot croissants can be then finished with a light touch of hot gum Arabic syrup.Note that croissants are actually at their best an hour after being taken out of the oven. During this time, the flavors have a chance to develop and the texture reaches its peak flakiness.


Storage
- Are you looking for a convenient way to enjoy freshly baked croissants whenever you want?. Unbaked croissants can be kept frozen for up to 2 weeks max. This means you can prepare a batch of delicious croissants ahead of time and have them ready to bake whenever the craving strikes. However, it's essential to keep in mind that after 10 days in the freezer, the yeast in the croissants start to lose their effectiveness.
How To Keep Baked Croissant Super Fresh
- When it comes to freezing food, timing is crucial. Whether you are storing leftover meals, fresh meat, fish, or even baked goods like croissants, it's essential to freeze them as soon as possible and within 2 hours for baked croissants . This ensures that the food retains its freshness and flavor when you eventually decide to enjoy it. Speaking of croissants, when you're ready to enjoy your frozen croissants, preheat your oven to 400ºF/200ºC. Once the oven is hot, turn it off and place the frozen croissants on a tray inside. After 5 minutes, remove the croissants from the oven and let them sit for 10 minutes or more before diving in. This method helps to revive the flaky texture and buttery flavor of the croissants, giving you a delicious breakfast treat in no time. Doing so, croissants shelf-life are reduced. Now, what to do with stale croissants? turn them into amazing Almond Croissants!


This content is part of the PREMIUM SECTION

This recipe requires a All-content access subscription. The Premium section includes more than 50 essential recipes from French pastry and a special section for mastering artisanal bread.
The Premium section is only accessible with "A year at the table" subscription. Discover it with special first year discount.