Please note that the full access to this content needs a subscription: please sign up.
Blueberry en trompe l'oeil
This recipe is a protected and only available for paid members. To obtain the full step by step recipe and detailed ingredients list, please sign up.
Preview the recipe
Blueberry Juice
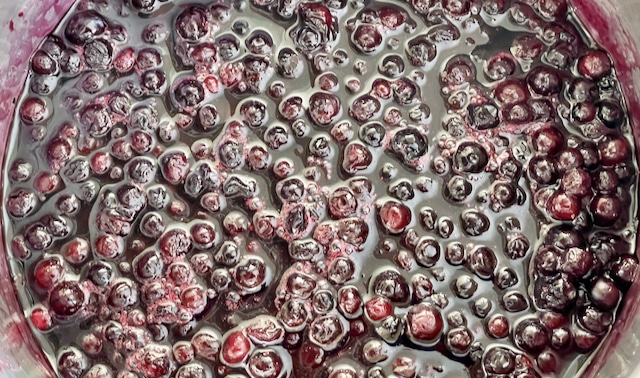
- One of the best ways to extract the vibrant flavors of berries is by using frozen fruits. To start, you will need a saucepan to gently heat the frozen blueberries. Add some fresh lemon juice and a touch of sugar to enhance the natural sweetness of the berries. Slowly bring the mixture to a gentle boil, allowing the flavors to meld together. Once the mixture has simmered and the berries have softened, it's time to take it off the heat. Cover the saucepan and let the mixture sit for at least an hour, or for the best results, overnight. This resting period allows the flavors to intensify and develop, resulting in a more robust and vibrant berry juice. After the resting period, it's time to strain the mixture. Pass the blueberry mixture through a fine-mesh sieve or chinois, pressing down on the solids with a ladle to extract all the liquid. Don't discard the blueberry solids just yet.

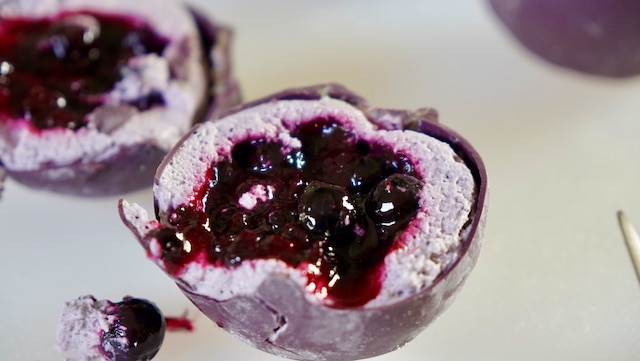
Blueberry Insert
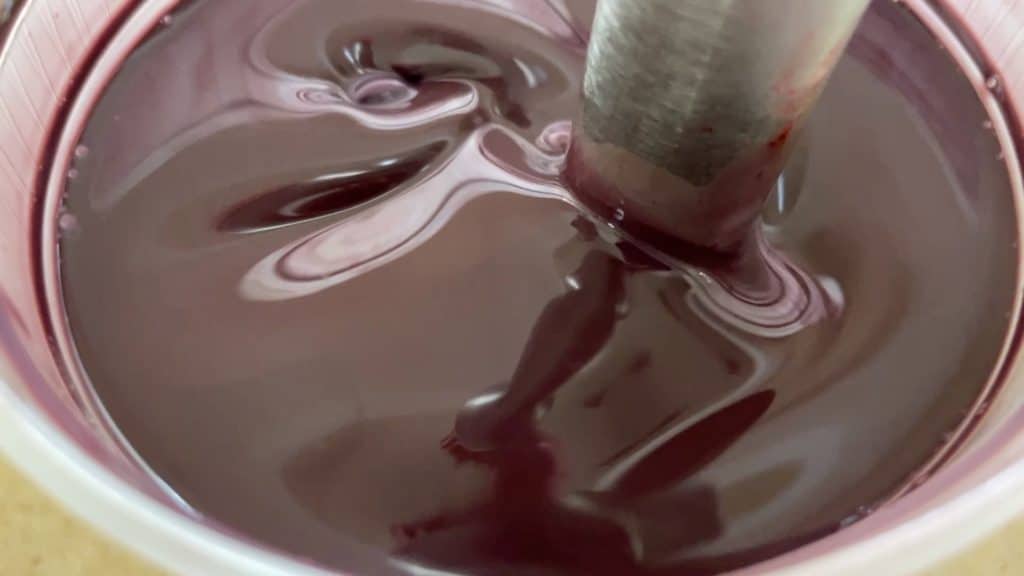
- Start by combining sugar with agar-agar. Agar-agar, a plant-based alternative to gelatin, is renowned for its jelly-like consistency and health benefits. Heat up blueberry juice and add the sugar-agar mixture along with a touch of citric acid, a naturally occurring antioxidant that enhances the flavor profile of the dessert. Whisk the mixture vigorously, bring it to a gentle boil, and let it cook for 2 minutes on low heat. Once the mixture has thickened, cool it down in an ice water bath and refrigerate it until it sets completely. This step is crucial for achieving the perfect texture and consistency of the jelly. While the jelly is setting, prepare the fresh blueberries by rinsing and picking through them. In a hot frying pan, quickly sauté a combination of fresh and frozen blueberries along with the solids saved from the juice and sugar mixture. Transfer the sautéed blueberries to a plate to cool off. Using an immersion blender, smooth out the blueberry juice and combine it with the sautéed blueberries, seasoned with a hint of Timut pepper for a subtle kick of citrusy spice. The Timut pepper's unique aroma and flavor profile complement the sweet and tangy notes of the blueberries perfectly. Fill half-sphere silicone molds with the blueberry mixture and freeze them until firm. Once set, un-mold and seal them together to form spheres. Keep them frozen.

Blueberry Mousse/Ganache Montée
- To start, soften gelatin by soaking it in cold water and draining it. Meanwhile, bring half of the heavy cream to a boil. In a narrow container, gently melt the chocolate and combine it with the hot heavy cream. Use an immersion blender to mix the two until smooth. Next, add the softened gelatin and the blueberry solids saved from the juice, blending well. Finally, incorporate the remaining chilled heavy cream, mix thoroughly, and refrigerate the ganache montée overnight before whipping.
Blueberry Crowns
- Roll out a piece of marzipan into a thin 2mm sheet. Dusting the marzipan with corn starch will help prevent it from sticking and make it easier to work with. Once rolled out, use a cookie cutter to cut the marzipan into small 3cm disks. Next, take each disk and carefully turn them into paper-thin coins by gently pressing and stretching them out. This step requires precision and a light touch to achieve the desired thinness. Once the coins are ready, use a sharp knife to cut them again, creating small pieces that will form the crown's intricate design. To assemble the marzipan crowns, fold the edges of each piece to create the shape of a crown.
Montage
- Whip half of the mousse and save the second half for the next day if you have 5 silicone spheres only. Next, whip the ganache montée to soft peaks. Fill the silicone spheres two-thirds full with the ganache, then add the frozen blueberry inserts and gently press them down. Cover the spheres with the lid, ensuring a tight seal. Fill up the spheres completely, making sure there are no empty spaces left. Any leftover mousse can be used for touch-ups. Freeze the cakes overnight for the flavors to meld together. If you're planning to make this dessert in advance, keep the cakes in their molds until you're ready to glaze them.


De-Molding
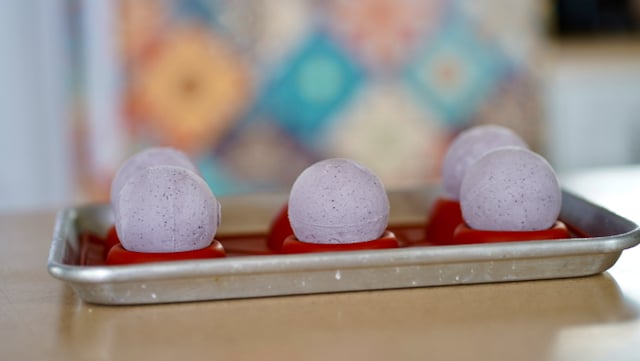
- Remove your frozen cakes from their molds. Next, arrange them onto frozen upside-down semi-sphere molds. This step is crucial as it will keep each cake in a stabilized position, ensuring a professional finish. Place the molds back in the freezer for about an hour to set. Once the cakes are firm, carefully shave off any uneven ends. Use your palms to smooth out the surface of the cakes, creating a sleek and polished look. Return the cakes to the freezer for another 30 minutes to ensure they are completely set. To add the final touch, top each cake with a dot of leftover mousse. This will help secure the crown in place.

Chocolate Enrobage
- Chocolate enrobing is the process of coating various confections with a smooth and glossy layer of chocolate, providing a luxurious finish and added flavor. To start, melt cocoa butter to 140ºF/60ºC. Once the cocoa butter is melted, remove it from the heat and add chocolates. The mixture will melt into the cocoa butter. Next, transfer the chocolate to a narrow container. Add food coloring to the mixture at this stage if you desire colored chocolate coatings. After adding the food coloring, it's time to incorporate oil into the mixture. The oil helps to thin out the chocolate mixture slightly. Be sure to mix the oil in thoroughly to achieve a uniform consistency. Before enrobing your confections, it's important to sieve the chocolate mixture. When enrobing cakes, aim for a temperature of around 90ºF/32ºC for the chocolate mixture.

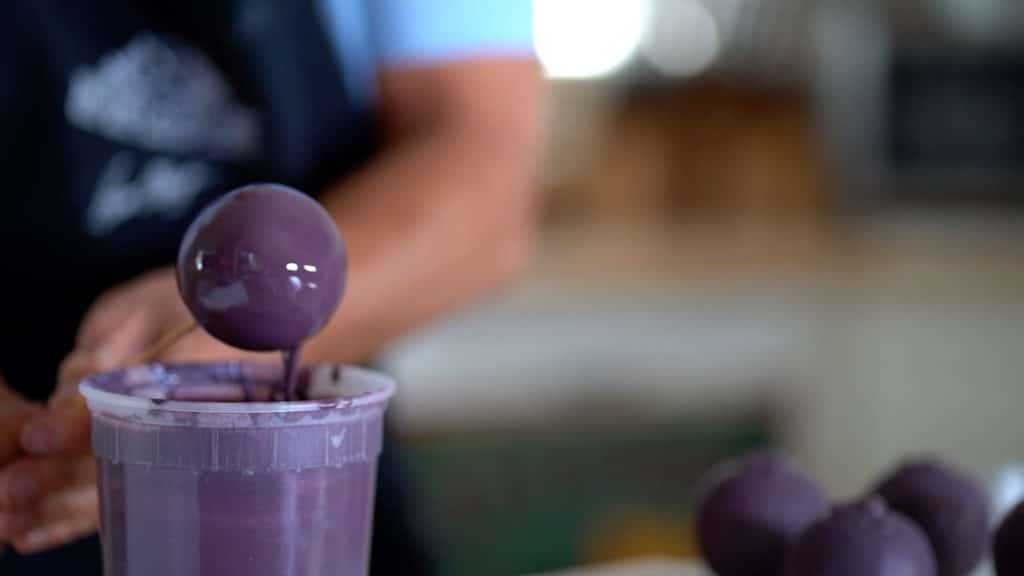
Glazing
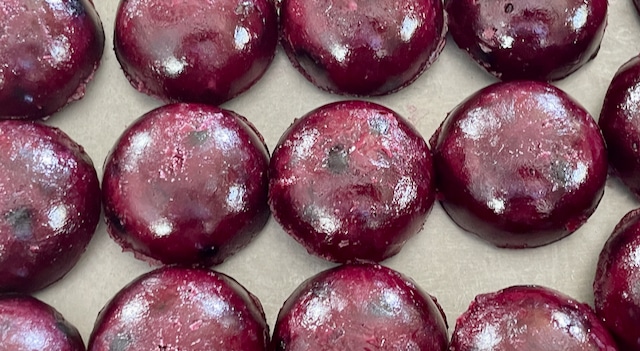
- Carefully insert a wooden skewer through the crown of the frozen fruit and dip it into the luxurious chocolate enrobage. As you pull it out of the bath, quickly flip it over so the crown side is facing down, gently rotating the dessert as the chocolate begins to set. Once your glazed fruit crown is perfectly coated, place it onto a baking tray lined with parchment paper or a silicone mat, crown side up. Remove the wooden skewer and fill the hole left behind with a small dot of enrobage to seal the deal. Repeat this process with each dessert until they are all enrobed in chocolate.

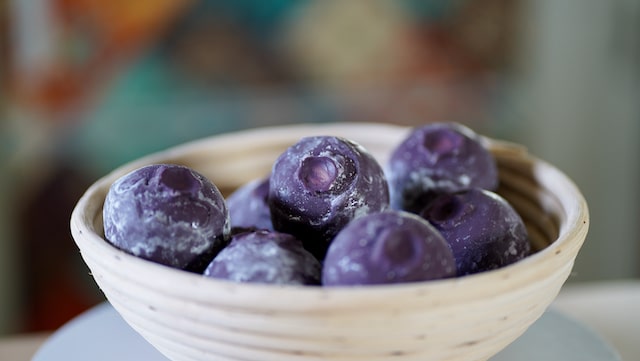
Blueberry Bloom
- To achieve the blueberry bloom effect, you will need to coat some of the surface of the glazed cakes with corn starch. The corn starch will create a soft, powdery texture that mimics the natural bloom found on fresh blueberries. Be sure to brush off any excess starch to ensure a delicate and refined finish. Once you have applied the corn starch, you can use a hot melon baller to smooth out the top of the crowns on your cakes. The hot melon baller will help create a seamless and polished look, perfect for showcasing the blueberry bloom effect. This step requires precision and attention to detail, so take your time to achieve the desired result.


Storage
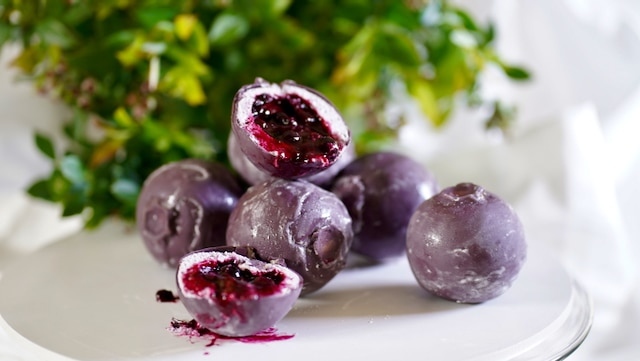
- When glazed, these sweet treats can actually be stored in the freezer for a month. When you're ready to enjoy your frozen blueberry desserts, simply defrost them overnight in the refrigerator. After defrosting, arrange the cakes on a pre-frozen tray to prevent any potential cracking due to thermal shock. Be sure to avoid using a room temperature tray, as this can lead to unwanted damage to the delicate shells. As the desserts thaw, you may notice some condensation forming on the surface of the chocolate shells. This is a natural occurrence and nothing to be concerned about. After approximately 3 hours, the condensation will evaporate, leaving your desserts looking as delicious as ever.
- Once fully thawed and ready to serve, the desserts will return to their original appearance, ready to be enjoyed by you and your guests. Enjoy!


Ready to discover this recipe? You're only 1 step away.
This recipe is only accessible to registered members!
Create your account to access all recipes and content of my website.
Join us now and enjoy more 800 recipes (Mostly French with European Influences, American Classics and Asian fusion)
Already register? Sign in
