Please note that the full access to this content needs a subscription: please sign up.
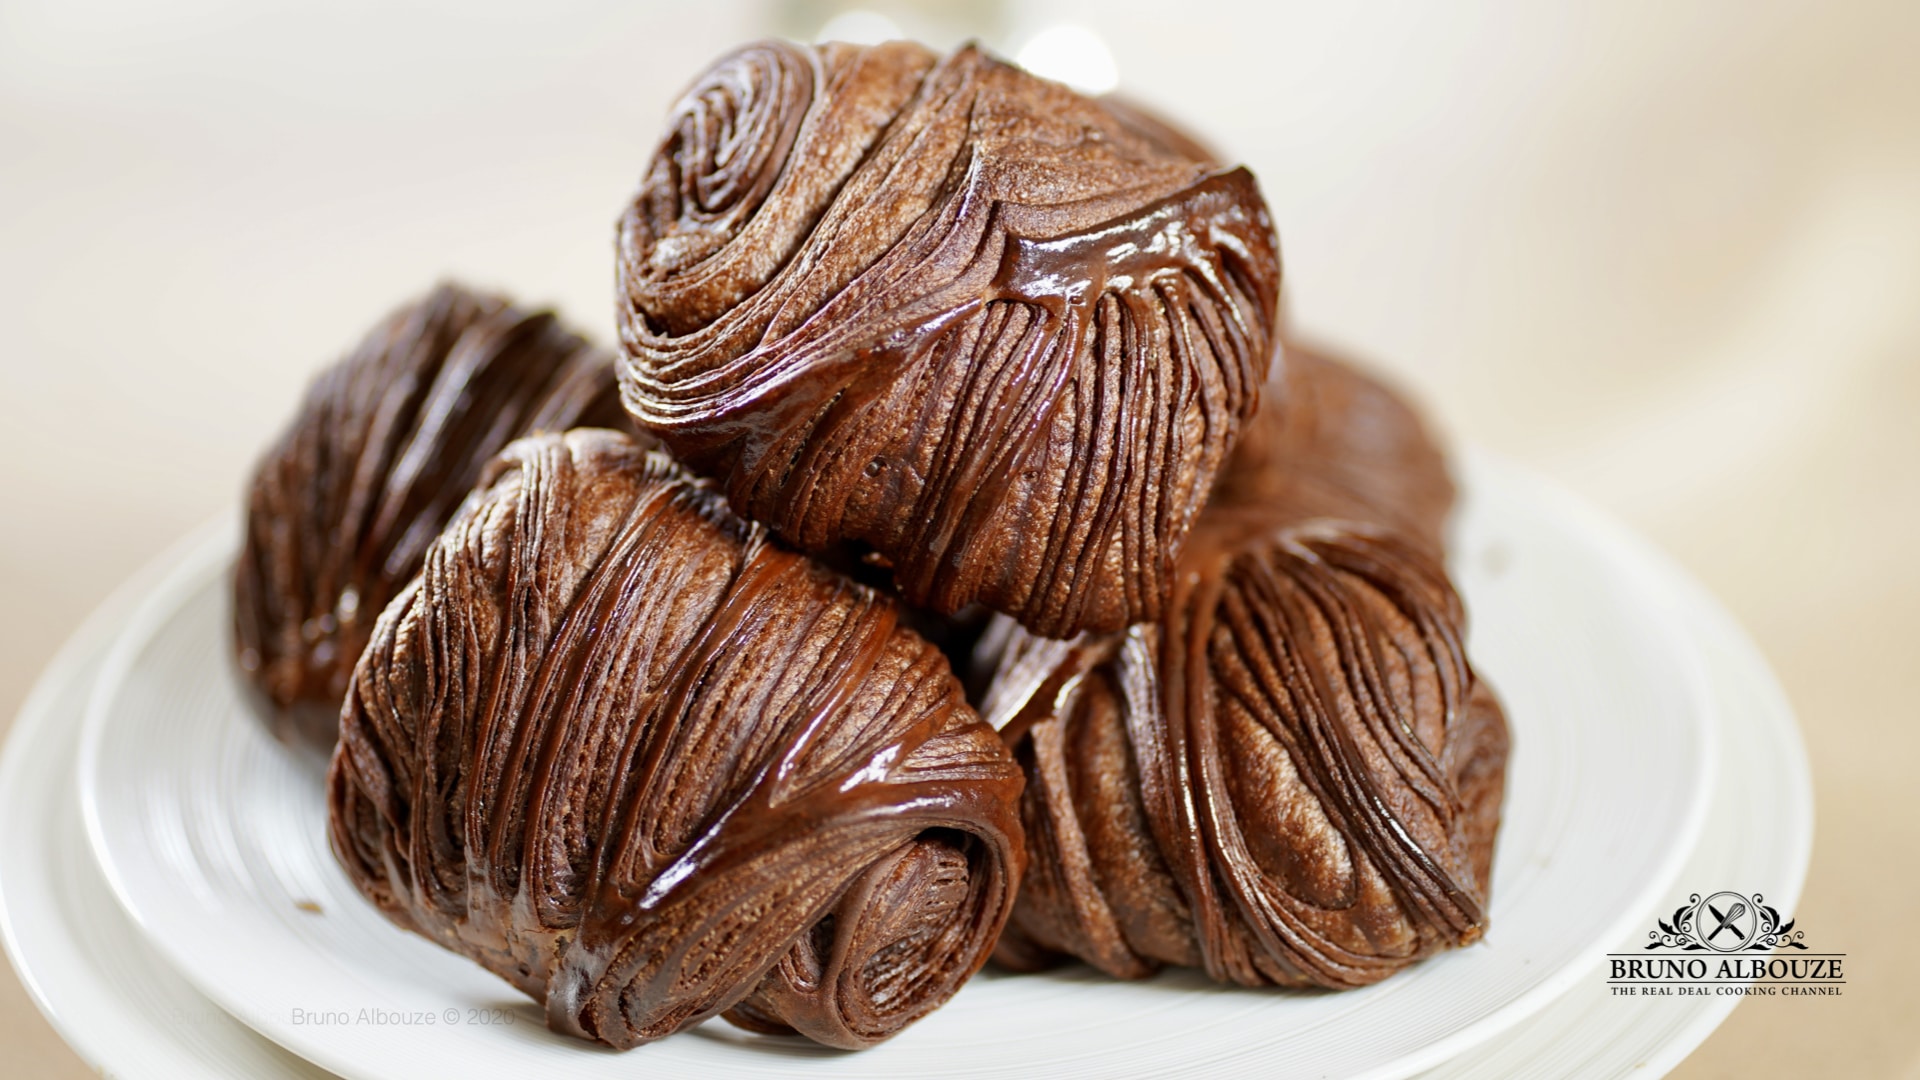
The ultimate chocolate croissant
This recipe is a protected and only available for paid members. To obtain the full step by step recipe and detailed ingredients list, please sign up.
Preview the recipe
Cocoa Nibs Infused Milk
- Toasting cocoa nibs in the oven for just 5 minutes can enhance their flavor and aroma. Next, add the toasted cocoa nibs to the milk and blend well to infuse the milk with their rich flavor. Strain the mixture to remove any solid bits and readjust the liquid weight by adding more milk. As you prepare your dough or recipe with the cocoa nib-infused milk, save some of the toasted cocoa nibs for a delightful snack later on. Re-measure the infused liquid makin sure you have the required liquid left for the dough. If not, add more cold milk.
Chocolate Croissant Dough
- This process can be done by hand or with the help of a stand mixer fitted with the hook attachment, both methods yielding equally satisfying results. To start, mix the flour with sugar, honey, cocoa, salt, and yeast, and then incorporate the butter into the mixture. Whether you choose to mix by hand or with a stand mixer, the key is to ensure that the ingredients are well combined before adding the chilled cocoa nibs-infused milk. Once the dough is formed, transfer it onto a work surface and begin kneading. If kneading by hand, use the palm of your hand to work the dough until it becomes smooth and elastic, a process that typically takes around 10 minutes. Alternatively, if using a stand mixer, let it work its magic on medium-high speed for about 7 minutes, or until the dough pulls away from the sides of the bowl. After kneading, place the dough in a lightly oiled container, cover it with plastic wrap, and allow it to ferment for about 2 hours, or until it has doubled in size. Once the dough has risen, transfer it back to the work surface and gently deflate it. Fold the sides over to shape it into a tight oval form, then flatten it and freeze it for 20 minutes on each side, uncovered. This step helps to chill the butter within the dough, making it easier to laminate. After freezing, wrap the dough and refrigerate it until you're ready to begin the lamination process.
Butter Slab
- Make a 6X6-inch/15x15cm butter slab between 2 parchment paper sheets and chill. Leave it out 20 minutes prior folding.
Gianduja
- First make praliné: toast nuts for about 10 min in a 350ºF/190ºC oven. In a hot saucepan, turn sugar into caramel. Add toasted nuts in caramel along with salt and cocoa butter. Coat nuts well and transfer onto a silicone baking mat to cool. Break caramelized nuts into pieces. Thrown in running food processor gradually and blend until it turns into paste. Praliné can be stored for months in a refrigerator. For the Gianduja: melt both chocolates together (do not overheat) and mix with praliné. Pour mixture in a small tray lined with parchment or plastic wrap and chill. Divide into 12 grams bars/2.4X0.4-inc/6x1cm (2 per serving). Freeze until ready to use.


Egg Wash
- Blend the egg with an immersion blender.
Folding/Laminating
- Croissant folding Process/Lamination called ''Tourage'' in French. A double turn and one single turn is given to dough. Leave butter out for 20 minutes prior folding. Butter shall be at the same consistency as the dough; firm but workable. For better handling, the laminating process should be done under cool temperature. Turn air-conditioning on if room temp exceeds 73.5ºF/23ºC. For the double turn (Tour double: Roll out dough into a ≈6x15 inch/14x35cm rectangle; about twice the size of the butter slab. Place butter covering half of the surface of the dough, and fold over to enclose (do not overlap dough). Seal and roll out into a long and narrow strip ≈ 6x27-inch/15x70cm keeping all edges as straight as possible. Begin rolling from the center of the dough towards the edges, and not from one side of the dough all the way to the other side. This technique helps to keep the dough at an even thickness. Always brush out any excess flour before folding. The left edge is folded in to meet the last third on the other side, then the right third is folded in then close like a book. Wrap up dough and refrigerate 30 min or for up to an hour to relax. For the single turn: roll out dough (seams set from noon to 6) into a 6X27-inch/15X70cm rectangle, and fold like a business letter (if the dough resist chill to rest 15 min more). Wrap up and let rest an hour. Roll dough (seams set from noon to 6) into a 9X27-inch/23X70cm rectangle. The thickness of croissant dough should be around 0.20-inch/5mm.Divide dough into 14 rectangles that should measure 6.3X2.75-inch/16X7cm. Arrange cuts onto a frozen baking tray and refrigerate to harden prior scoring Score using a sharp pairing knife or best use a razor blade. Flip and roll out with 2 Gianduja bars, and repeat until done. Freeze chocolat croissants overnight.
Proofing
- Space chocolate croissants out onto baking tray lined with silicone mat or parchment prior proofing – If frozen, leave croissants to thaw in the refrigerator overnight first and leave out to proof for about 2 hours at 78ºF/26ºC. Egg wash.


Baking
- Preheat fan oven to 350ºF/180ºC. Bake chocolate croissants for about 18-20 minutes. Let cool to room temp – Enjoy!
Ready to discover this recipe? You're only 1 step away.
This recipe is only accessible to registered members!
Create your account to access all recipes and content of my website.
Join us now and enjoy more 800 recipes (Mostly French with European Influences, American Classics and Asian fusion)
Already register? Sign in


Entrees
How To Cut Potato Gratin

Cooking techniques
Deboning A Turkey Leg

Entrees
Rustic Ratatouille

Daily summer Recipe
Plum Slab Pie

Free Recipes
Chocolate Sauce

Free Recipes
Apricot Sablé Breton

Desserts
Sundae Ice Cream

Free Recipes
How To Decorate Ice Cream Cones

Free Recipes
Tapenade

Amuse Bouche
Zucchini-Basil Gazpacho

Free Recipes
Filo Flower

Entrees
Stuffed Zucchini Thai Cod
