Hello, I’m Bruno Albouze, and today, I’m excited to share with you the art of baking bread at home, using a tool you might not expect – the Dutch oven. While cocotte dishes like blanquette de veau and carbonnade de lapin evoke warmth and conviviality, this versatile cast-iron pot can also transform your bread-making experience. Let’s explore how to create artisanal bread that rivals any bakery, right in your own kitchen.
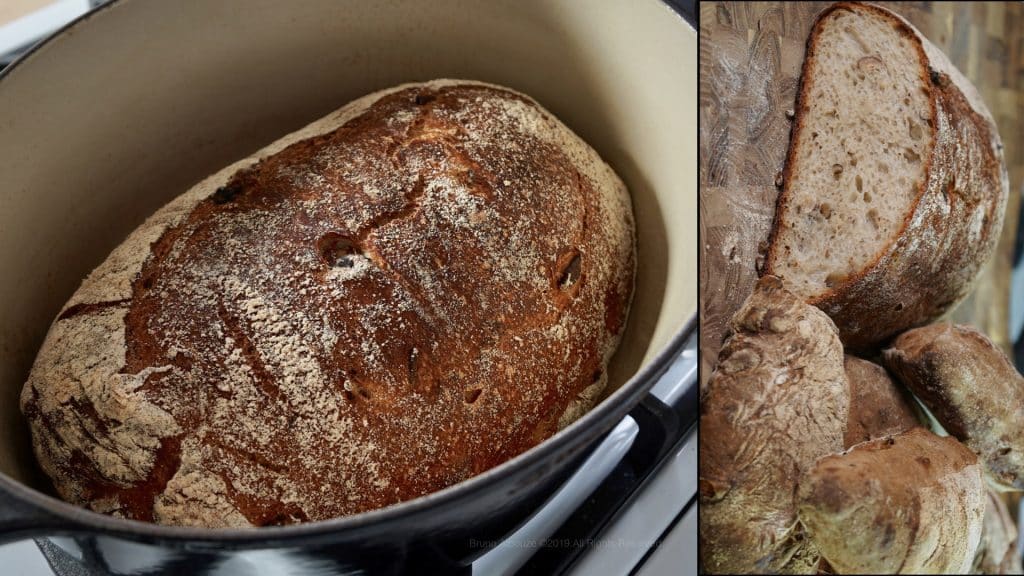
1. The Dutch Oven: A Baker’s Secret Weapon Forget the bread machine; it’s time to turn to the trusty Dutch oven. Its thick cast iron walls and self-basting system create the perfect environment for baking bread. The result? A loaf with a beautifully golden, crispy crust and a soft, airy crumb. Whether you have a 20, 24, or 26 cm Dutch oven, you can bake a variety of bread to perfection. Mushroom Hazelnut Bread baked in dutch oven.
2. Choosing the Right Flour The foundation of great bread is the flour. Say goodbye to T45 and T55 flours and embrace less refined options like T65 and T80. For a heartier loaf, try wholemeal or semi-wholemeal flours like T110 or T150, perfect for adding seeds like poppy or flax. Blending wheat flours or incorporating rye or spelt flour can add a rustic touch to your bread.
3. The Leavening Agent: Yeast or Sourdough For the dough to rise effectively, you have three choices: active yeast, instant yeast, or fresh baker’s yeast. Active yeast needs to be dissolved in warm water while instant and fresh yeast can be added directly to the dry ingredients without activation. Fresh yeast remains baker’s favorite though. Remember, never mix salt directly with the yeast, as it can inhibit yeast activity. Enhancing bread with sourdough/levain leavening agent with the ideal acetic acid pH level requires experience and knowledge. Biga and poolish liquid levain starters offer faster options but have a much milder taste: acetic vs lactic. For instance the traditional French baguette is made with a lactic levain using the poolish technique, or high hydration with autolyse followed by a long fermentation process with low amount of yeast. In both cases, the bread crumb has a creamy color, honeycomb structure (alvéolage), and a nutty-lactic taste.
4. Scoring the Dough: Your Personal Signature Before baking, score the top of your dough. This ‘grigne’ is not just decorative; it helps control how the bread expands in the oven. Bakers use one angle of a razor blade to score bread, and only the bread’s skin is cut.
5. Flour Options for Homemade Bread When it comes to flour, you have two exciting options. For a long-lasting loaf with a distinctive taste and texture, try making sourdough bread. This requires preparing a sourdough starter, a process that takes 3-4 days but is well worth the effort. Or, ask your baker to give you a piece of his levain. If you are short on time, opt for a quicker recipe using the biga or poolish technique.
Baking bread at home is a rewarding experience that brings a sense of accomplishment and joy. Whether you choose the traditional sourdough route or the quicker yeast method, the Dutch oven is your key to baking bread that’s
not only delicious but also a testament to your culinary skills. Embrace the process, experiment with different flours and techniques, and enjoy the heavenly aroma of freshly baked bread filling your home. There’s nothing quite like breaking into a loaf of bread that you’ve made with your own hands. Happy baking and bon appétit!

