Please note that the full access to this content needs a subscription: please sign up.
''I scream'' for pistachio!
This recipe is a protected and only available for paid members. To obtain the full step by step recipe and detailed ingredients list, please sign up.
Preview the recipe
Pistachio Ice Cream
- Place in the freezer the container in witch ice cream will be stored in as well as the rubber spatula. Combine half of the sugar with powdered glucose. Mix remaining sugar with the ice cream stabilizer. In a small saucepan, warm up milk and heavy cream to 86ºF/30ºC, on low heat. Add honey and the sugar-glucose mixture and blend. At 104ºF/40ºF, add pistachio paste and egg yolks, and blend. Then add the sugar-ice-cream stabilizer. Cook custard to 185ºF/85ºC on medium-low heat. Blend and pass through a sieve and cool down mixture in ice water.Refrigerate for 4 hours a least before churning.
*Glucose/Inverted Sugar/Stabilizer
- *Glucose will come in the form of a thick syrup or powder (atomized glucose). For ice cream, it is rather recommended to use powdered glucose or dextrose. Both have an anti- crystallizing effect. It improves texture and shelf life as well as increasing the dry extract content. *Inverted sugar will have an anti-crystallizing effect as well. Honey can used in place of inverted sugar which has exactly the same properties. The only difference is that it will bring an honey taste to your ice creams. *Stabilizers are ingredients that add viscosity. The most common ones used in ice creams are guar gum, cellulose gum and carob bean gum. At home, ice cream stabilizer may be substituted for gelatin. In this case, soak 3g gelatin (200 bloom) in cold water to soften and drain. And add soften gelatin once the custard is cooked and taken out from the heat.
Churning
- When you are ready to churn, assemble your ice cream machine according to the manufacturer's directions. Churn for about an hour and transfer ice cream to a frozen container. Cover and freeze for up to a month. To serve ice cream, leave frozen ice cream in the refrigerator for an hour or so. Or, microwave until desired softness is reached.
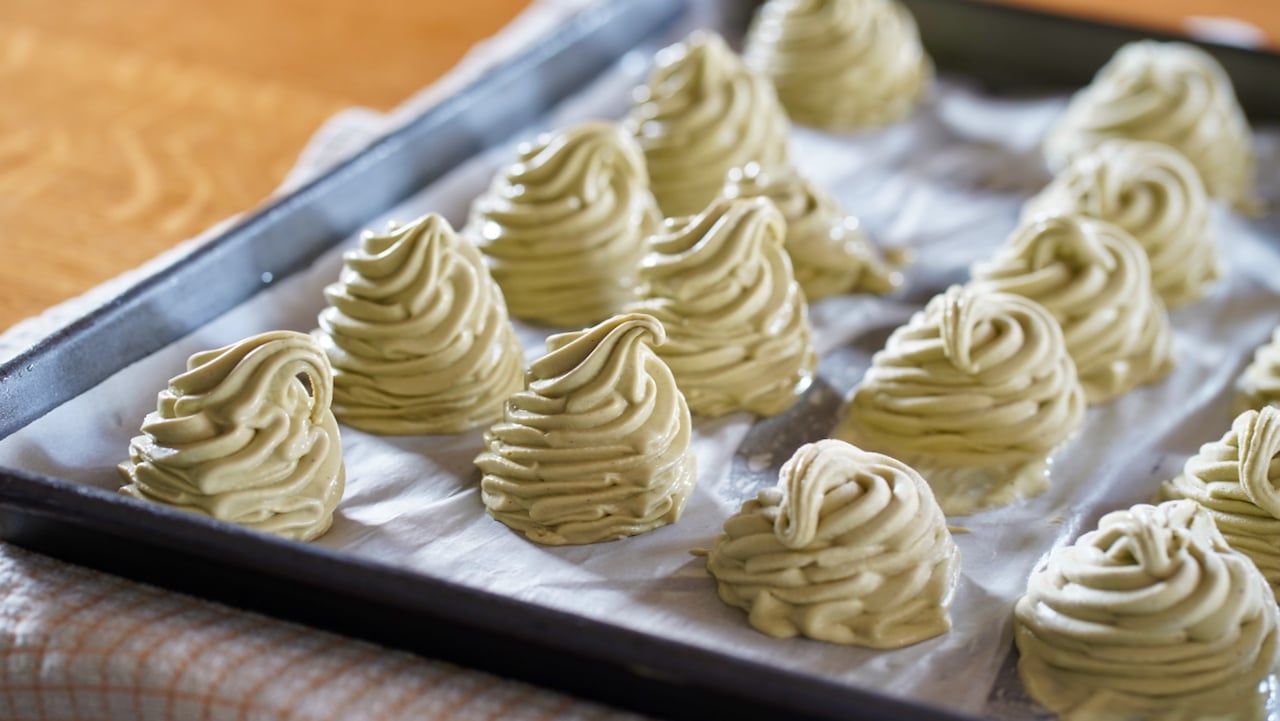
Piping Ice Cream
- When it comes to making ice cream, it's important to take some precautions to ensure the process runs smoothly. Given that ice cream melts quickly, especially in warmer temperatures, preparing your workspace and tools in advance can make all the difference. First and foremost, ensure that your freezer is clear and able to accommodate the size of the baking trays you will be using. If you have air conditioning, it's a good idea to turn it on to create a cooler environment for working with the ice cream. To begin, line two baking trays with baking mats or parchment paper, avoiding the use of plastic trays as they may not provide the necessary insulation. Place the trays in the freezer and allow them to freeze for at least 2 hours. Next, prepare a pastry bag fitted with the piping tip of your choice. Place the filled pastry bag in the freezer alongside a large rubber spatula. Chilling these tools in advance will help maintain the temperature of the ice cream during the piping process. Once the ice cream has been churned to the desired consistency, transfer it to a frozen container and allow it to freeze for an additional 30 minutes. Working quickly, use half of the ice cream (keeping the remaining half in the freezer) and pipe it out onto the frozen tray lined with parchment paper. Freeze the piped ice cream rosettes immediately to prevent melting. Repeat this process with the remaining ice cream, creating uniform rosettes on the frozen tray. The following day, bag up the frozen ice cream rosettes, which can then be used for various dessert presentations, such as ice cream cones or other elegant creations.
Ready to discover this recipe? You're only 1 step away.
This recipe is only accessible to registered members!
Create your account to access all recipes and content of my website.
Join us now and enjoy more 800 recipes (Mostly French with European Influences, American Classics and Asian fusion)
Already register? Sign in


Appetizers
Beetroot Red Cabbage Mango Salad

Free Recipes
How To Prepare Red Cabbage Raw


Free Recipes
Apple Pie Traybake

Cakes
Olive Oil Chocolate Cake

Desserts
Spicy Chocolate Bar

Entrees
Deboning A Poularde Leg
Free Recipes
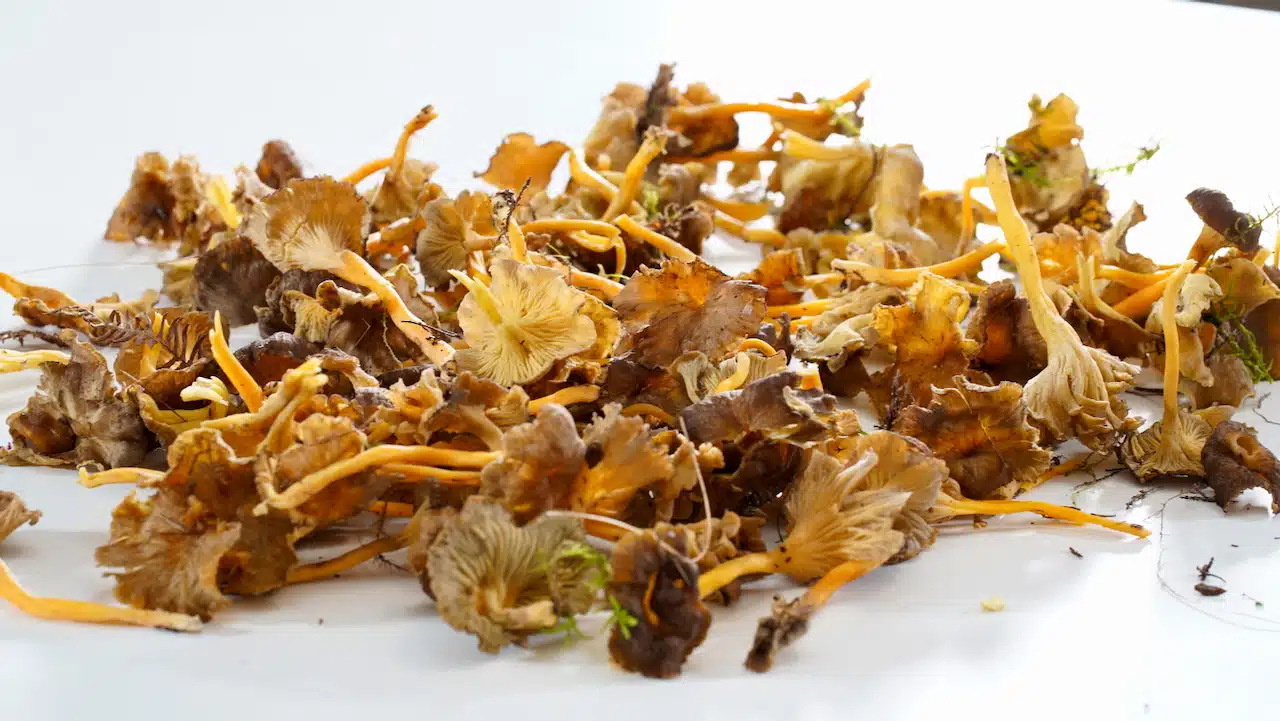
Chanterelle

Bread
Panettone Perdu

Free Recipes
Mustard Fig Spread

Free Recipes
Poularde Demi-Glace
