Please note that the full access to this content needs a subscription: please sign up.
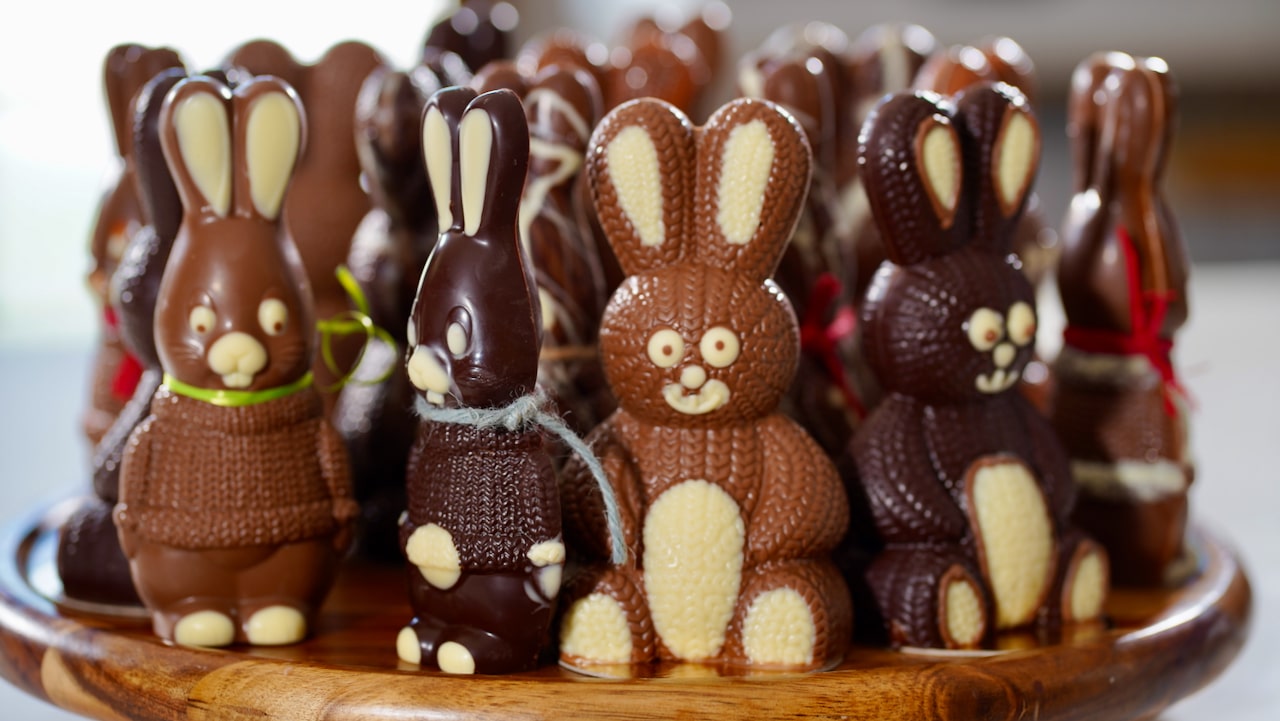
Lapin en chocolat
This recipe is a protected and only available for paid members. To obtain the full step by step recipe and detailed ingredients list, please sign up.
Preview the recipe
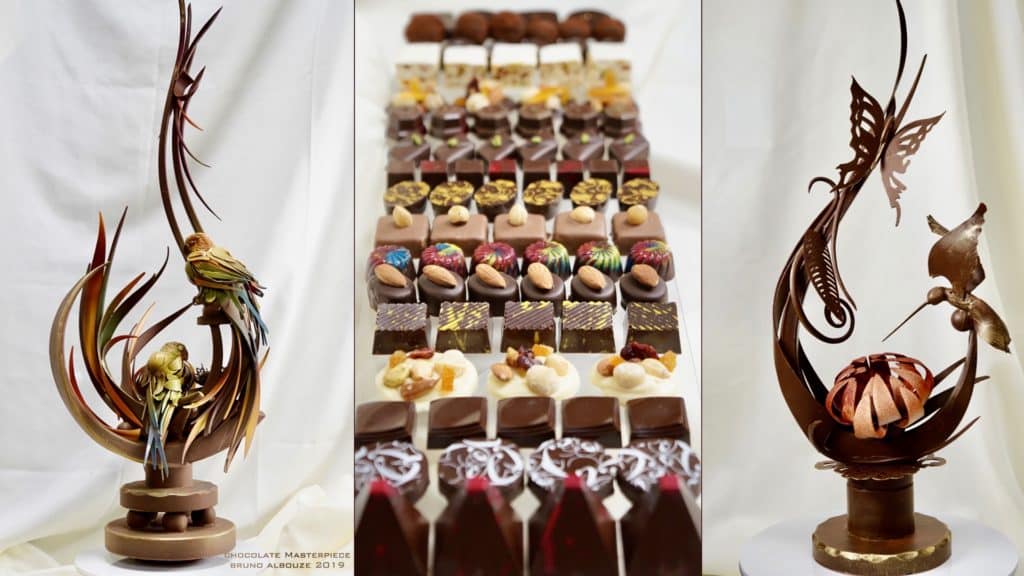
Nesting Parrots Chocolate Showpiece
- I made this chocolate showpiece for an event that occurred in San Diego California in 2019. An award-winning chocolate showpiece!

Why Is Easter About a Bunny Laying Eggs?
- Eggs, just like the rabbit, have long been considered an ancient symbol of fertility, rebirth and new life, all associated with the springtime celebration of Easter!


What Chocolate To Choose For Molding?
- *The white bunny mold used in the video is called: Lapin Tricot from Barry. Nearly all of the ‘true’ chocolate (with cocoa butter) that you can buy commercially is tempered. It has a shiny finish, a clear ‘SNAP’ when you break it, and generally stays in shape at room temperature. In short, it’s more stable and looks and feels better. When it comes to molding chocolate though, choosing the right type of chocolate is crucial to ensure successful results.
- There are a few key considerations to keep in mind when selecting chocolate for molding. First and foremost, it's important to use high-quality couverture grade chocolate which contains a high percentage of cocoa butter. This will ensure that the chocolate has a smooth and fluid texture, making it easier to work with. Dark chocolate, milk chocolate, and white chocolate are all popular choices for molding. Dark chocolate, with its rich and intense flavor, is perfect for those who prefer a more bittersweet taste. Milk chocolate, on the other hand, has a creamier and sweeter flavor that appeals to a wider audience. White chocolate, which doesn't contain cocoa solids but is made from cocoa butter, sugar, and milk solids, has a mild and sweet flavor profile.
Mise-En-Place
- Before you start your chocolate-making adventure, take a moment to inspect your molds. Look for any signs of damage, such scratches. It's also essential to make sure that your molds are spotless, and curves shines. To clean your chocolate molds, wash in dishwasher under 140ºF/60ºC. Once dry, simply wipe them down with a dry, soft cloth or cotton. This will help remove any dust or traces that may have accumulated on the surface of the molds.
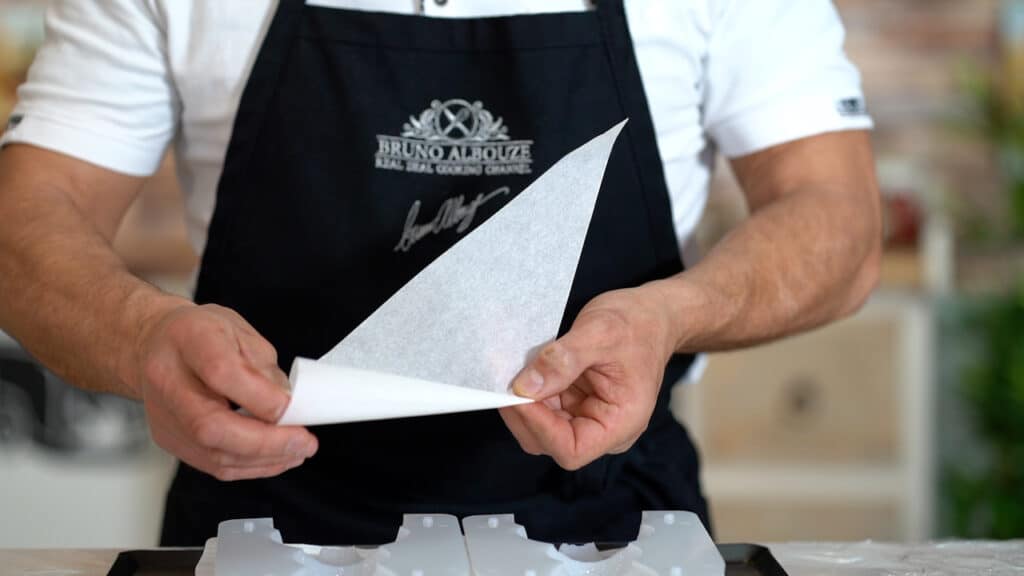
Parchment Cornet
- Cornet is useful for detailed work. Start with a rectangle or a square of parchment paper. Cut it from one corner across to the opposite corner to make a triangle. To make a cone shape, take the two corners at the bottom of the triangle and roll them into the center to form a cone shape.

Colored Chocolate
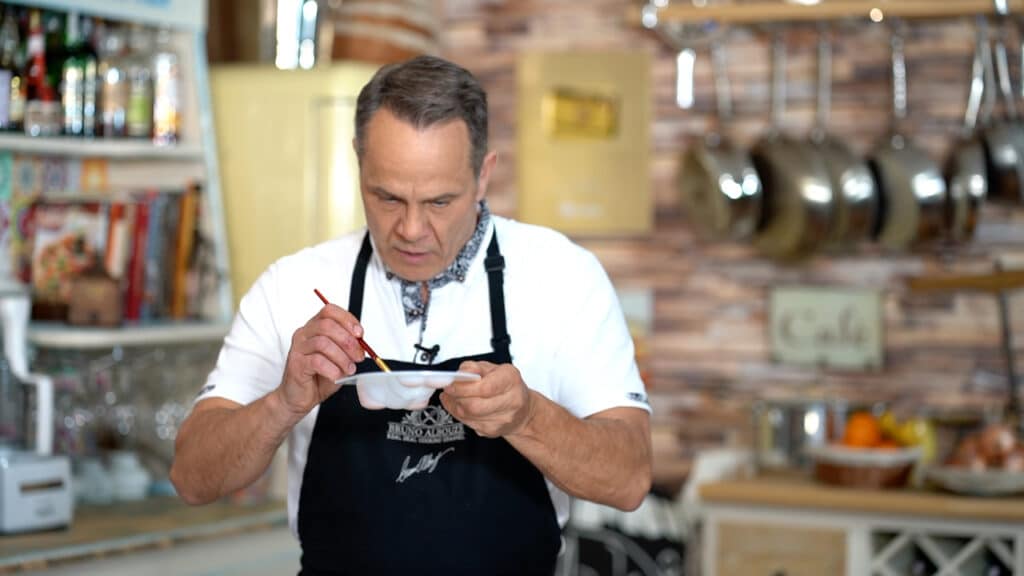
- Chocolate enrobage is use to glaze individual frozen desserts. It also gives a velvety finish to frozen cake/entremets. Place white chocolate in a narrow deli container. Meanwhile, in a small saucepan melt cocoa butter, and pour over the white chocolate. Let sit a couple of minutes, and mix with an immersion blender. Add food coloring, mix and sieve. Use on molds at 86ºF/30ºC with a tiny paint brush. If you plan to use colored chocolate, it would have to be applied first in light coating. Then proceed as indicated bellow.

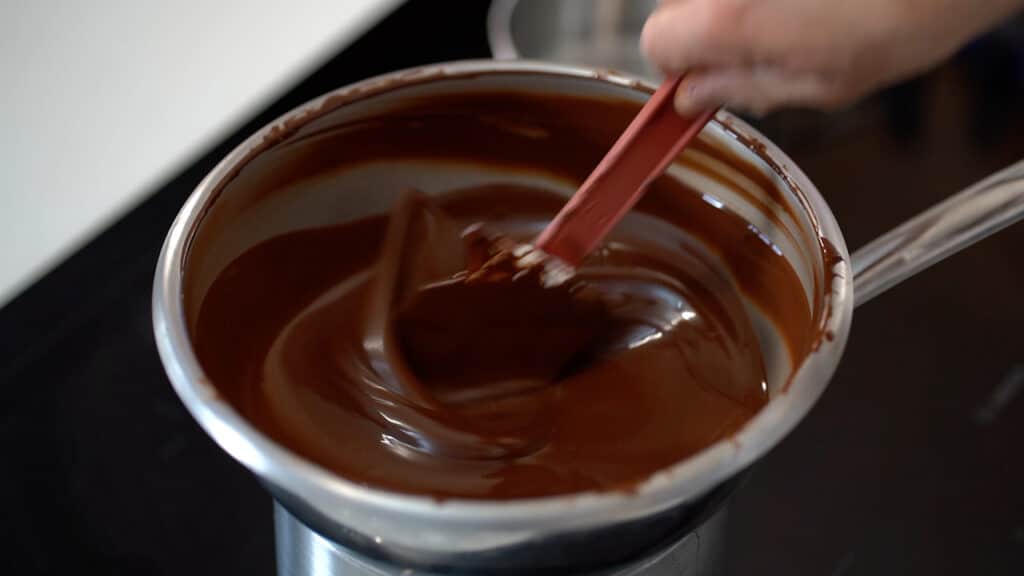
Tempering Dark Chocolate
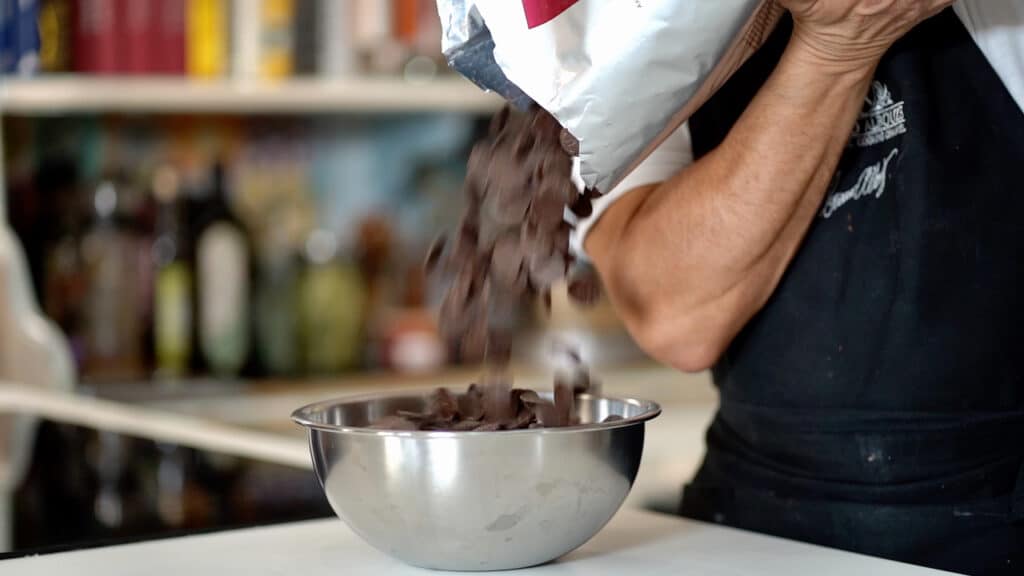
- Before you start, maintaining room temperature below 68ºF/20ºC is important when working with chocolate. Although, you are planning to produce a small amount of molded chocolate, always melt a sufficient quantity of chocolate; that will be easier to deal with. Leftovers chocolate should be spread into sheets and re-used later to make mousse for desserts. Whether you're making bonbons, truffles, chocolate decorations, or coating fruits and nuts, mastering the art of tempering chocolate is essential for achieving professional-looking and tasting results. Here is a simple method to temper dark chocolate using the ''cooling in the fridge'' technique. Place the chocolate pistoles (chocolate can also be broken down into small pieces using a food processor), in a heat-proof bowl and set it over a pot of barely simmering water. Make sure the bowl does not touch the water. Gently melt the chocolate, stirring frequently with a spatula, until it reaches a temperature of 45-50°C (113-122°F).
- Be careful not to overheat the chocolate. Once the chocolate has melted completely, remove it from the heat, and place in the refrigerator. Stir up every 10 minutes or so. When chocolate begins to set and temperature reaches 27-28°C (80.6-82.4°F). Warm up the sides of the bowl using a hair dryer and place the bowl back over the simmering water for a few seconds at a time, stirring constantly, until the dark chocolate reaches a working temperature of 31-32°C (87.8-89.6°F). Your dark chocolate is now tempered and ready to be used for coating, molding, or dipping. Rewarm tempered chocolate with hair dryer every so often to keep it around 31ºC.


Tempering Milk Chocolate
- Follow the same procedure but melt milk chocolate to 45°C/113ºF, cool to 26°C/78.8ºF, and reheat to 29/30°C/84ºF.


Tempering White Chocolate
- Same procedure but melt white chocolate to 40°C/104ºF, cool to 25°C/77ºF and reheat to 28°C/82.5ºF.


Chocolate Molding
- When chocolates are tempered, maintain one bain-marie on low heat.
- Line up chocolate molds. With the dark chocolate filled cornet filled, make 2 very small dots for each eye pupil. Next, fill the eye curves with white chocolate, and continue with the muzzle, inner part of the ears, belly, paws and tail. Enclose molds if required, and set aside a few minutes until set.

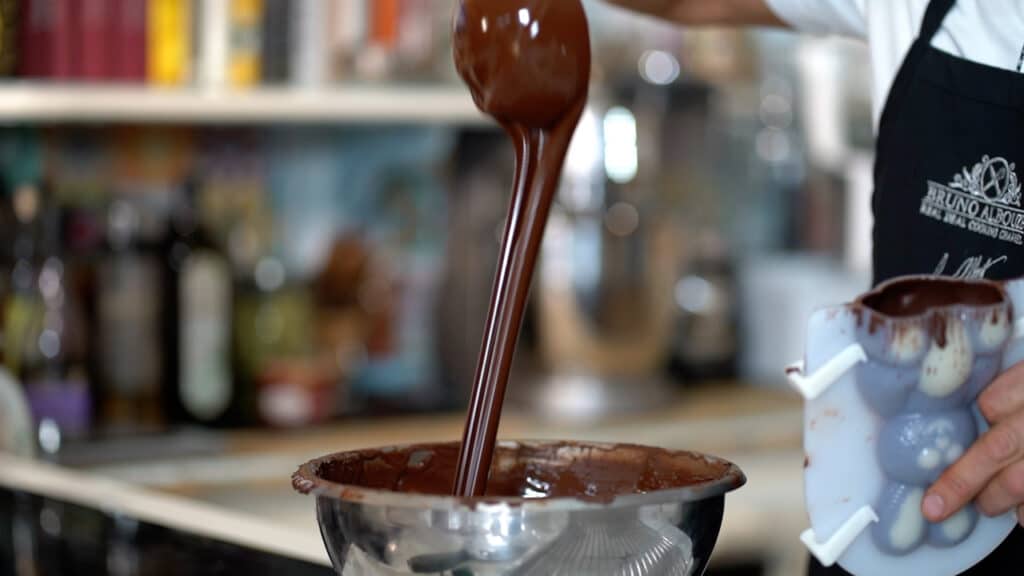
- Fill up the molds completely with tempered milk or dark chocolate. Once the molds are filled, it's important to remove any air bubbles that may have formed during the pouring process. To do this, gently tap the mold over the counter multiple times for about 30 seconds. Flip over mold, and allow chocolate run out of the mold. Towards the end, shave off dripping chocolate using the large plaster scraper.
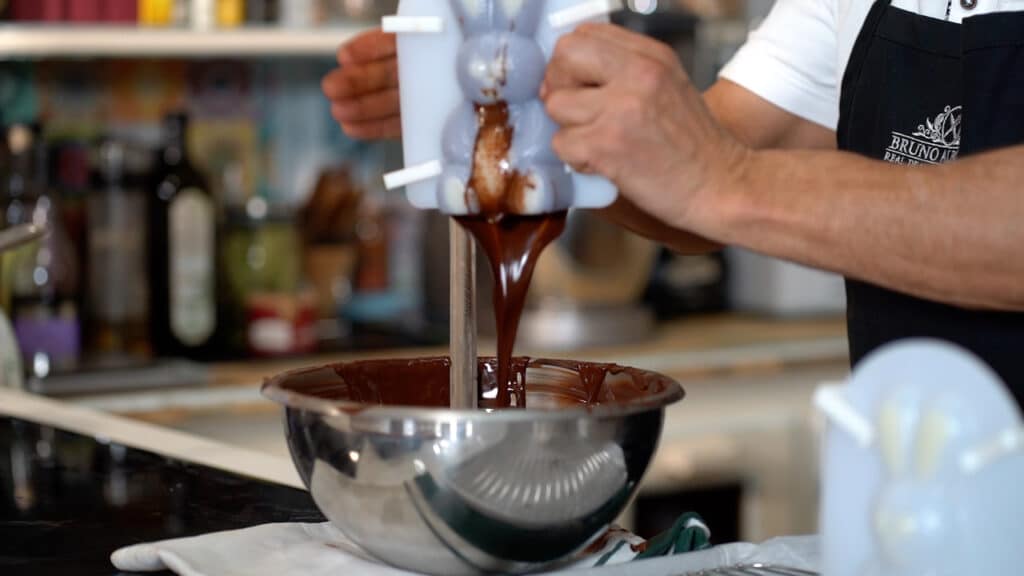
- Place mold head up in the refrigerator for 10 minutes until chocolate is just set. Refill with the chocolate of your choice, and place in the refrigerator for 30 minutes until chocolate is completely set. Carefully de-mold and store chocolate in a dry and cool storage ≈ 60ºF/16ºC.


Bunny Surprise
- These Kinder Surprise-inspired bunnies are sure to be a hit.

- The chocolate bunny surprise is coated with a layer of milk chocolate, and followed by white chocolate.


What To Do With Leftovers Chocolate
- Try to maintain chocolates tempered until the job is finished. Then, spread leftovers chocolate on parchment overlapping it. Let cool and brake into pieces. Already melted chocolate can't be reused indefinitely – it thickens up overtime. However, many things can be made with such as chocolate mendiant, chocolate glazes and mousse for cakes.


Ready to discover this recipe? You're only 1 step away.
This recipe is only accessible to registered members!
Create your account to access all recipes and content of my website.
Join us now and enjoy more 800 recipes (Mostly French with European Influences, American Classics and Asian fusion)
Already register? Sign in


Appetizers
Beetroot Red Cabbage Mango Salad

Free Recipes
How To Prepare Red Cabbage Raw


Free Recipes
Apple Pie Traybake

Cakes
Olive Oil Chocolate Cake

Desserts
Spicy Chocolate Bar

Entrees
Deboning A Poularde Leg
Free Recipes
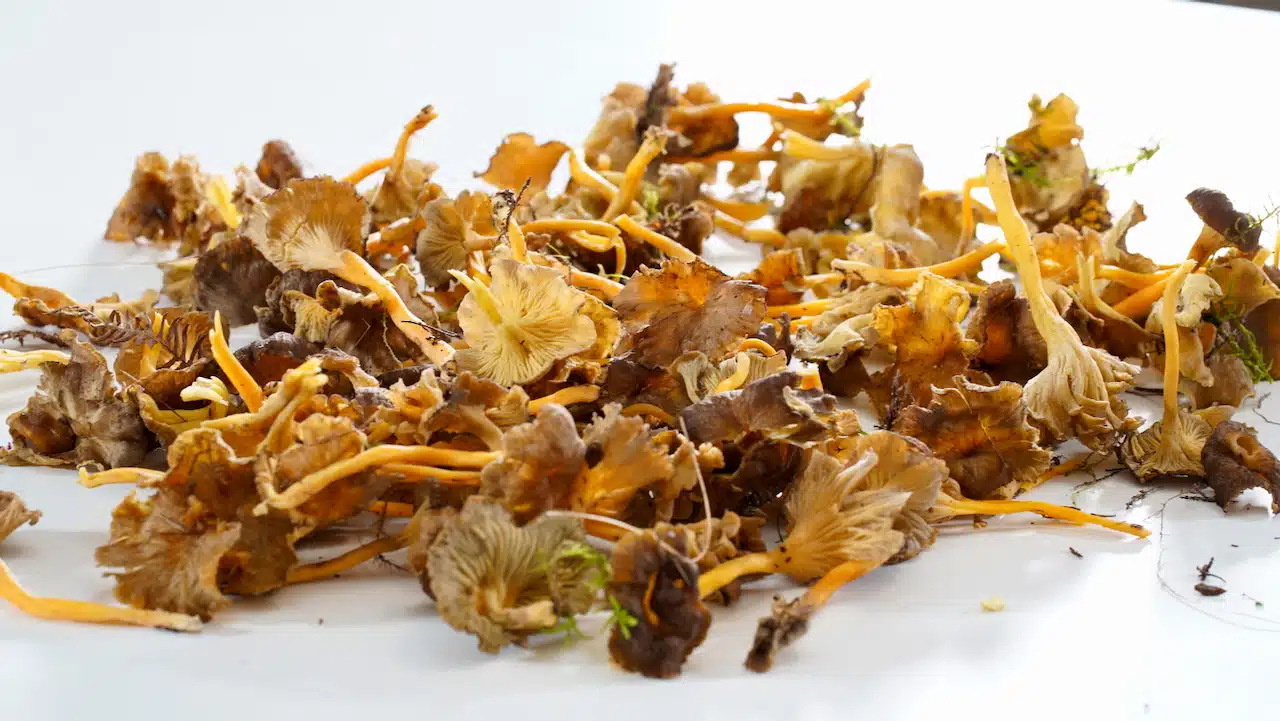
Chanterelle

Bread
Panettone Perdu

Free Recipes
Mustard Fig Spread

Free Recipes
Poularde Demi-Glace
