Please note that the full access to this content needs a subscription: please sign up.
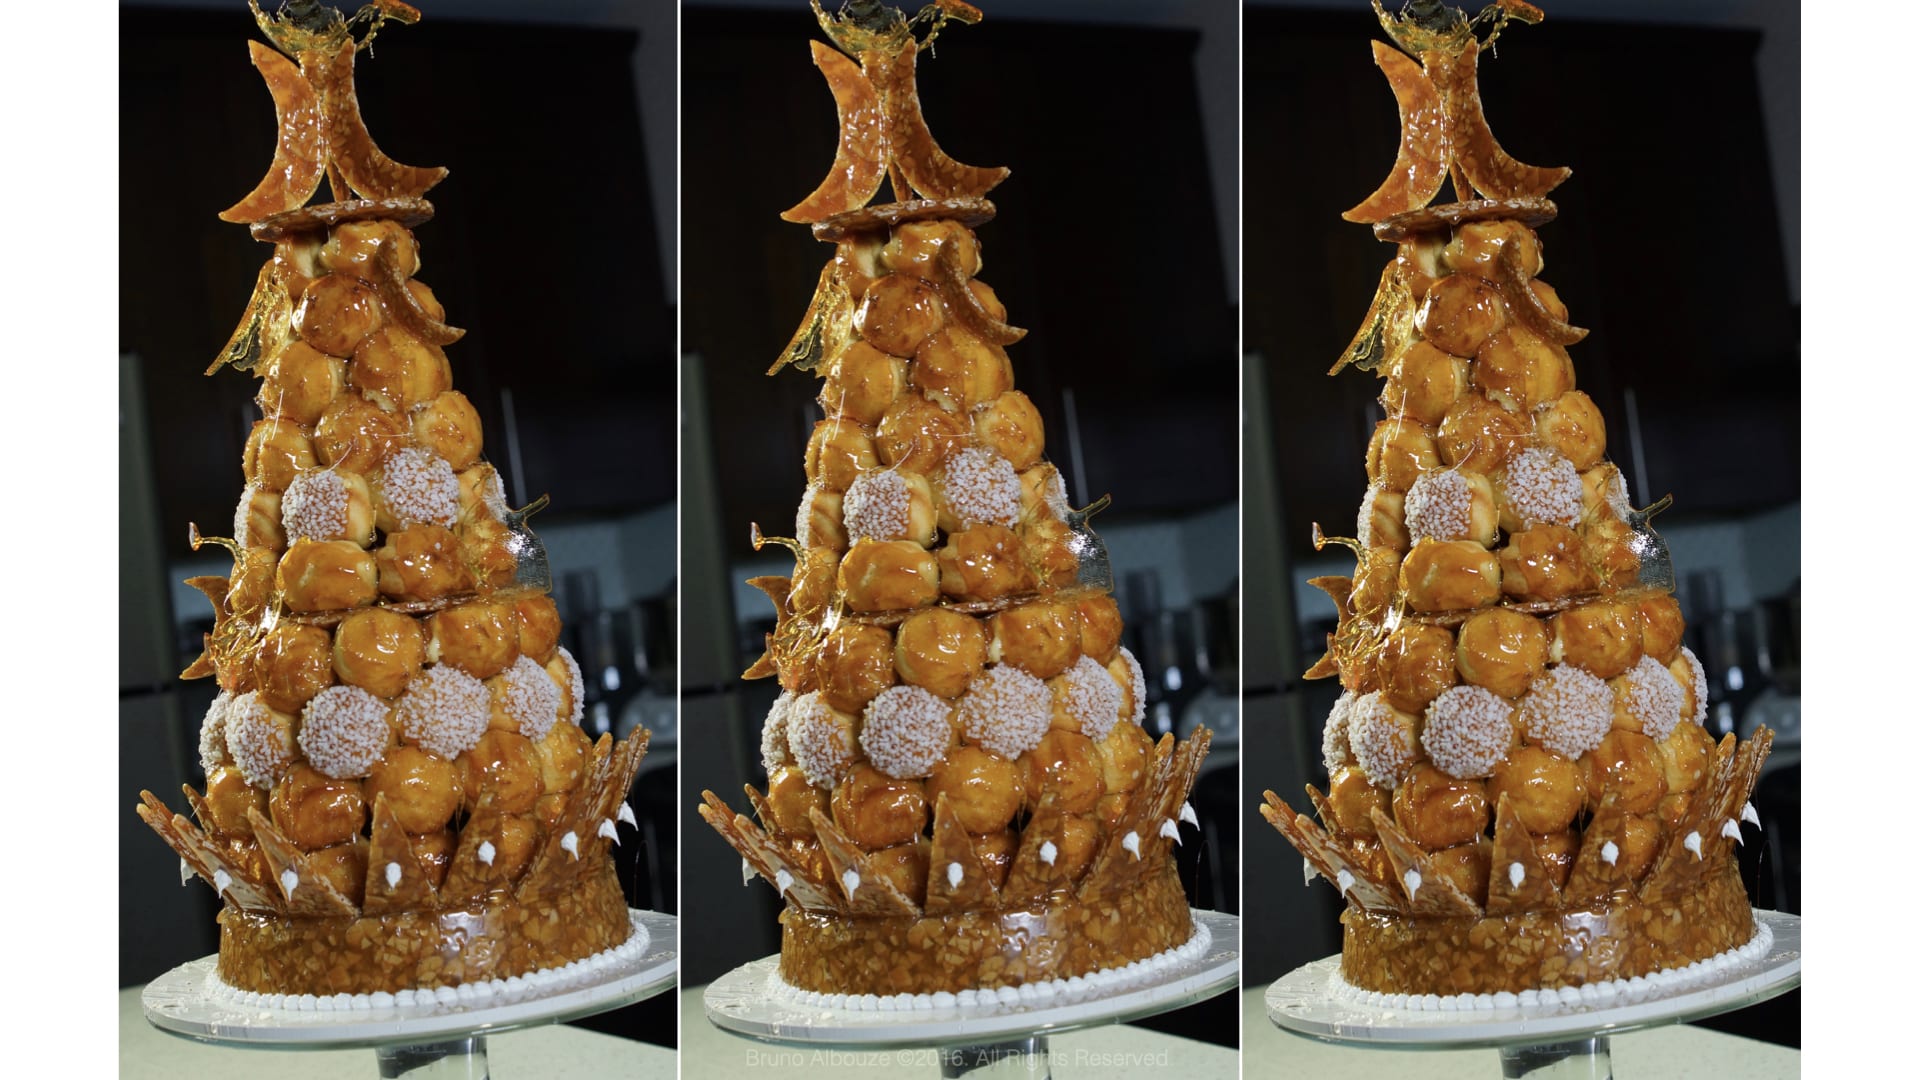
Croque-en-bouche, "crunch in the mouth"—a whispered promise of the delight to come...
This recipe is a protected and only available for paid members. To obtain the full step by step recipe and detailed ingredients list, please sign up.
Preview the recipe
Nougatine Base
- Preheat the oven to 250ºF/125ºC. Lightly toast the almonds on a baking sheet for about 20 minutes, then set aside. Increase oven temperature to 300ºF/150ºC and leave on. In a large, heavy-bottomed saucepan, combine the corn syrup, water, and sugar. Cover and cook over high heat for 5 minutes. (Do not stir the mixture until the caramel stage is reached). Remove the lid, reduce the heat to medium-high, and continue cooking, swirling the pan gently if needed, until the syrup turns a light to medium amber color. Immediately turn off the heat. Carefully stir in the hot toasted almonds and the butter (or cocoa butter) until fully combined. Pour the mixture onto a silicone baking mat. Let it stand for a couple of minutes until it is cool enough to handle but still pliable.Wearing rubber cleaning gloves, begin working the nougatine. Lift and fold the edges of the mass toward the center from all sides to cool it evenly and make it more malleable. At this point, the temperature should be around 185ºF/85ºC. Greasing utensils is not necessary, as the nougatine contains butter). Roll the nougatine out into a disk roughly 4 millimeters (about 1/6 inch) thick. Transfer the disk to a 9-inch (23 cm) round cake pan or tart ring and carefully press it into the mold to form the base. You may need to reheat the nougatine briefly in the 300ºF/150ºC oven if it becomes too stiff to work with. Trim off any excess and save the scraps. Let the molded base cool completely at room temperature until hardened before carefully unmolding.
For the Dents de Loup (Wolf’s Teeth) & Crescent
- Prepare another batch of nougatine following the steps above. Roll it out into a large rectangle. Cut out two long strips, each 2.5 inches (6 cm) wide. Briefly rewarm the strips if needed, then cut them crosswise into about twenty 1-inch (2.5 cm) rectangles. These are the "teeth." Rewarm the remaining nougatine. Roll it out and cut one 4-inch (10 cm) disk and one 6-inch (15 cm) disk. From the remaining nougatine, cut three crescent (moon) shapes approximately 4 inches (10 cm). First cut it into circles using a round cookie cutter. Then, make a second cut across each circle to create crescent moon shapes. Make extra smaller crescents for additional decoration if desired.
Assembly and Storage
- Assemble the nougatine pieces using a light amber caramel as "glue. Nougatine can be stored, well-wrapped, at room temperature for several weeks. Leftover scraps can be gently reheated and re-rolled for other projects, or crushed and used as a garnish for ice cream, custards, or plated desserts.
Pate A Choux
- Unbaked pâte à choux can be piped onto a tray, frozen solid, then transferred to a freezer bag and stored for several weeks. Bake directly from frozen on a prepared baking sheet, adding a few extra minutes to the baking time if needed.
- Yield: Approximately 84 choux puffs (3 per serving).In a medium saucepan, combine the water, milk, butter, sugar, and salt. Bring the mixture to a full boil, then immediately remove from the heat. Using a heatproof rubber spatula or a wooden spoon, quickly stir in all the flour until a thick paste forms. Return the saucepan to medium-high heat. Cook, stirring constantly with the wooden spoon, for about 1 minute, until the mixture pulls away cleanly from the sides of the pan and a light film forms on the bottom. Transfer the hot dough to the bowl of a stand mixer fitted with the paddle attachment. Mix on low speed for about 1 minute to release excess steam and cool slightly. With the mixer running on low speed, gradually add the eggs all at once. Continue beating until fully incorporated and the dough is smooth, glossy, and forms a soft peak when the paddle is lifted.Preheat your fan oven to 350ºF/180ºC. Line 3 large baking sheets with silicone mats or parchment paper. Fit a large piping bag with the 5/8-inch open star pastry tip. The use of a star tip is essential, as the ridges it creates allow for even expansion and minimal cracking during baking. Pipe mounds of dough (about 28 per sheet) onto the prepared trays. Dust the tops lightly with powdered sugar.
Baking
- Bake the choux pastry for 35 minutes, working in batches if necessary (1 or 2 trays at a time). Do not open the oven door during baking, or the pastry may deflate. After the initial baking time, turn the oven off and leave the door slightly ajar for 15 minutes to allow the shells to dry out gradually. Transfer the puffs to a wire rack and let them cool completely.
Storage
- Once completely cooled, the unfilled baked puffs can be refrigerated in an airtight container for up to 2 days, or frozen for several months before filling.
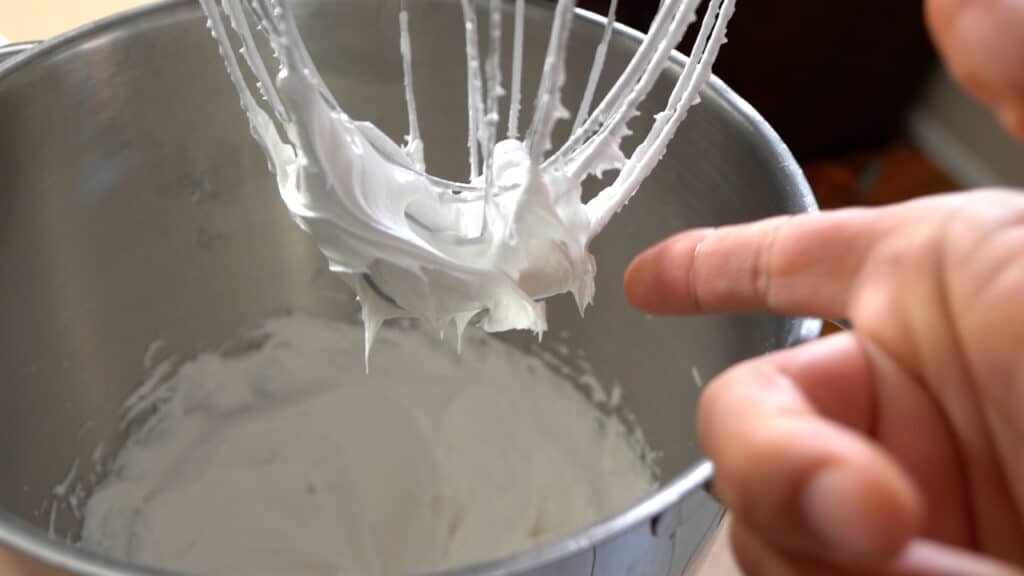
Royal Icing
- Using a stand mixer fitted with the whisk attachment, beat all ingredients together on high speed until stiff peaks form. This icing, known as royal icing, is ideal for fine decoration. Use a very small open star or plain pastry tip to pipe your designs.Royal icing dries very quickly. Keep the surface covered with a damp cloth or plastic wrap during piping to prevent it from forming a crust.Royal icing can be stored in an airtight container in the refrigerator for several weeks. Before reusing, transfer it to the bowl of a stand mixer and whip briefly by hand or with the paddle attachment to restore its original consistency.

Vanilla Mousseline
- In a medium saucepan, bring the milk, half of the sugar, and the vanilla to a gentle simmer. Meanwhile, in a separate large bowl, whisk the egg yolks with the remaining sugar. Whisk in the flour and cornstarch until a smooth paste forms. Once the milk mixture simmers, remove the saucepan from the heat. While whisking the egg yolk mixture constantly, gradually pour in about one-third of the hot milk to temper the yolks. Pour the tempered yolk mixture back into the saucepan with the remaining hot milk. Return it to the stove over medium-high heat and cook, whisking constantly, until the custard thickens and comes to a full boil. Continue to cook for 2 full minutes to cook out the starch flavor, whisking vigorously to prevent scorching.Remove from heat and immediately whisk in the first 250g of cubbed butter until completely melted and incorporated. Pour the custard into a clean bowl and cool to 65ºF/18ºC, either over an ice bath or in the refrigerator, stirring occasionally. Once cooled, transfer the custard to the bowl of a stand mixer fitted with the whisk. Add the remaining 250g of room temp butter and beat on medium-high speed for about 5 minutes, until the Mousseline is very light, creamy, and fluffy.Troubleshooting: If the mixture appears grainy or separated, gently warm the sides of the mixing bowl with a blowtorch or by placing it briefly over a pot of simmering water while continuing to beat until smooth.
Stuffing Choux
- Pierce each bottom choux pastry with a narrow pastry tip. Fill the choux puffs, scraping away any excess cream from the opening. Arrange the filled puffs upside down on a baking tray lined with parchment paper. At this point, the filled puffs can be refrigerated for up to one day before you assemble and glaze the structure.Do not assemble or glaze the croquembouche with caramel in advance and refrigerate it. Caramel is highly sensitive to humidity and will soften and weep in the refrigerator.
Caramel For The Puffs
- It is crucial to prepare a sufficient quantity of caramel; the larger mass retains heat longer, which greatly facilitates the assembly process. For the caramel, use a narrow, heavy-bottomed saucepan. First, add the glucose and water, followed by the sugar. Cook to a light amber color, reaching a temperature of 340°F/170°C. To halt the cooking process, quickly immerse the bottom of the saucepan in a shallow pan of cold water.Carefully dip the top of each puff into the hot caramel. Place the glazed puffs, caramel-side up, on a parchment-lined tray. Wear heat-resistant gloves and keep a bowl of ice water nearby in case of accidental burns. Do not use tongs or a fork, as they increase the risk of burns. Instead, hold the choux by its bottom base, leaving enough space for the caramel to adhere without touching your fingers. If the caramel thickens, gently reheat it. You can keep it workable by leaving the pan over very low heat (setting 2-3 on an induction stove).Optional Decoration: For variety, dip approximately 20 puffs in caramel and then immediately into pearl sugar.Assembly Method: While using a croquembouche cone (form) is highly recommended for a perfect shape, you can also succeed using the traditional method, as I did, by building the tower on a nougatine base with supporting disks.
Final Croquembouche Assembly
- To make the day it is served. In a large, clean saucepan, prepare another batch of caramel, cooking it to a light amber stage. Dip the bottom and sides of each pre-glazed puff into the hot caramel, one at a time. Immediately place the puff onto the nougatine stand, arranging the first row in a circle. This base layer should hold approximately 12 choux. Continue building the tower in concentric, decreasing circles. Add a second row of about 11 puffs, then a third of 10, using the hot caramel as glue between each puff. To stabilize the structure, after the fourth row, affix the 6-inch (15 cm) nougatine disk to the top using hot caramel. Continue building upward. Construct the tower until complete, using roughly 10 rows total. The final top row should hold only 3 to 4 puffs.To finish, attach the final 4-inch (10 cm) nougatine disk to the top. Glue the three half-moon nougatine shapes onto this disk. Add any additional nougatine decorations, sugar work, or dragées (decorative Jordan almonds) as desired. Enjoy!
Ready to discover this recipe? You're only 1 step away.
This recipe is only accessible to registered members!
Create your account to access all recipes and content of my website.
Join us now and enjoy more 800 recipes (Mostly French with European Influences, American Classics and Asian fusion)
Already register? Sign in


Appetizers
Beetroot Red Cabbage Mango Salad

Free Recipes
How To Prepare Red Cabbage Raw


Free Recipes
Apple Pie Traybake

Cakes
Olive Oil Chocolate Cake

Desserts
Spicy Chocolate Bar

Entrees
Deboning A Poularde Leg
Free Recipes
Chanterelle

Bread
Panettone Perdu

Free Recipes
Mustard Fig Spread

Free Recipes
Poularde Demi-Glace
