Please note that the full access to this content needs a subscription: please sign up.
Make your own chocolate centerpiece
This recipe is a protected and only available for paid members. To obtain the full step by step recipe and detailed ingredients list, please sign up.
Preview the recipe
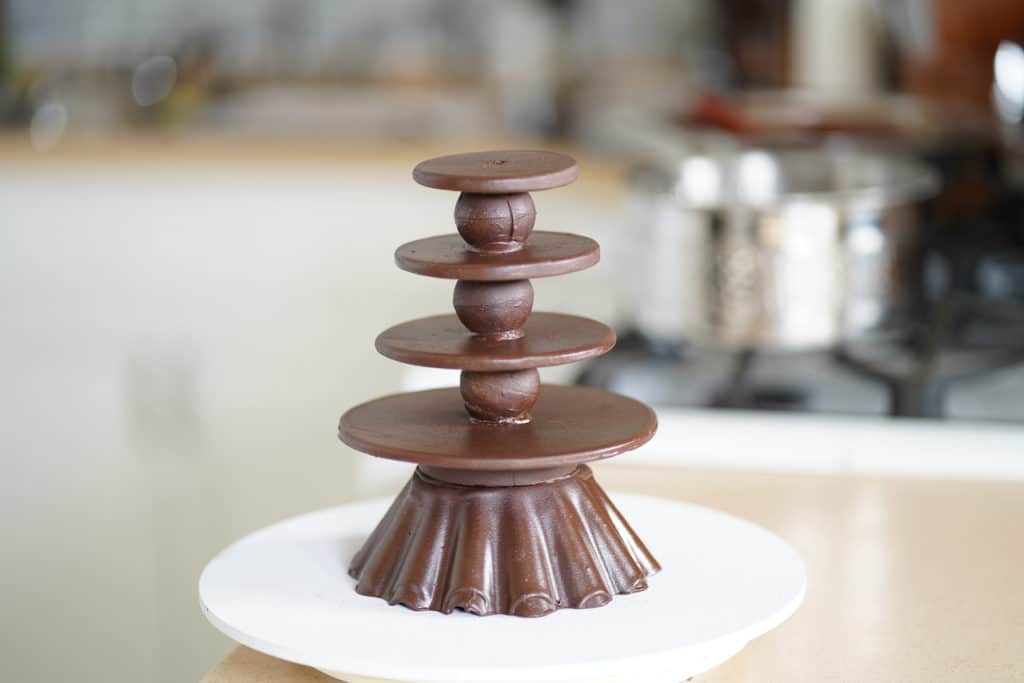
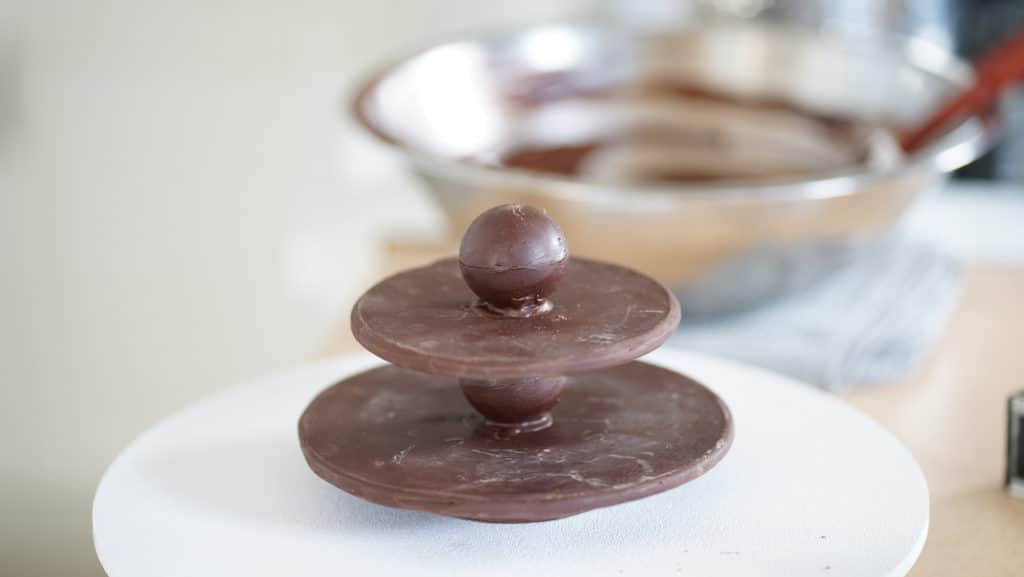
4-Tier Chocolate Centerpiece
- Tart pans, fancy molds, silicone molds, tart rings, and cookie cutters can be used to make this Christmas tree. For the spheres which will be placed between each tier, use a 1.6-inch/4cm Ø half sphere silicone mold. For the base of the tree, you can use an upside down brioche a tete mold; optional though. For the foot of the Xmas centerpiece, use a 3-inch/8cm Ø tart ring, or cookie cutter. For the first bottom tiers, use a 6-inch/15.5cm tart ring. For the second tiers, use a 4.5-inch/11.5 cm tart ring. For the third, use 3.75-inch/9.5cm. For the fourth, use 3.5-inch/8.8cm tart ring. For the fifth, use a 3-inch/8cm tart ring (The fifth one should be added at the end topping truffles). The dimensions of this chocolate centerpiece are approximate. For example, each chocolate disk can be made into larger size (About 1-inch/2.5cm) to carry more truffles. Grease brioche mold and rings with oil, or cooking spray, and wipe off excess fat (Rings can also be surrounded by plastic strip instead). Cover brioche mold tightly with plastic wrap. All prepared rings should lay onto a flat tray lightly oiled, and lined with plastic wrap, or parchment, or silicone mat. Instantly set tempered chocolate using an air duster. When turned upside down and sprayed, super cooled liquid will come out and freeze chocolate instantly.

Tempering Chocolate
- For better handling, a fair amount of melted chocolate is preferred when tempering. Leftover chocolate should be spread over a sheet of parchment into a ¼-inch/6mm chocolate sheet. Once set, break into pieces and store in container for later use. Melt chocolate slowly over a water-bath. The simmering water should not touch the bottom of the pastry bowl. Stir up chocolate every so often using a rubber spatula. The chocolate temperature should not exceed 130ºF/55ºC. Remove bowl from simmering water, wipe off bottom and refrigerate for about 15 minutes stirring every so often. When the temperature reaches 80ºF/26ºC, rewarm for a few seconds, or until temperature of the chocolate reaches 92ºF/33ºC. Keep water to a simmer stage to rewarm tempered chocolate if needed.
Centerpiece Base
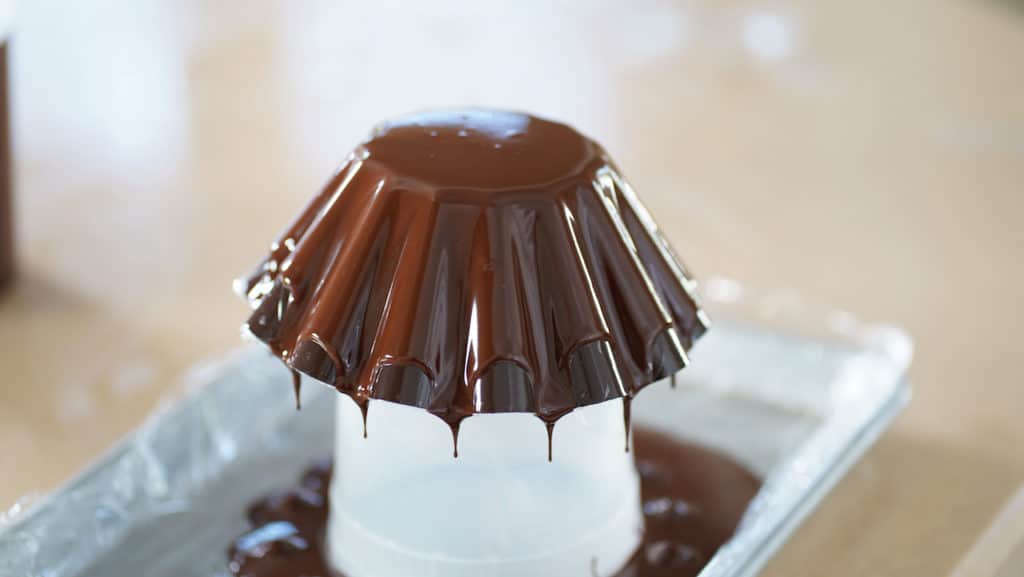
- For the brioche mold, coat with chocolate, and let set at room temperature. Then, add a second layer of chocolate. Even out bottom using an offset spatula; chill to set. Break off the formed stalagmites prior removing from mold. To even out the surface, warm up a baking tray over steaming water. With a quick rotating motion melt out excess chocolate. Flip immediately, and chill to set.

Chocolate Spheres
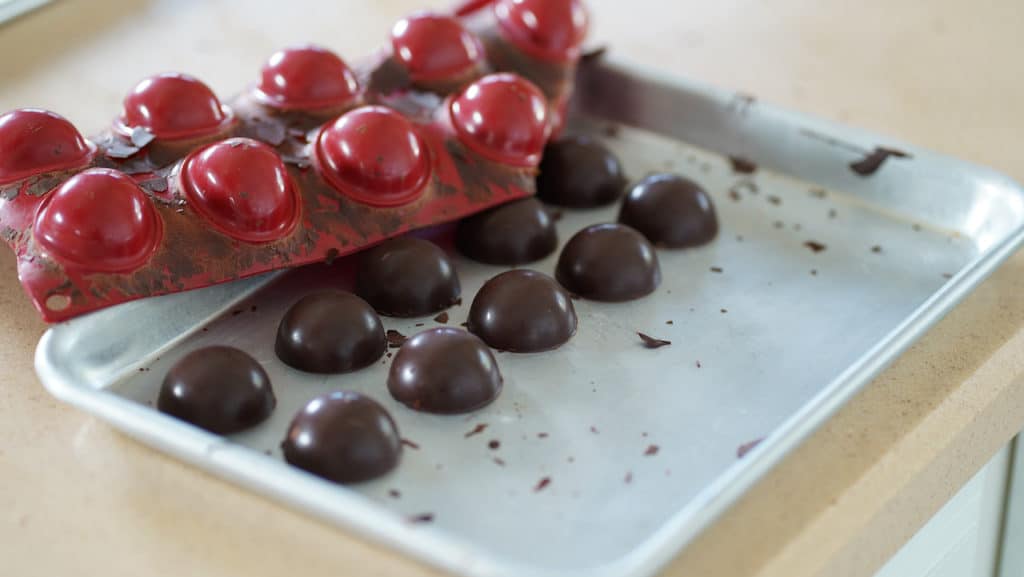
- For the spheres, fill up 8 half spheres, tap to remove any air bubbles, flip over a wire rack to drain (Use parchment underneath to save the dripping chocolate. After 5 minutes, or when it begins to set, flip and clean up the surface using an offset spatula. Let set and repeat this step with a second layer of chocolate. Chill to set and pop half chocolate spheres from silicone mold. To assemble, quickly melt the surface of one half sphere over a warm baking tray and seal with the other half.

Chocolate Disks
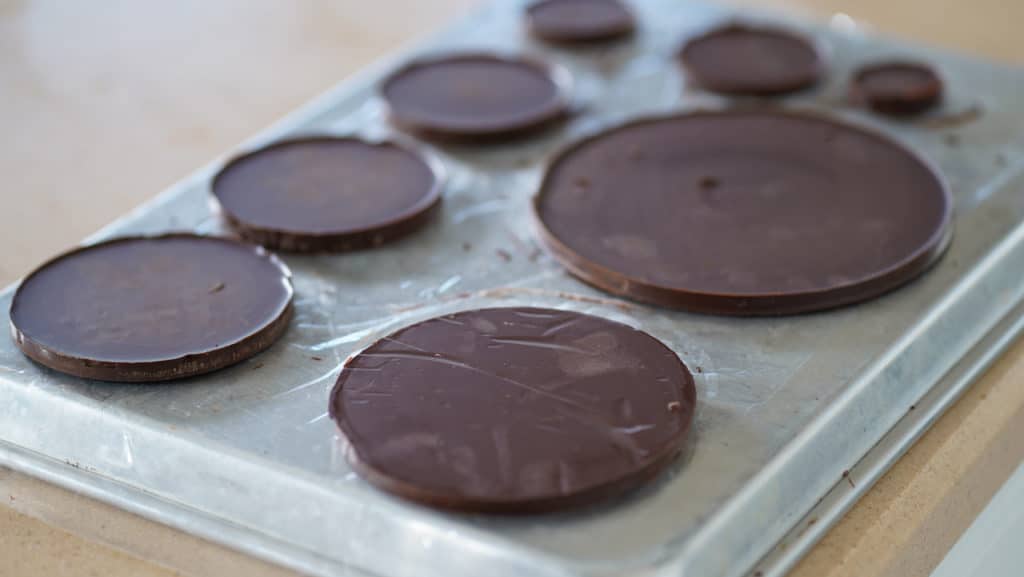
- To create the foot tree, use a 3-inch/8cm diameter tart ring, or cookie cutter, make a ¾-inch/2cm thick chocolate disk. Fill remaining tart rings, and cookie cutters into 0.20-inch/5mm thick chocolate disks. Chill to set and remove from rings. Carve out imperfections using a pairing knife. Wear gloves and warm up each disk to smooth them out; set aside.

Assembly
- Use tempered chocolate for the assembly. With the tip of a pairing knife, gently mark the center of each chocolate part. Place the largest chocolate disk over a cookie cutter. Add a dollop of tempered chocolate in the center, and then the first sphere, and seal with an air duster. Add a dollop of chocolate on top of the sphere, and seal the second chocolate disk making sure it is perfectly leveled off before doing so. Flip it and seal the chocolate foot with a dollop of tempered chocolate. Flip, and do likewise following the same procedure.

Chocolate Spray
- The chocolate spray called (Flocage) is optional. It gives a glossy finish. Melt cocoa butter in the microwave. Stir in chopped dark chocolate and mix using an immersion blender, and sieve. Readjust temperature to 122ºF/50ºC. Pick a cool spot outside. When ready, fill up the cup of an air spray gun and spray the chocolate sculpture (Do not use the locking air pressure regulator). A chocolate sculpture can last weeks in a cool area. It can also be wrapped up in plastic film for later use. The day of Christmas, fill each tier with chocolate truffles, and decorate with silver sugar pearls if desired. Enjoy!

Ready to discover this recipe? You're only 1 step away.
This recipe is only accessible to registered members!
Create your account to access all recipes and content of my website.
Join us now and enjoy more 800 recipes (Mostly French with European Influences, American Classics and Asian fusion)
Already register? Sign in


Free Recipes
Apple Pie Traybake

Cakes
Olive Oil Chocolate Cake

Desserts
Spicy Chocolate Bar

Entrees
Deboning A Poularde Leg
Free Recipes
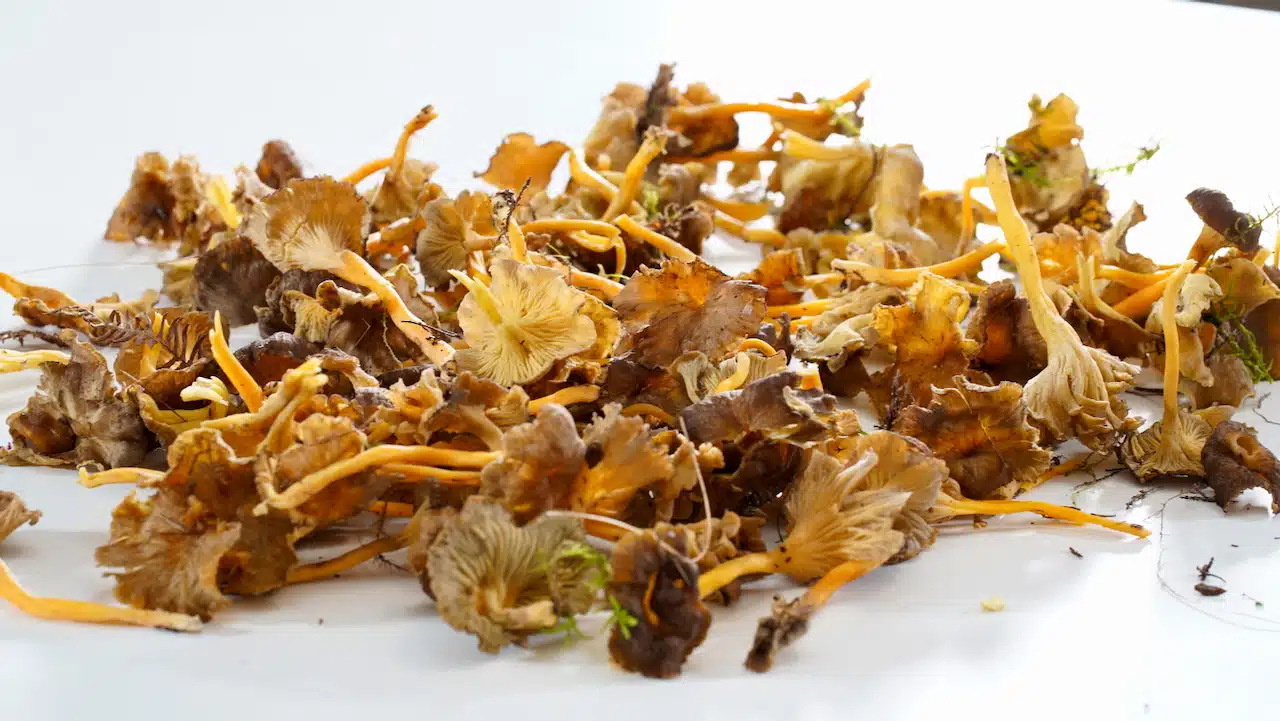
Chanterelle

Bread
Panettone Perdu

Free Recipes
Mustard Fig Spread

Free Recipes
Poularde Demi-Glace

Free Recipes
Chestnut Paste

Breakfast
Cronut
