How to Decorate Ice Cream Cones
Course: frozen desserts
Cuisine: French
Keyword: ice cream
Prep Time: 15 minutes minutes
Cook Time: 0 minutes minutes
Can be made ahead of time: 0 minutes minutes
Servings: 16
Calories: 50kcal
Cost: $8
Custom your ice cream cones!
Equipment
- 1 Ice cream cone holder
- 5 Serving bowls
- 1 Narrow container
- 1 Saucepan
- 1 Digital thermometer
Ingredients
- 16 each Wafer ice cream cones
Fancy Ice Cream Cones Decors
- 500 g Tempered chocolate Recipe
- 50 g Crushed hazelnuts toasted
- 50 g Crushed pistachio toasted
- 50 g Unsweetened shredded coconut toasted
- 50 g Chocolate vermicelli
- 50 g Sparkling sugar heart
Chocolatey Ice Cream Cone
- 200 g Bittersweet chocolate
- 100 g Cocoa butter or coconut oil
Instructions
- Place wafer ice cream cones in the freezer an hour before starting.
Fancy Ice Cream Cone Decors
- Any tempered chocolate will work for coating waffle ice cream cones, but since ice cream is naturally sweet, dark chocolate is often the best choice.

- Once your chocolate is tempered, coat about an inch/2.5cm in chocolate.

- And gently press on crushed nuts before the chocolate sets.

- Using toasted crushed pistachios…

- Using toasted crushed hazelnuts…

- Using toasted coconut…
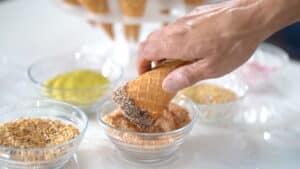
- Using sprinkles…

Chocolatey Ice Cream Cone
- Using chocolate enrobage (with cocoa butter) allows the cone to get a thiner chocolate coating. The cone can also be dipper immersed in chocolate. Gently melt chocolate over a bain-marie, and remove from the heat. Transfer the barely melted chocolate to a narrow container. Meanwhile, in a small saucepan melt cocoa butter. When melted, add it to the chocolate and mix with the immersion blender. Sieve.

- Use chocolate enrobage at ≈113ºF/45ºC. Coat the tip of the previously frozen cone first.

- Flip and glaze about a third of the cone. Repeat until done.

Storage
- Ice cream cones can be carefully stalked back and arranged in sealed containers. Keep frozen for up to 6 months.

Nutrition
Serving: 30g | Calories: 50kcal
