Please note that the full access to this content needs a "Year at the table" subscription: please sign up.
It starts with the flour: pure wheat flour—farine de froment...
This recipe is a protected and only available for paid members. To obtain the full step by step recipe and detailed ingredients list, please sign up.
Preview the recipe
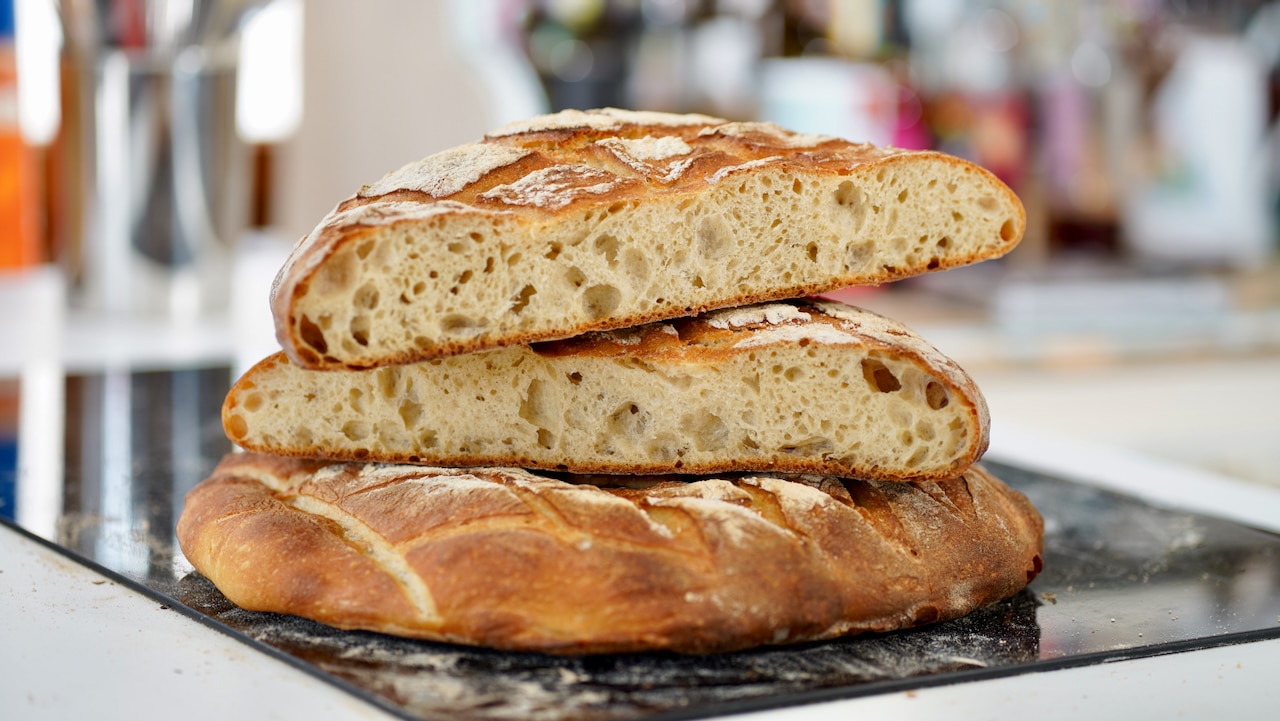
- In bread making, loaves are a great alternative to baguettes, especially if shaping bread dough into baguettes remains a challenge for you. These large loaves are indeed much easier to manage, and thanks to their size, their shelf life is extended.

What is Traditional Bread Flour
- Traditional French bread flour is specially formulated for crafting authentic French breads using time-honored methods. It contains no added gluten or enhancers such as ascorbic acid. A traditional T55 or T65 flour produces a creamy crumb with beautiful air pockets and a golden, crispy crust—the ideal characteristics of a classic French baguette. This flour typically has a protein content of approximately 10%, a gluten level of 6-7%, and a W value of 200. In the US, a good brand of unbleached all-purpose flour can achieve similar results. My best advise is to look around reputed French bakeries and I mean the one that's got the best online bread reviews not grotesque copycats.
- Plan to bake each loaf every 50 minutes (allowing 30 minutes for baking and about 20 minutes for the pizza stone to reheat to 250ºC). To prevent the remaining dough from over-proofing while waiting to be baked, the 2 other loaves should be kept at a cool temperature, around 5 to 10°C. You can store them covered in the refrigerator, or outside if the weather is cold enough.


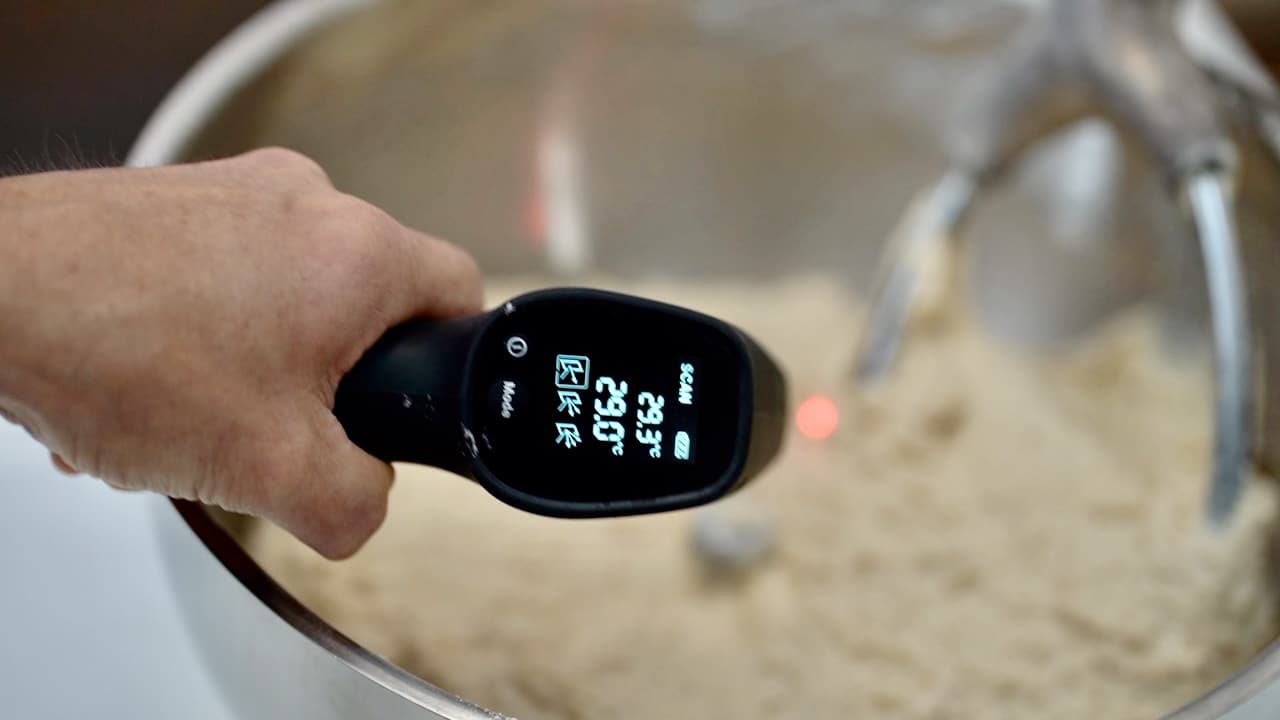
Basic Temperature: 75ºC
- This ancient baguette recipe calls for a desired dough temperature (DDT) that is warmer than most bread recipes: 28–30°C versus the standard 24°C. This higher temperature is intentional, as the method incorporates three specific factors: a slow and short mixing process, a low amount of yeast, and a four-hour bulk fermentation interrupted by a degassing intervention every hour.For example, during winter, if the room temperature and flour are both at 18°C and the friction factor is insignificant (≈1 degree celsius).75-18-18-1= water temp set at: 38/39ºC.Summer: 75-24-24-1= water temp should be set at: 24/25ºC. You also want to lower even further the amount of yeast by 2.

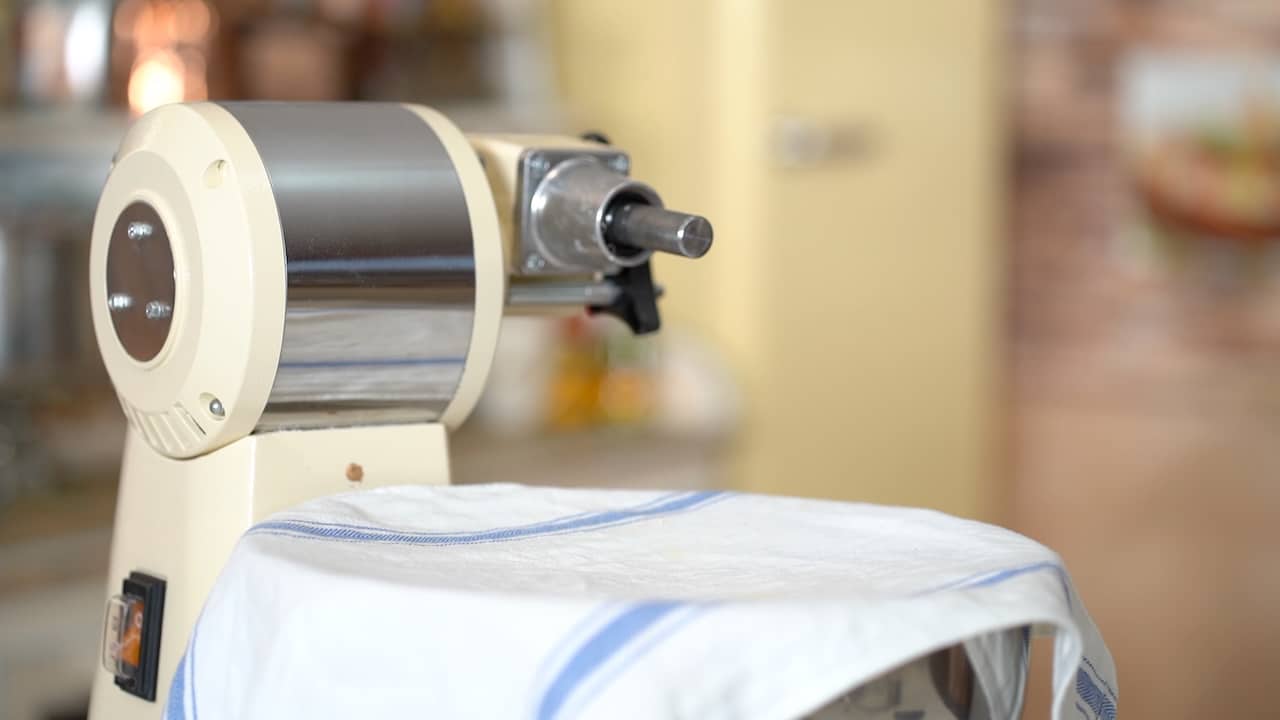
Kneading
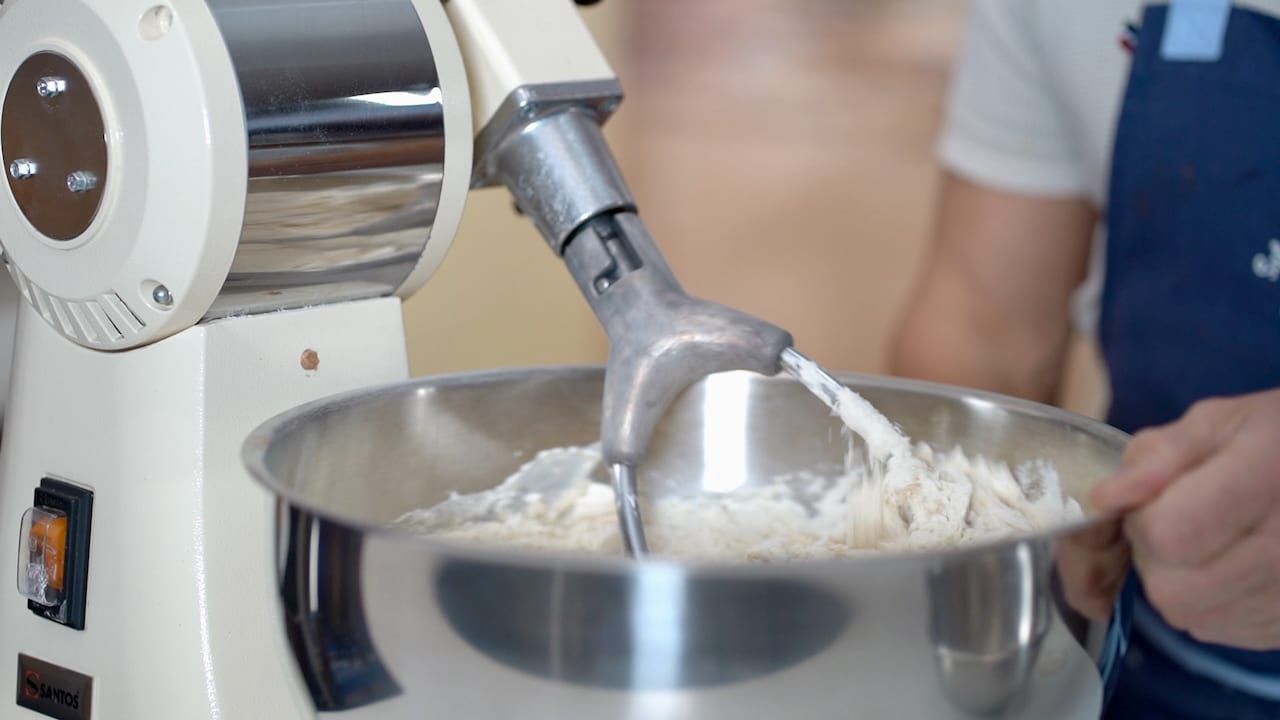
- First, pour the water into the mixing bowl and sprinkle in the fresh yeast. Add the flour and salt, then mix on low speed for 8 to 10 minutes max. Pause the mixer occasionally to scrape down the sides of the bowl and the dough hook.The dough does not need to be mixed beyond this point. We are not aiming for a fully developed dough that passes the 'windowpane test'; instead, we want the dough to be slightly under-mixed. The gluten network will develop during the bulk fermentation.

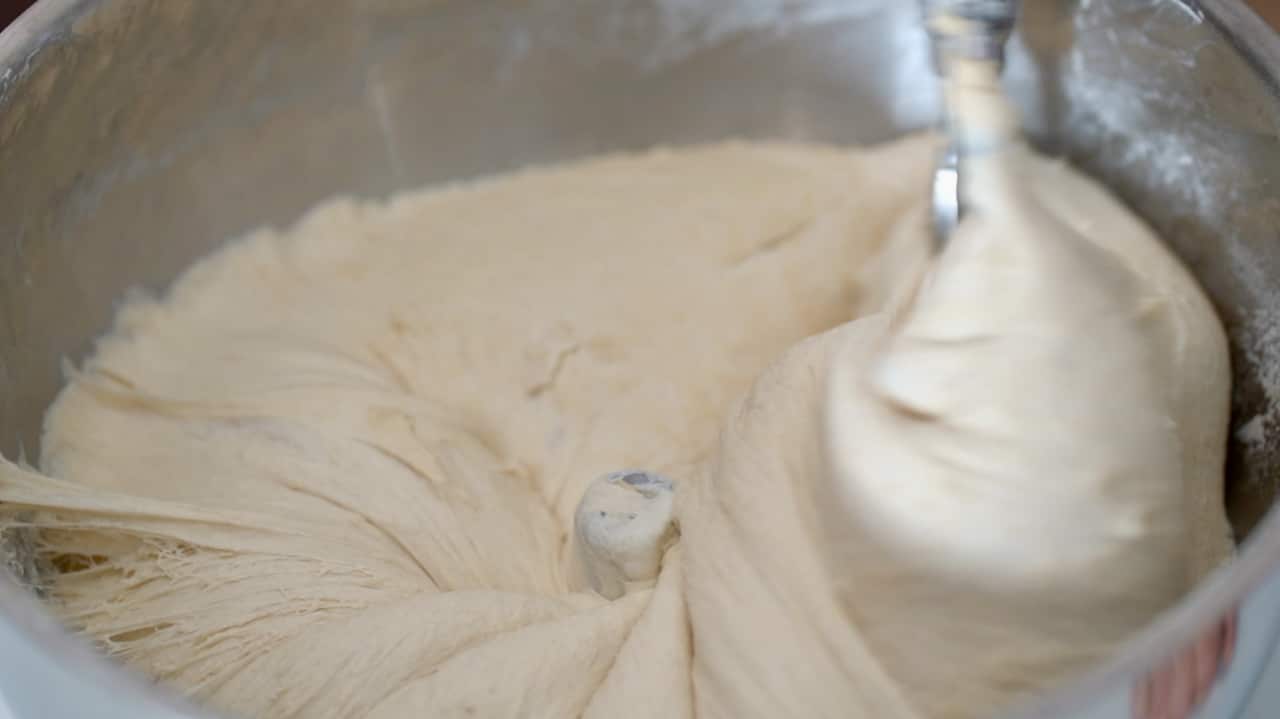
Bulk Fermentation
- Cover the dough and let it ferment for 4 hours. During this time, the dough must be degassed 3 times (once every hour).
- This bulk fermentation can take place in the mixing bowl; to degas it, simply turn on the mixer briefly each hour, then re-cover the dough. Flour proofing baskets.


Dividing Dough into Loaves
- Flour the work surface and the dough. Use the plastic dough scraper to release it from the edges of the bowl.

- Turn the bowl over (now, the skin is down).

- With the help of the large triangle dough scraper, cut the dough into three equal potions. Flour dough between cuts. No bunch rest is needed when shaping the bread loaves.

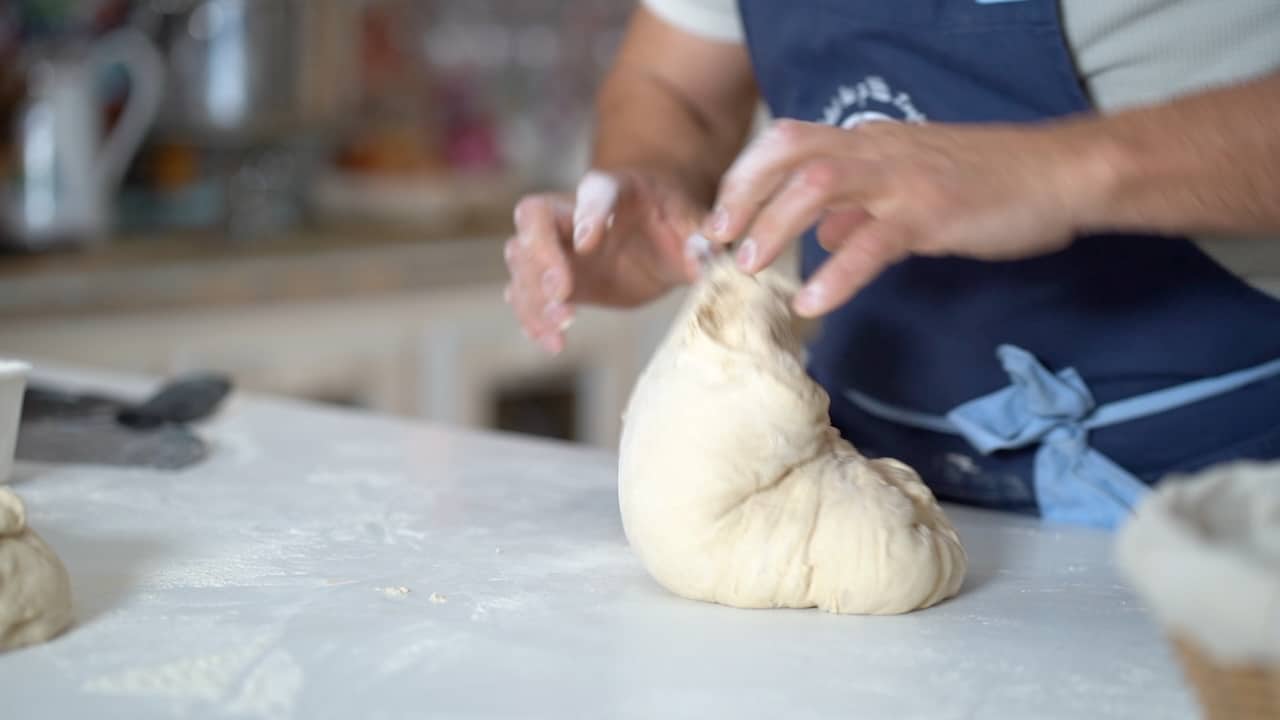
- Lightly flour your hands and the surface of the dough. Gently deflate it by giving it a few quick pats all over (skin side down). The goal is to release the larger bubbles that have formed here and there while keeping the smaller bubbles intact. Be careful not to smash the dough—the millions of tiny bubbles are the result of a properly executed bulk fermentation. Using as little extra flour as possible, fold the edges of the dough toward the center. Once this is done, flip the dough over so the smooth side (the skin) is now facing up. With both hands, gently rotate the dough as if you were lifting a ball, using minimal pressure to seal the underside. Give quick pats if large bubbles pop. Place the loaf skin side down into a floured proofing basket. Repeat with the remaining dough.
- Place each loaf into a floured proofing basket. Cover bread with a kitchen towel.

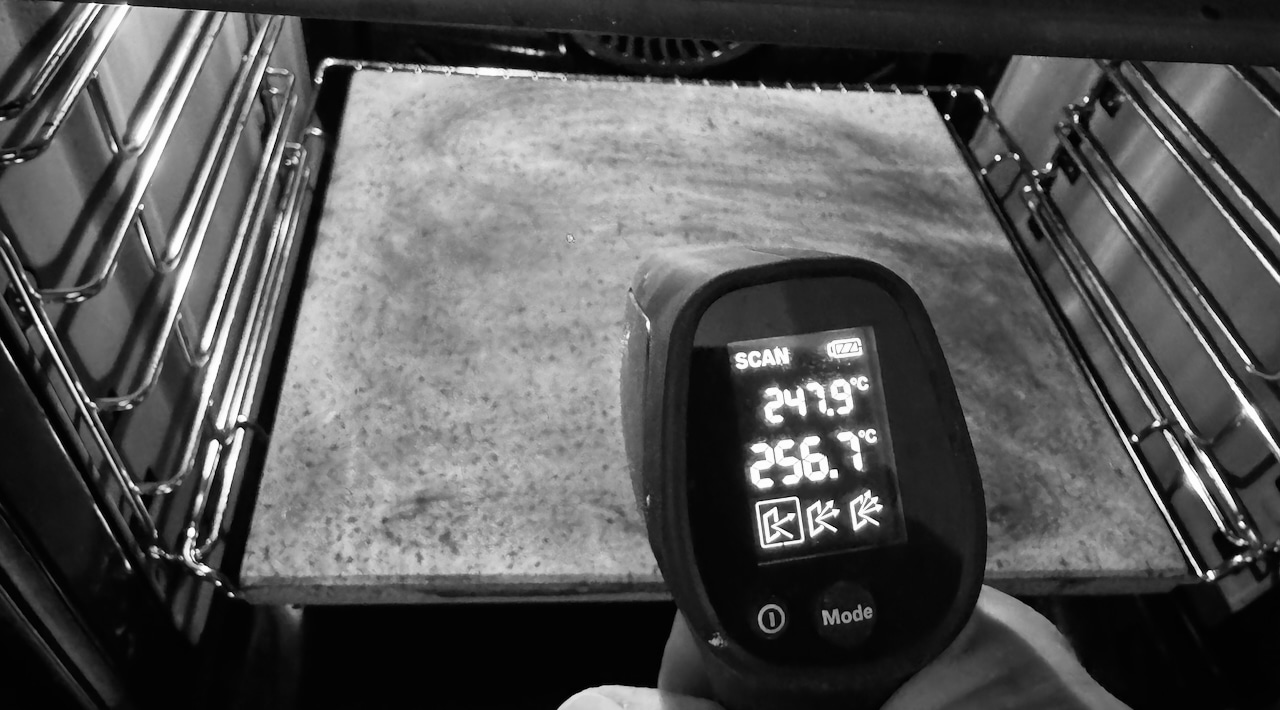
- Preheat your conventional oven to 480ºF/250ºC with the pizza stone positioned on the bottom third of the oven for 45 minutes before baking your first loaf. The temperature of the pizza stone is the best indicator. It should be no less than 250ºC; the higher, the better.


Proofing
- Unless you own a large oven, at home you would only be able to bake one loaf at a time. Keep the other two loaves in a cool place, between 5 and 10 degrees Celsius (≈47ºF). It will take about 2 hours to proof at 20°C (68°F) and about an hour at 26°C (80°F), until they have almost doubled in size. If proofing in the refrigerator, it will take approximately 4 to 5 hours. Remove the loaf from the refrigerator and let it sit at room temperature for 30 minutes before baking.


Baking
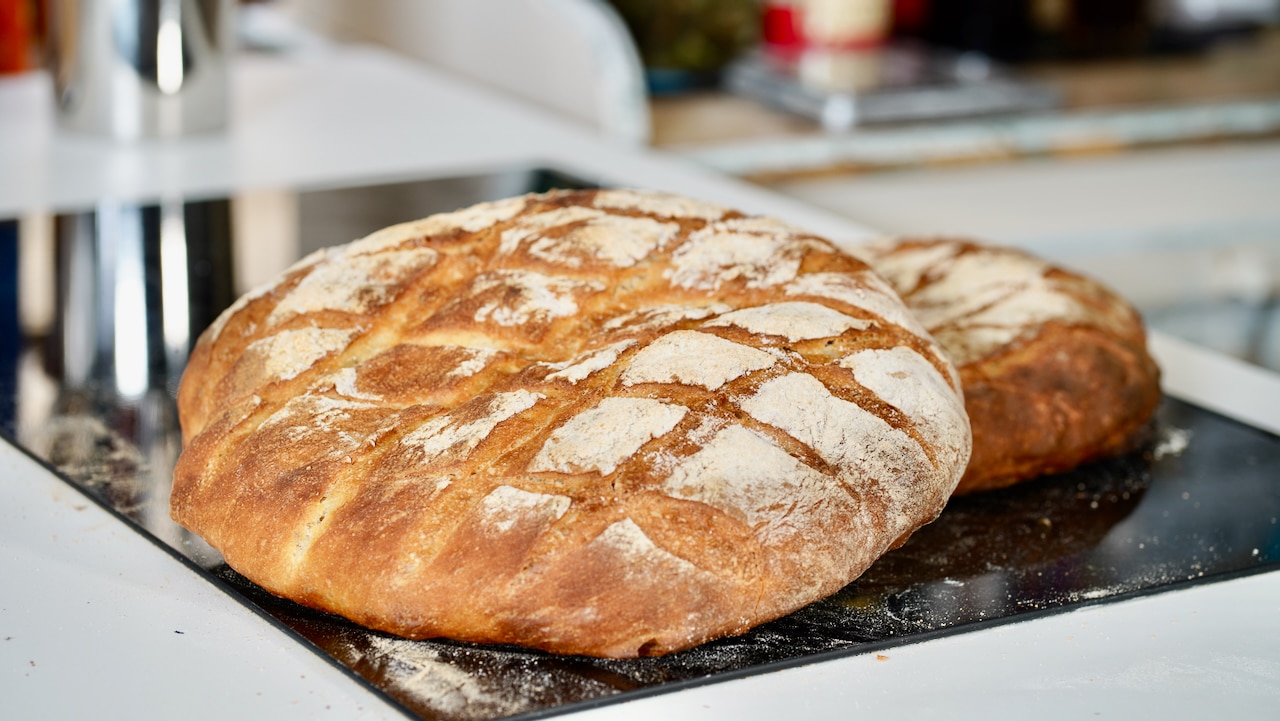
- Lightly dust the top of the proofed loaf, and flip it over onto the hot pizza stone.

- Using your fingertips, immediately press the loaf into a flat, even disk.

- Then, score the surface with a crisscross pattern. Spray water inside the oven, then bake for 30 minutes at 425°F/220°C. Carefully open the oven door to let the steam escape, then leave the loaf in for 5 more minutes.

- Transfer them to a wire rack to cool. Immediately, reheat the oven to the same temperature and repeat the same baking process for the remaining loaves.


Storage
- Store bread loaves at room temperature for up to 48 hours, wrapped in cling film or a fragrance-free kitchen towel. For later events: To enjoy bread loaf as crispy as they were on the first day, store them in sealed freezer bags just a few hours after baking—they can be kept this way for up to two months. An hour before serving, place them in a preheated (220ºC) oven, turn it off, and leave them inside for 5 minutes. Let the loaf rest at room temperature for 30 minutes before eating.


This content is part of the PREMIUM SECTION

This recipe requires a All-content access subscription. The Premium section includes more than 50 essential recipes from French pastry and a special section for mastering artisanal bread.
The Premium section is only accessible with "A year at the table" subscription. Discover it with special first year discount.