Please note that the full access to this content needs a subscription: please sign up.
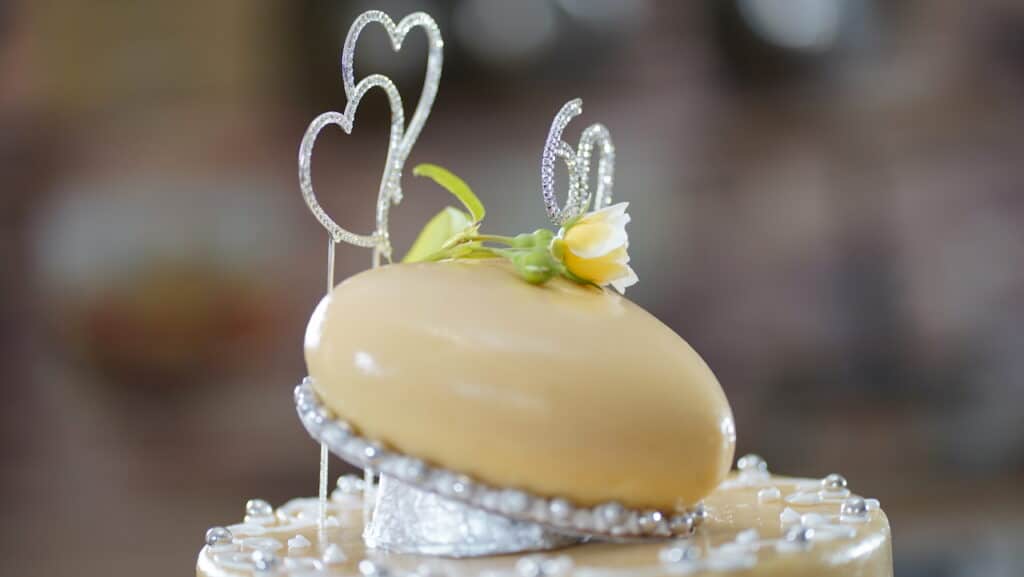
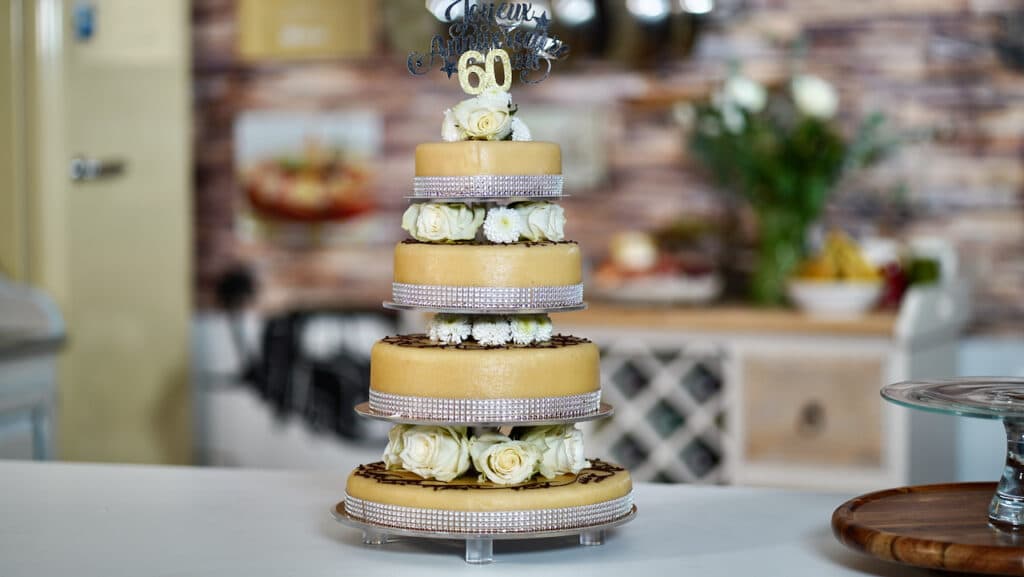
A masterpiece made entirely of vanilla goodness
This recipe is a protected and only available for paid members. To obtain the full step by step recipe and detailed ingredients list, please sign up.
Preview the recipe
Why Wedding Cakes Are Made To Be More For Looks Than Taste?
- When it comes to wedding cakes in the USA, they are often stunning works of art—yet many fall short in flavor. This disconnect may stem from our innate desire for artistic expression, where visual grandeur overshadows the essence of pastry-making: a precise science demanding expertise to achieve both beauty and exceptional taste.

How To Create A Wedding Cake
- Creating a stunning wedding cake is a true art form that requires attention to detail and a flair for design. When it comes to configuring and building wedding cakes, the possibilities are truly endless. In addition to providing structural support, cake stands also serve as a decorative element that can enhance the overall look of your wedding cake.

- For added height and drama in cake designs, consider using styrofoam rounds. These lightweight bases—cylindrical or tiered—can match the dimensions of your edible cakes or be built taller and larger.

- Simply decorate your styrofoam cylinders to match your event’s theme like a dummy cake. They can then be coated with a smooth layer of royal icing or rolled fondant for a realistic cake-like finish (Picture shows a dummy cake).

- Alternatively, use a glue gun to securely attach embellishments like ribbons, flowers, etc...

- If you plan to stick a cake board over each styrofoam cylinder, double the amount of cake boards.


Roll Fondant vs Marzipan
- Roll fondant, also known as sugar paste, is a cost-effective and user-friendly option that many bakers love to work with. On the other hand, almond paste, or marzipan, is definitely pricier, but its rich, nutty flavor can truly elevate the taste of your creations. Both roll fondant and marzipan come with their own set of pros and cons, making them suitable for different purposes in cake decorating.

Vanilla Simple Syrup
- Soak gelatin in cold water for a few minutes to soften. Drain and set aside. In a saucepan, bring water, sugars and vanilla to boil and cook for a minute. Remove syrup from the heat, and add the soften gelatin – cover and let cool to room temperature. The gelatin helps stabilize the syrup, allowing it to hydrate the sponge without making it overly wet. This ensures your cakes stay moist yet firm, even after freezing and thawing just like the Opéra Cake.


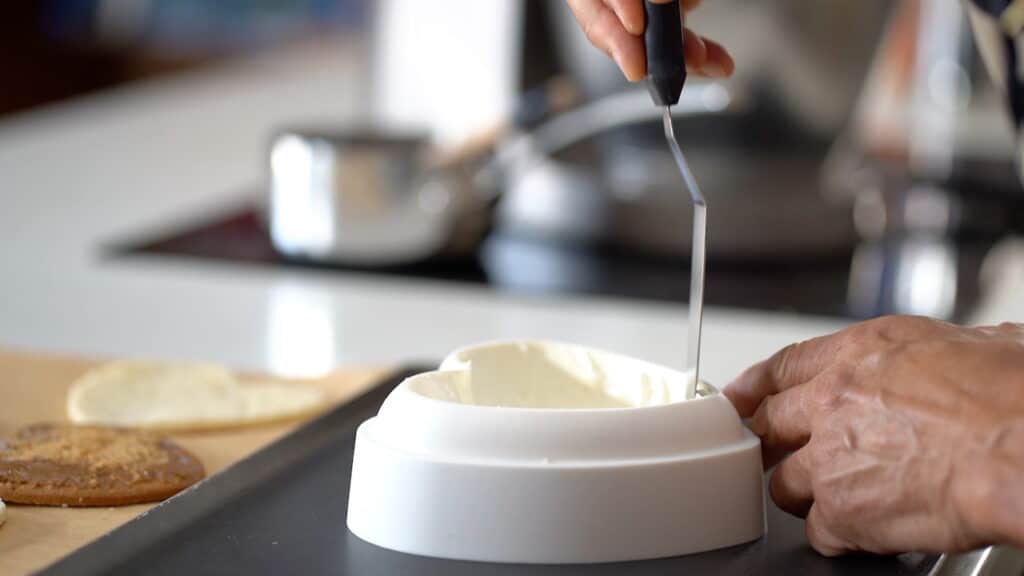
Vanilla Mousse (Ganache Montée)
- Make ganache montée a day before using. Soak gelatin in cold water to soften; drain and set aside. In a saucepan, bring heavy cream and vanilla to a boil; turn the heat off, cover and let infuse for 20 minutes. Meanwhile, gently melt white chocolate in a bain-marie. Remove vanilla bean from the heavy cream and squeeze it. Save vanilla pods to make Vanilla Sugar. Reheat the vanilla infused heavy cream, and pour in the white chocolate. Let stand 2 minutes, and mix with an immersion blender. While mixing, add the bloomed gelatin, and the remaining chilled heavy cream. Refrigerate the ganache montée overnight.


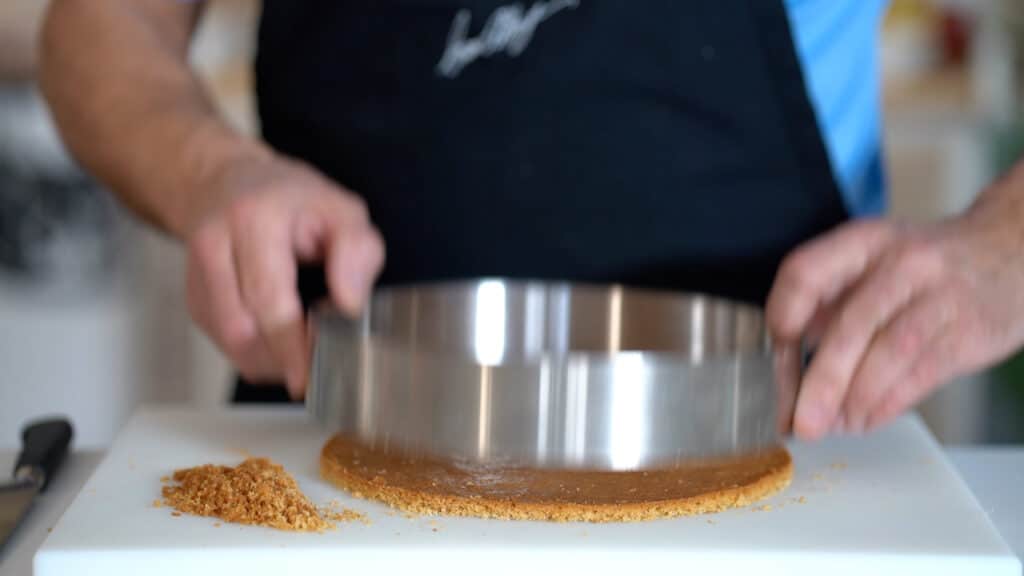
Sablé Breton Cookie Crust
- Mix and sift flour and baking powder; set aside. In the stand mixer fitted with the paddle attachment, begin to mix together sugars, vanilla, salt, almond meal and egg yolks. Microwave butter for a few seconds to soften (not melted!), and add it to the mixture. Mix until creamy consistency on medium-high speed. Scrap down sides of the bowl and attachment and continue to mix until smooth. Stop mixer and add half of the sifted powders; mix to combine on low and then add remaining powders. Mix until just combined. Transfer pastry to the countertop, and divide into 4 equal portions. Roll each portion into ⅙-inch/4mm thick sheet sandwiched between 2 parchment papers. Freeze to harden. Cut into disks according to the diameter of each cake ring. Save pastry scraps for later use. The pastry can also be chilled, and rolled out later into desired shapes and thickness.


Baking
- Preheat fan oven to 340ºF/175ºC. Bake sablé breton disks in cake ring for about 15-18 minutes until golden brown. Let cool.

- Remove cake rings and gently trim sablé's edge with a paring knife. You want to create a narrow gap between the crust and cake ring about ⅓-inch/8mm.
- Carefully, spread about a ¼-inch/6mm thick layer of praliné on each crust.


Cake Ring Montage
- The cake is built in layers, with sponge and mousse stacked alternately for a balanced texture (soft yet sturdy). This cake could also be built into large rectangle, and later be cut into desired squared shapes. In order to safely remove each jocond sheet from the parchment, top sponge with another parchment paper, flip and carefully remove it. Leave the brand new parchment underneath each sponge sheet. Cut sponge into disks that match the diameter of the crust. Two to three sponges per dessert depending on the height of the cake ring. Do not hesitate to use leftovers, they can indeed be reconstituted into disks just like a puzzle. Scraps can also be used to make dessert cups.


Heart Cake Montage
- For the step by step heart vanilla-almond cake montage: click here.
- Place each crust in cake ring onto a baking tray lined with parchment or cake board.

- Remove the ganache montée from the refrigerator. With a rubber spatula or dough scraper, take half of the mixture out of the bowl (go all away down scooping most of the vanilla seeds stocked to the bottom). In the stand mixer fitted with the whisk attachment, whip ganache montée to medium-soft peaks (do not overwork, keep it supple). Reserve mixing bowl and remaining ganache montée in the refrigerator.

- Fill the gap all around the edges of the crust with a thick rope of mousse first. Next, with a tablespoon or spatula, press the mousse upward and against the cake ring. Cover the praliné with a thin layer of mousse.

- Add the first Jocond sponge disk. Press it down to ensure the sponge is evenly distributed.

- Lightly wet the sponge with vanilla syrup using a pastry brush. Avoid over-saturating the sponge to maintain its texture.

- Repeat the same procedure twice.

- Cover the last sponge with more mousse. Smooth out cake using a large offset spatula, and freeze. Repeat with the remaining cakes rings. Whip the other half of the ganache montée when needed. Freeze cakes overnight.


To De-mold
- With the help of the kitchen blowtorch, warm up the edged of the frozen cake ring, and slide it down. Use your hair dryer if acetate collar is used. Keep cakes frozen.


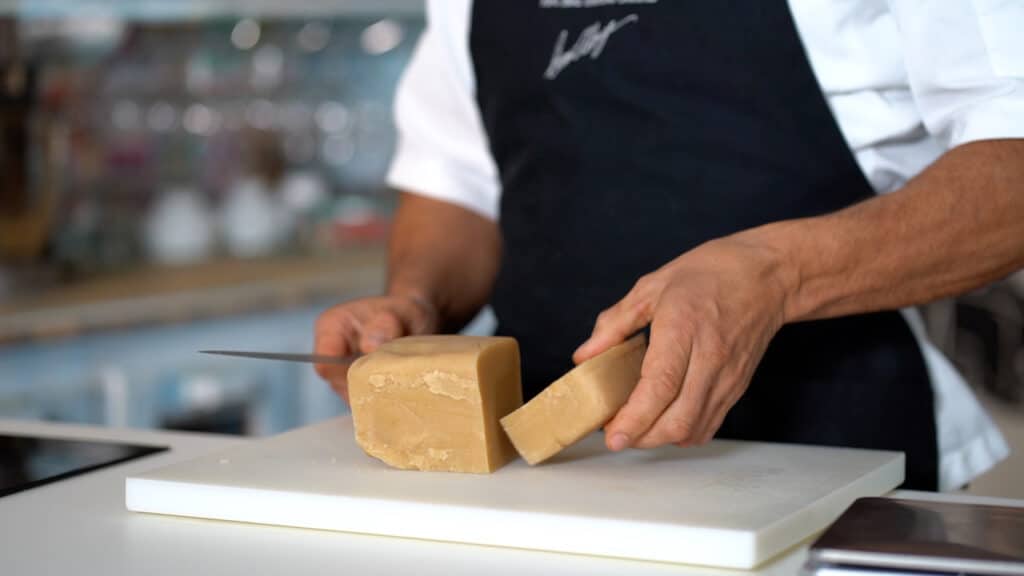
How To Cover a Cake with Marzipan
- Dust marzipan (350g per large cake) and countertop with cornstarch or potato starch. Roll it out into a large 0.16-inch/4mm thick disk.

- Grab cake from the freezer. Working from the back of the cake to the front, start draping the marzipan towards you, trying to keep it as centered as possible.

- Gently apply marzipan using the palm of your hand pushing out any air bubbles and creases, starting on the top then working down the sides.

- Use a paring knife to cut away the excess marzipan. Save scraps and form another ball with more marzipan to do the next cake.

- Place finished cakes onto a cake boards (use a dot of royal icing or glucose to stick cakes on boards), and freeze.


Cake Decorating Ideas
- When it comes to cake decorating, there are countless options to explore—each suited to the theme, season, and budget. Fresh blooms bring natural elegance, while delicate sugar flowers crafted from roll fondant or marzipan offer lasting beauty. Sugar work artistry, brings the ultimate sophistication. For intricate details, fine piping work using a cornet delivers precision and flair.


Piping Chocolate Technique
- Piping melted chocolate works over marzipan and roll fondant. The technique is simple: take a square of parchment paper and cut it diagonally into two triangles. Fold one triangle onto itself, shaping it into a slender cone, then secure the edges to form a small piping bag. Fill it with melted dark chocolate loosen with a couple drops of oil, snip the tip to your desired size, and let your creativity flow.

- Arrange flowers artfully all around the mounted cake. Keep wedding cake in the refrigerator for up to 24 hours.


Royal Icing
- Put cake on decorated styrofoam cylinder if using it. Stick it with a dot of royal icing or glucose. Use a piping bag fitted with a small 3mm round tip.
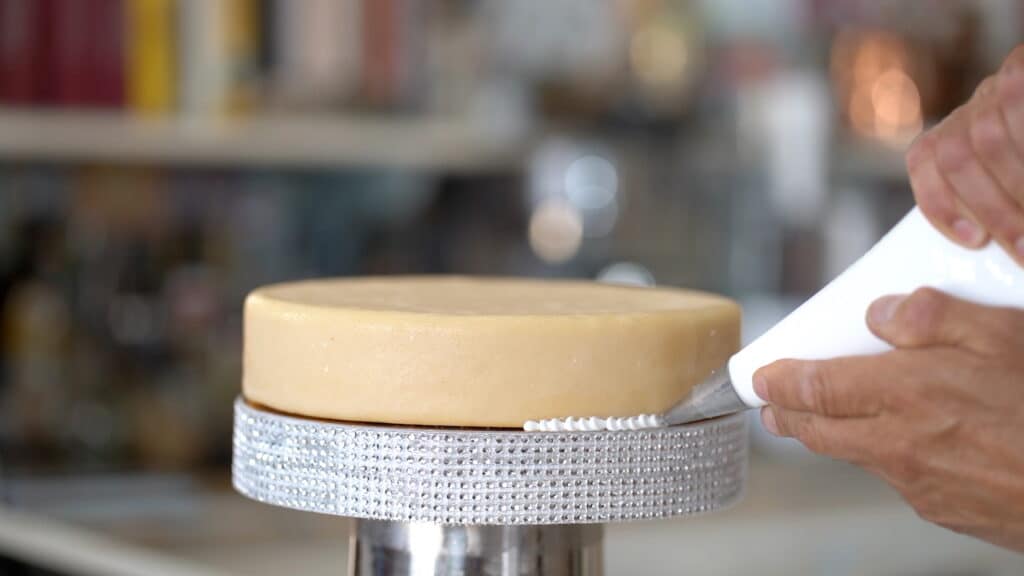
- Pipe dots of royal icing at the base of the cake, and stick silver chocolate balls all around if desired.

- To create an elegant, flowing design, hold the bag at a 45-degree angle just above the cake’s surface. Begin by gently pressing to release the icing, then sweep your hand in a smooth, continuous S motion, letting the line taper slightly at each curve for a graceful effect. Keep the pressure even, lifting slightly at the peaks and valleys to maintain consistency. Overlapping or connecting S shapes can form delicate scrollwork, vines, or lace-like patterns.Pro Tip: Practice on countertop first to perfect rhythm and pressure—confidence is key to achieving fluid, artful strokes. Refrigerate or freeze cakes (with the styrofoam).

- Put the chilled cakes on display 30 minutes before cutting. If cakes are frozen, let them thaw overnight in the refrigerator.

- Make vanilla almond dessert cups with leftovers. Enjoy!


Ready to discover this recipe? You're only 1 step away.
This recipe is only accessible to registered members!
Create your account to access all recipes and content of my website.
Join us now and enjoy more 800 recipes (Mostly French with European Influences, American Classics and Asian fusion)
Already register? Sign in


Appetizers
Beetroot Red Cabbage Mango Salad

Free Recipes
How To Prepare Red Cabbage Raw


Free Recipes
Apple Pie Traybake

Cakes
Olive Oil Chocolate Cake

Desserts
Spicy Chocolate Bar

Entrees
Deboning A Poularde Leg

Free Recipes
Chanterelle

Bread
Panettone Perdu

Free Recipes
Mustard Fig Spread

Free Recipes
Poularde Demi-Glace
