Please note that the full access to this content needs a subscription: please sign up.
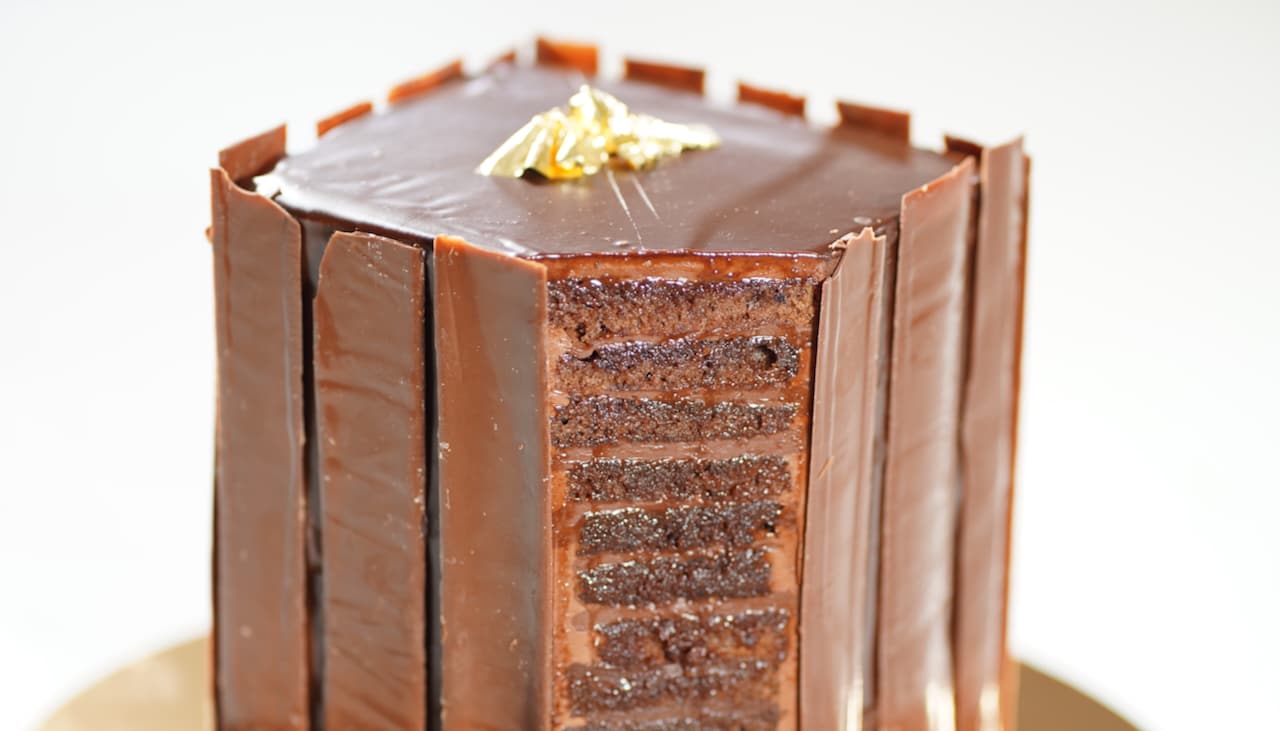
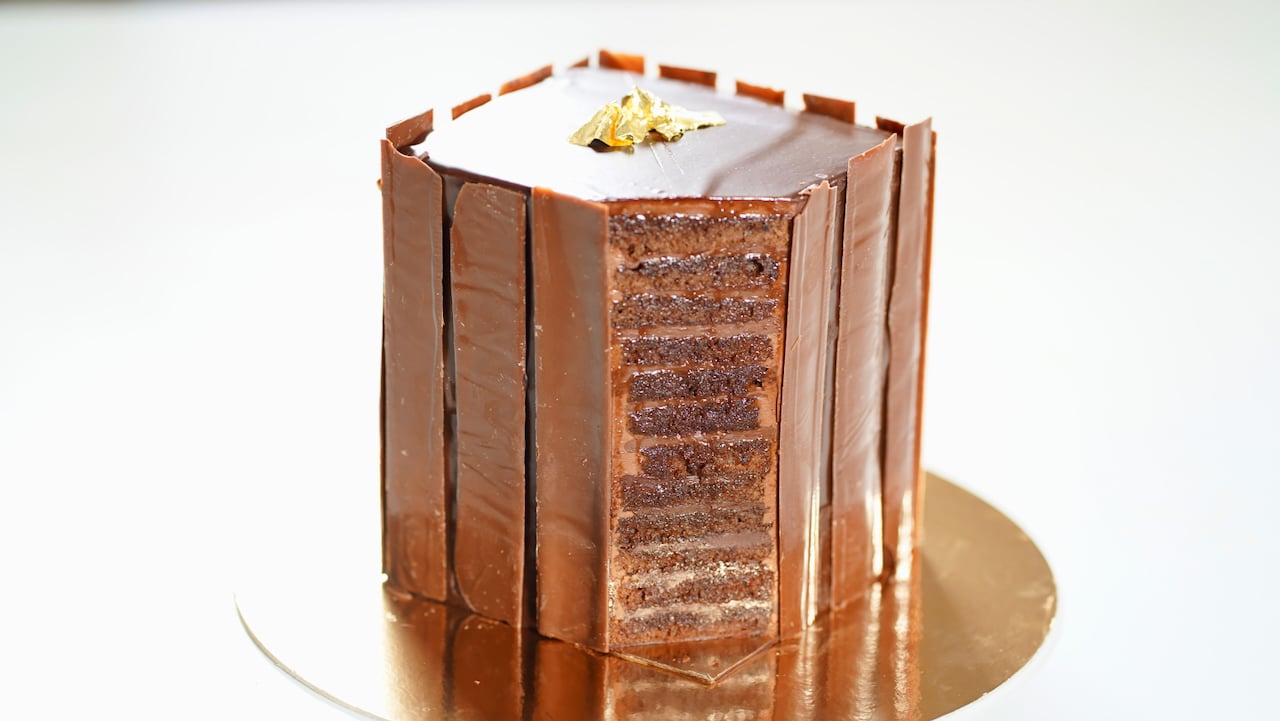
Introducing your next project: the 24-Layer Chocolate Cake Tower!
This recipe is a protected and only available for paid members. To obtain the full step by step recipe and detailed ingredients list, please sign up.
Preview the recipe
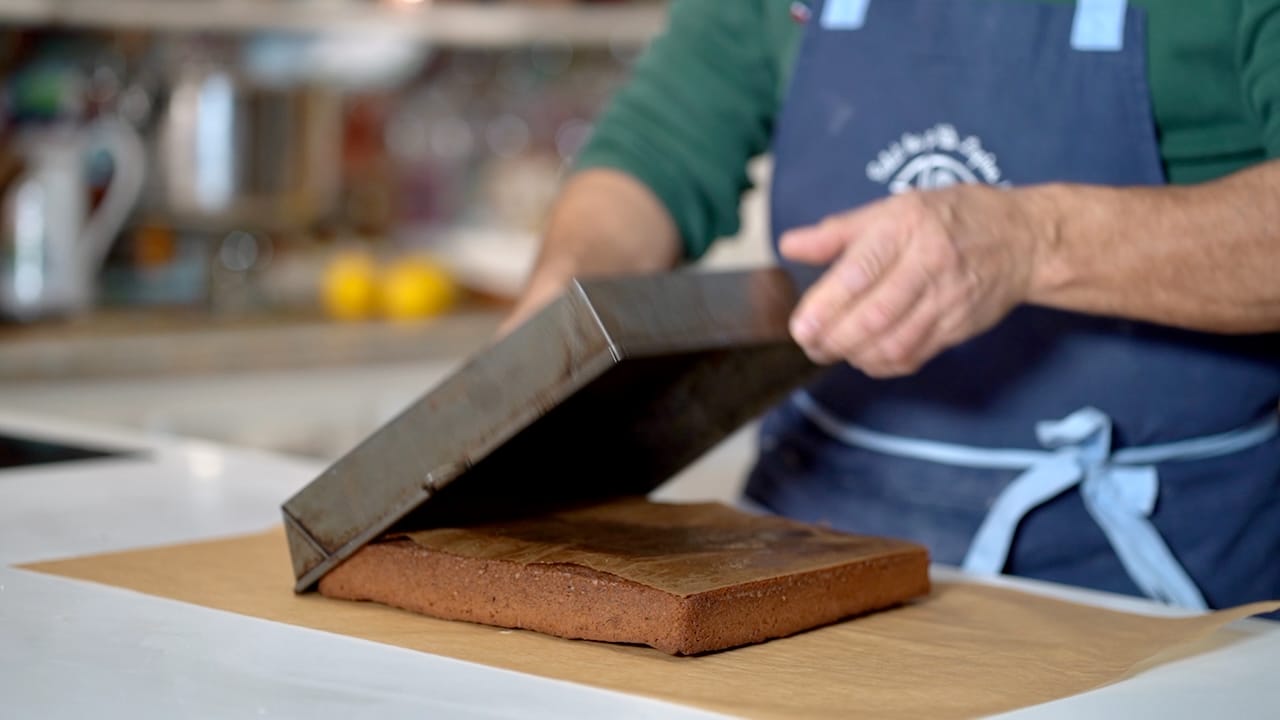
Chocolate Pain De Gênes
- To start, it is recommended to make the Pain de Gêne sponge cake a day in advance to allow it to rest and develop its flavors. In addition, the cake will be easier to slice. In a food processor, pulse powdered sugar and almond meal to create a fine powder known as tant pour tant (TPT). Essential in macaron making for example. It achieve a lighter batter texture ensuring smooth integration into the batter and a finer crumb structure. In a stand mixer fitted with the whisk attachment, beat the almond-sugar mixture and eggs on high speed for approximately 10 minutes until light and fluffy. Meanwhile, sift together flour, cocoa powder, and baking soda to ensure a smooth and airy texture in the final cake. In a large pastry bowl, gently fold one-third of the egg mixture with melted butter, then add the sifted powders. Then fold in the remaining batter until fully incorporated. Pour the batter into the prepared cake pan.

Baking
- Preheat a fan oven to 320°F/160°C. Bake the cake for about 30-35 minutes, until it is set and a skewer inserted into the center comes out clean. Allow the cake to cool completely. Keep it refrigerated before slicing.
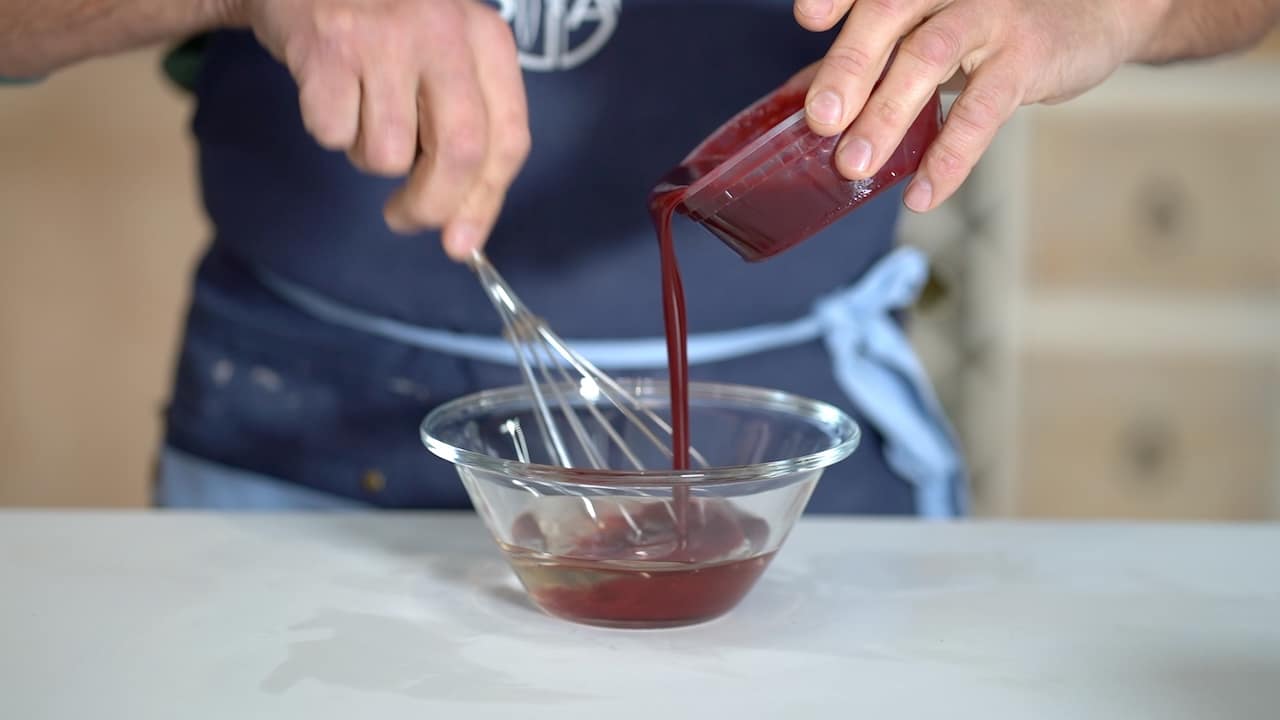
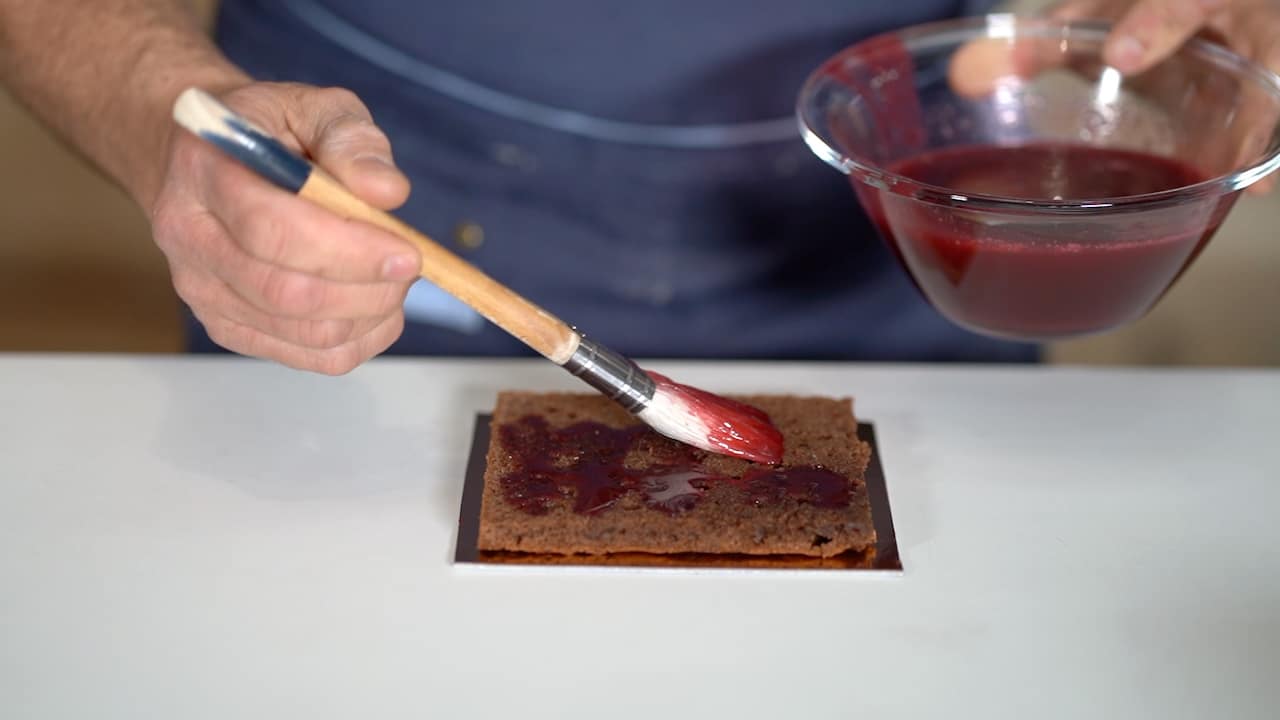
Raspberry Punch
- Bring to a boil water and sugar. Cook for for 2 minutes and add the raspberry puree. Instead of fruit puree, the syrup may be flavor with liquor such as grand marnier or dark rum. Use the punch at room temp.

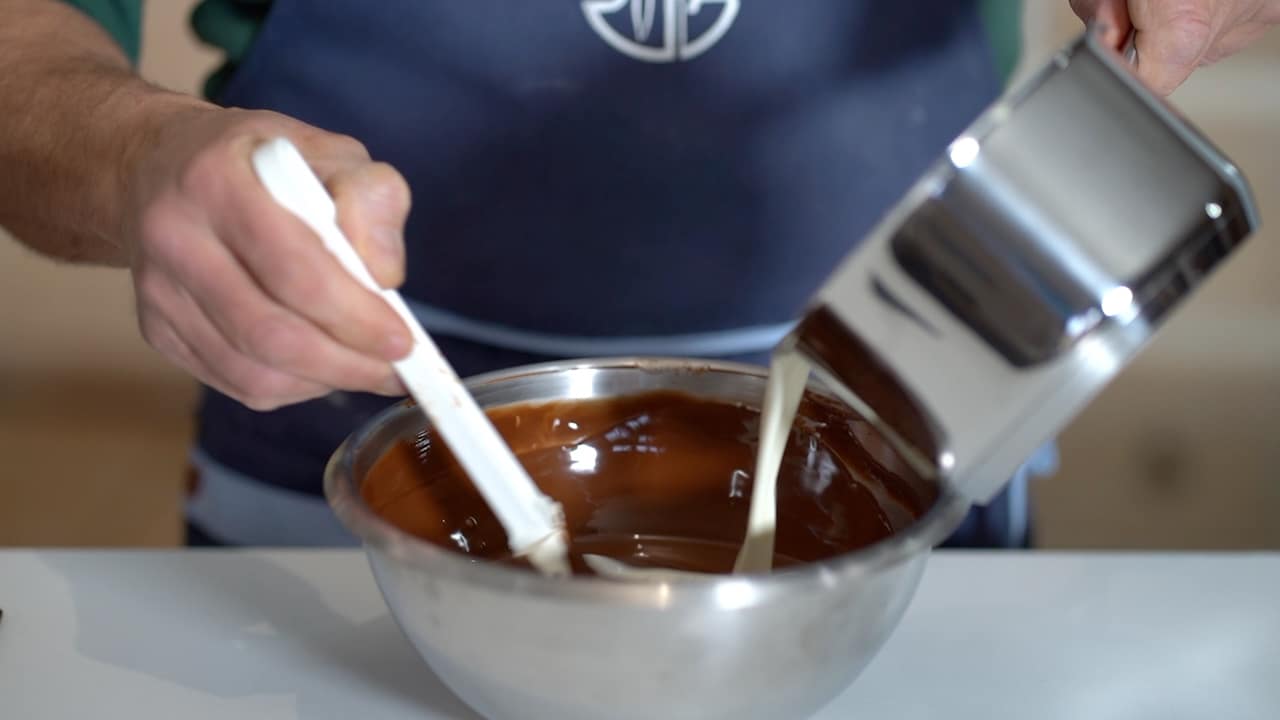
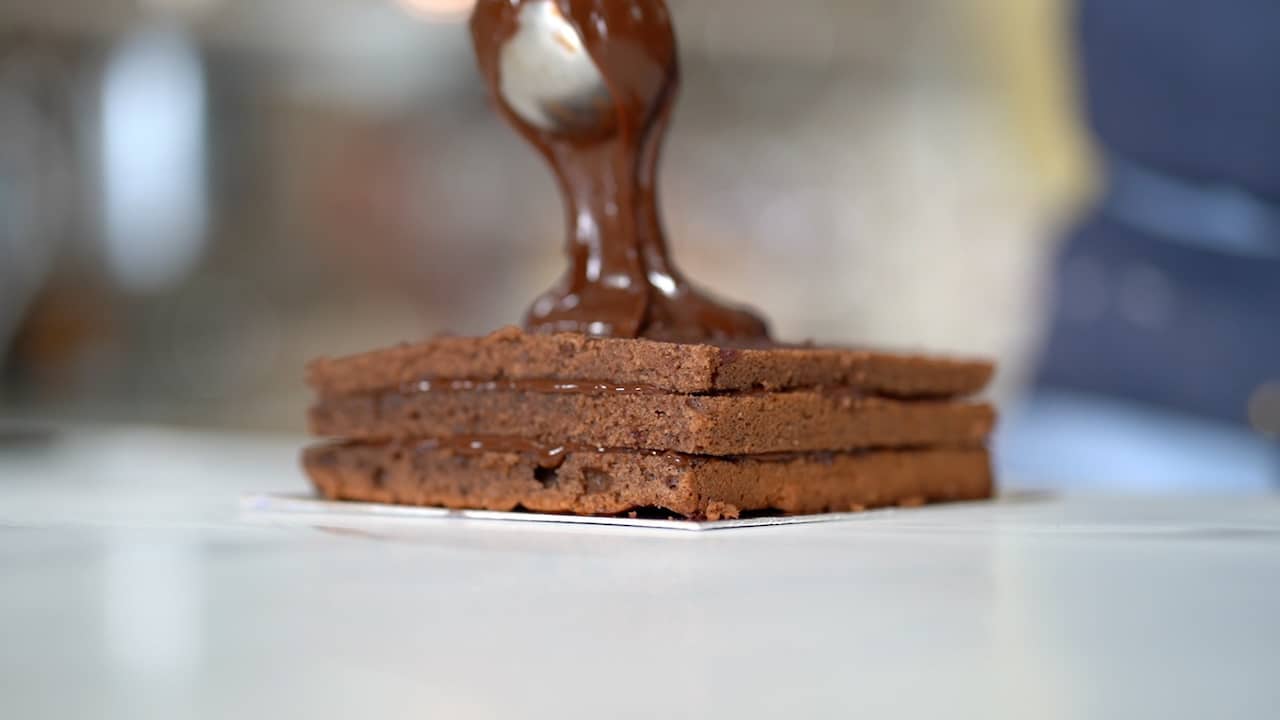
Hazelnut Chocolate Ganache
- Chop the chocolate and melt it in a bain-marie, stirring occasionally. Be careful not to overheat the chocolate; remove it from the bain-marie as soon as it is melted. Meanwhile, gently heat the heavy cream without bringing it to a boil.
- Pour about one-third of the warm cream into the melted chocolate and mix with a rubber spatula. Once smooth and homogeneous, incorporate the remaining cream. Add the room-temperature hazelnut praliné. If needed, use an immersion blender to create a perfectly smooth ganache. Leave the ganache at room temperature until ready to use; it should remain spreadable. If your ganache becomes too stiff, gently rewarm it to soften it.


Assembly
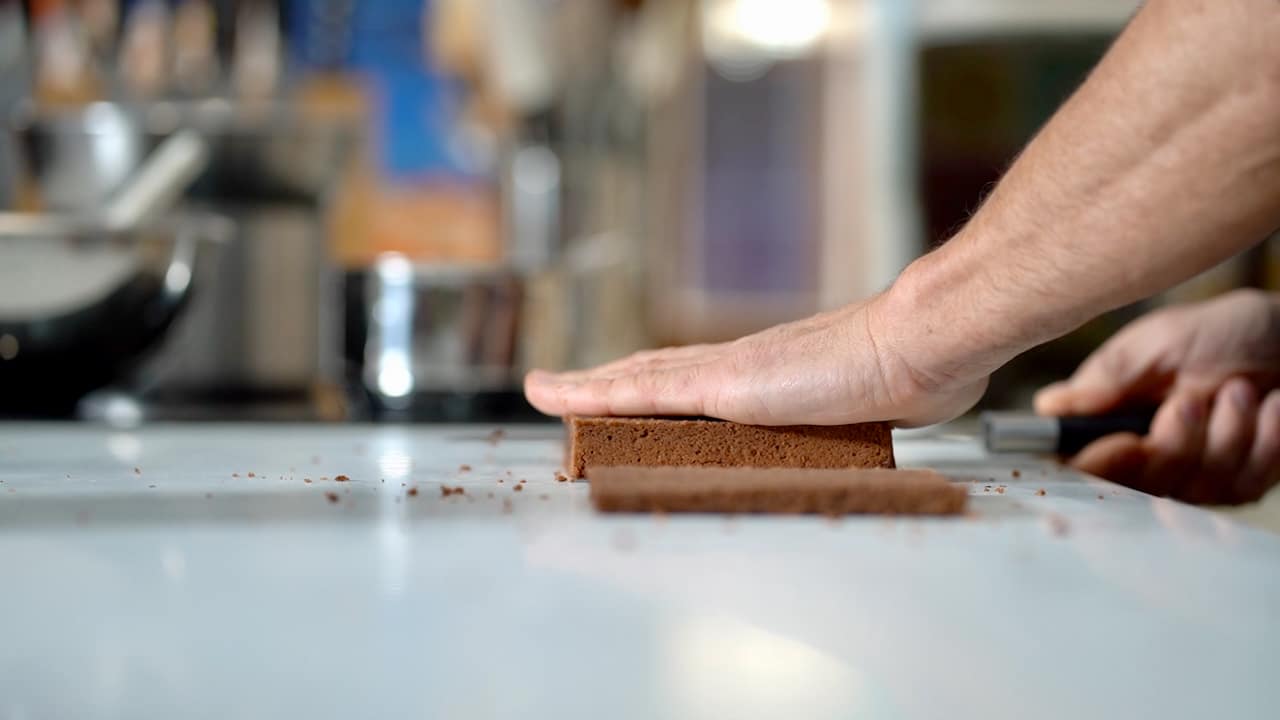
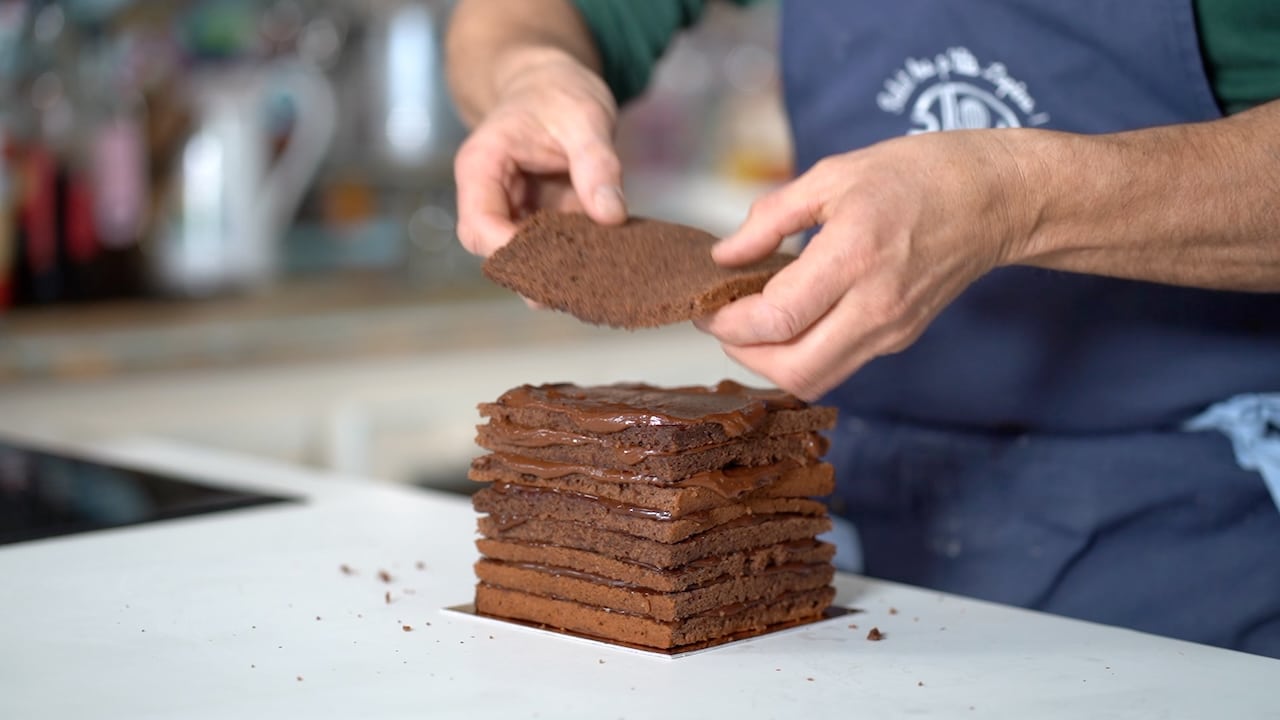
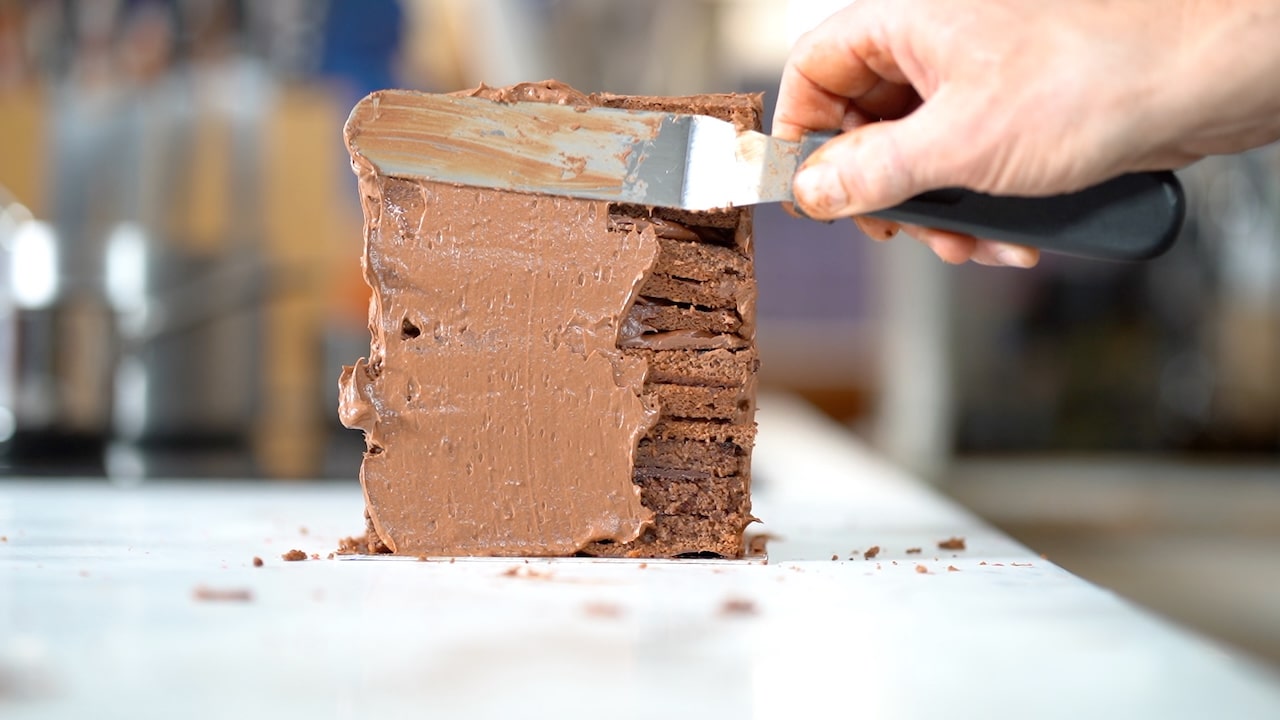
- Cut the almond chocolate slab into two, and then four equal slabs.
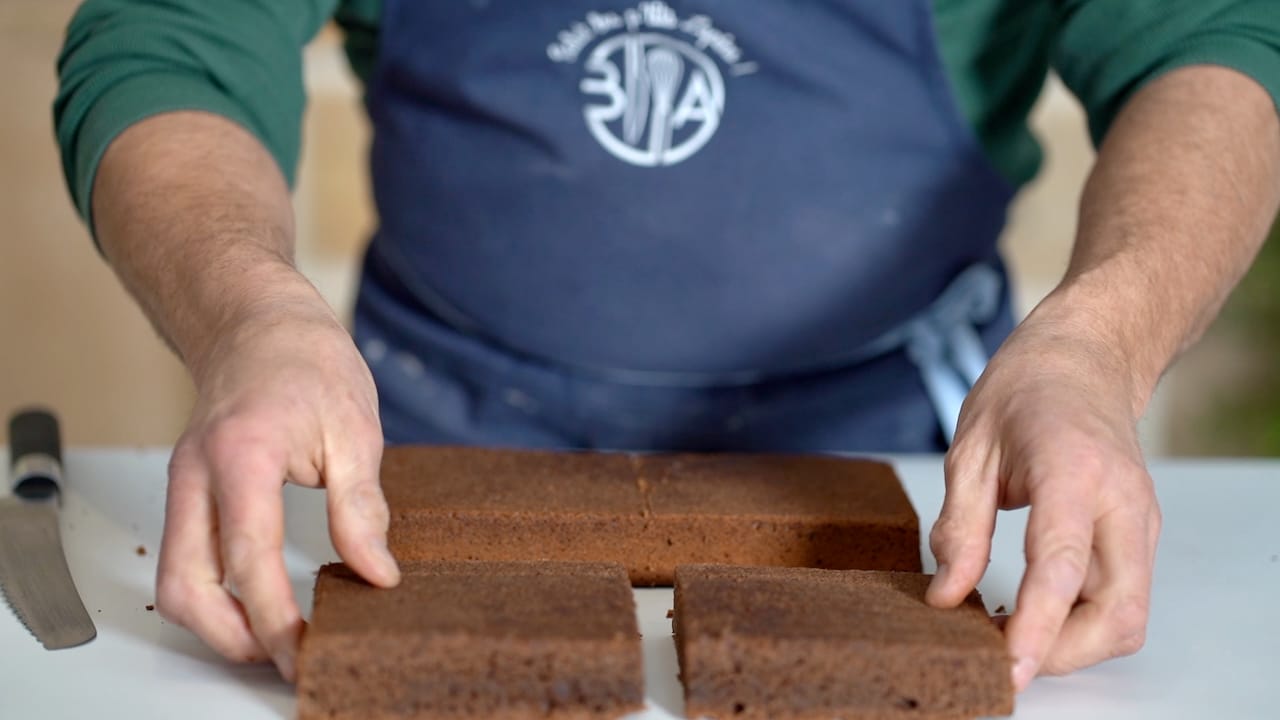
- Cut horizontally each sponge into 3 slices (12 slices total).


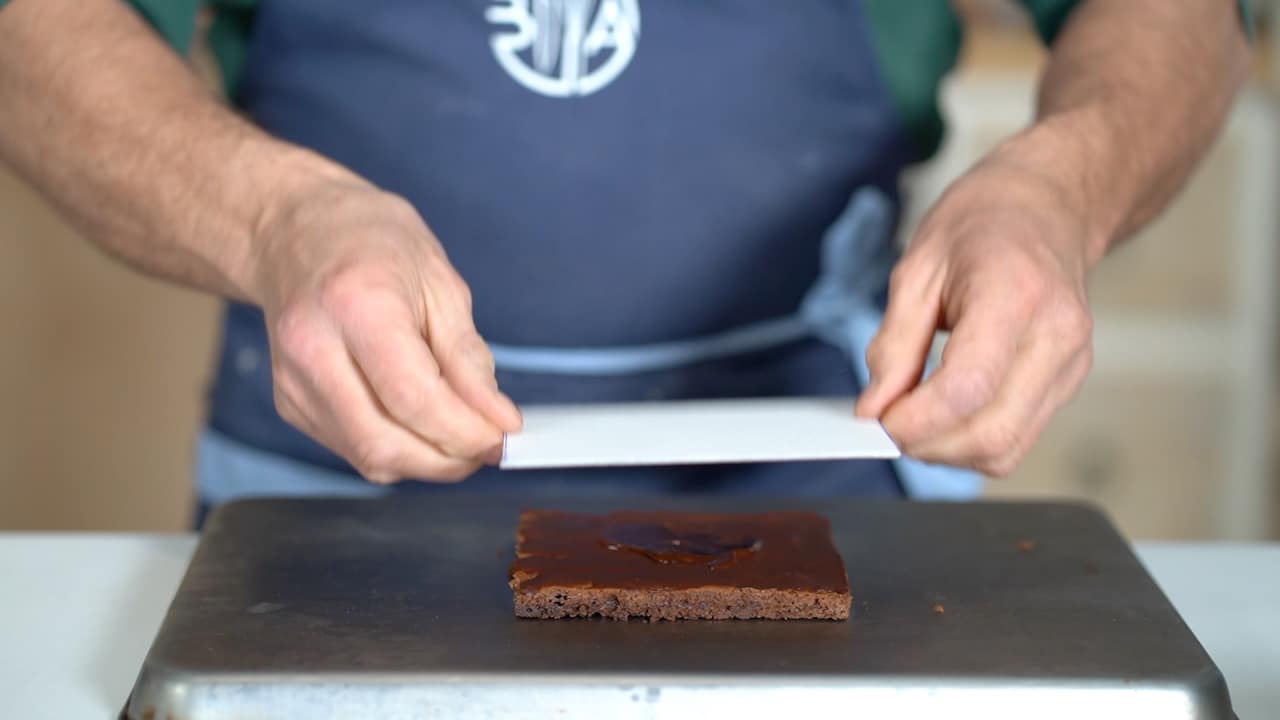
Chocolate Chablon
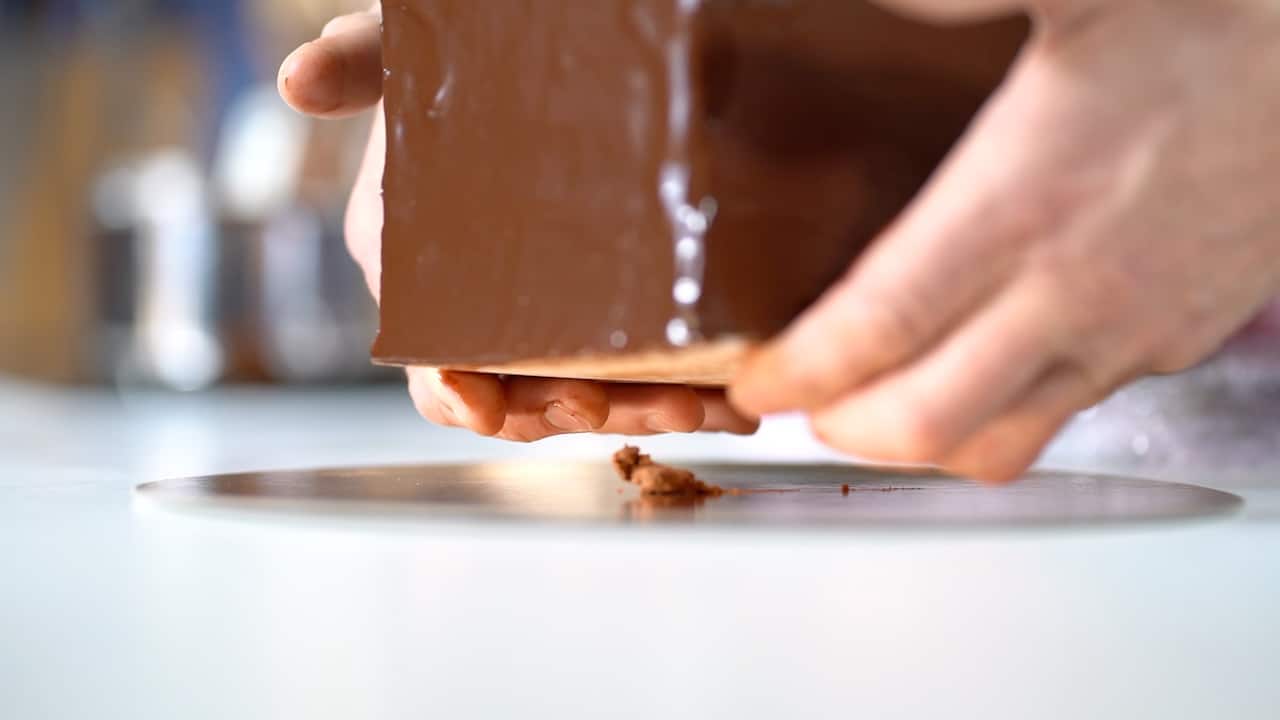
- Cut cake board into a 5.2-inch (13cm). Chablon is a versatile technique where melted dark chocolate is combined with a small amount of oil (10%) to create a protective coating for cakes. It offers structural support, especially for cakes that have been moistened with syrup, preventing them from becoming too delicate. Here's how to apply it: Flip one sliced sponge and spread a thin layer of chocolate chablon (skin side down).
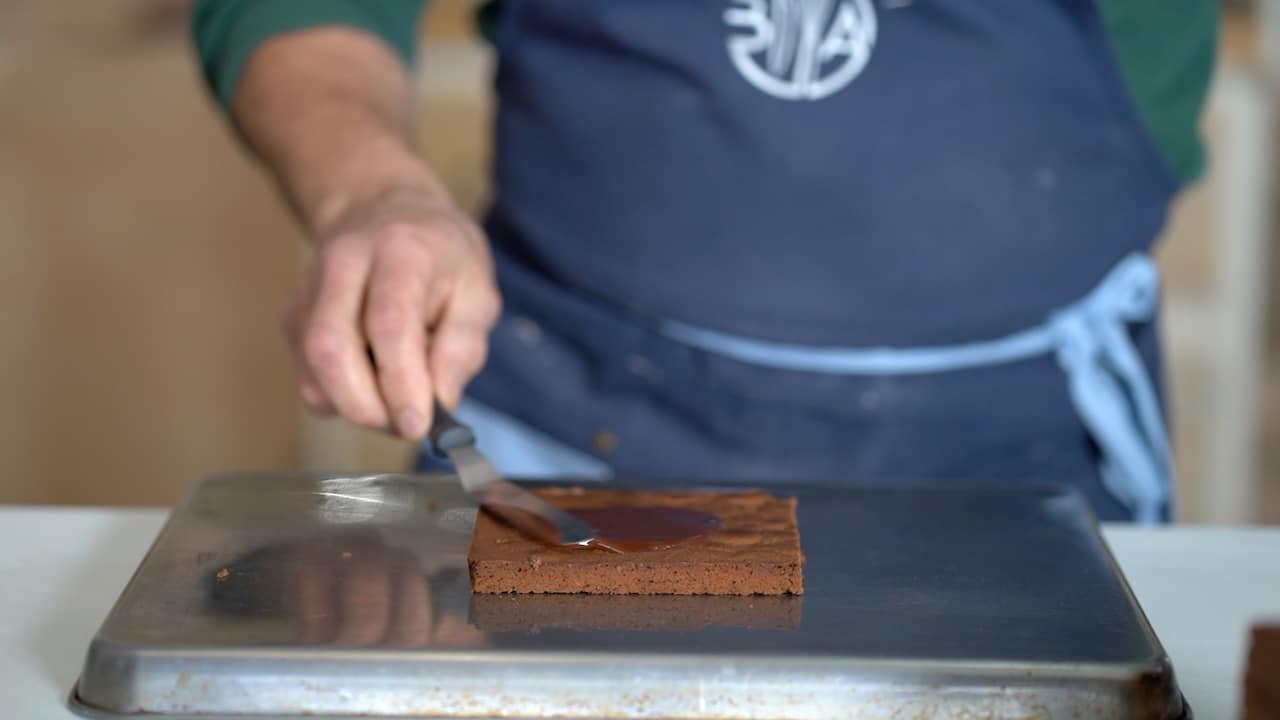
- Once set, add a dot of ganache to stick the cake board.


Assembly
- Lightly moisten the sponge with the punch to keep it moist.
- Spread the first layer of ganache over the sponge, ensuring it touches all sides of the cake ring for structural integrity. Avoid overloading; the ganache layer's thickness should match that of the sponge for balanced proportions.

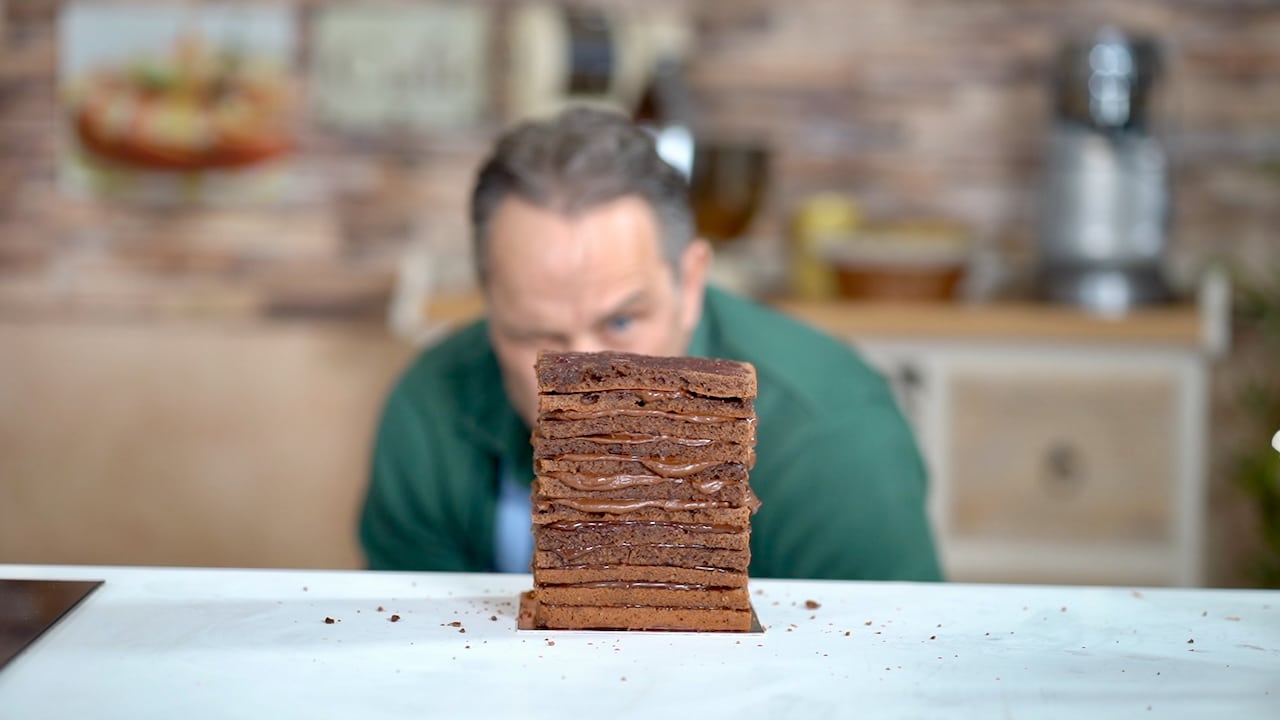
- Alternate between sponge layers and ganache until all layers are assembled. Press down gently after each layer to maintain evenness.
- Repeat the layering process, alternating between sponge and chocolate ganache, until all tiers are assembled.
- Smooth it out evenly with an offset spatula to create a polished surface. Refrigerate cake.
- Heat your large offset spatula and smooth out the chilled cake. Place the chocolate tower in the freezer.
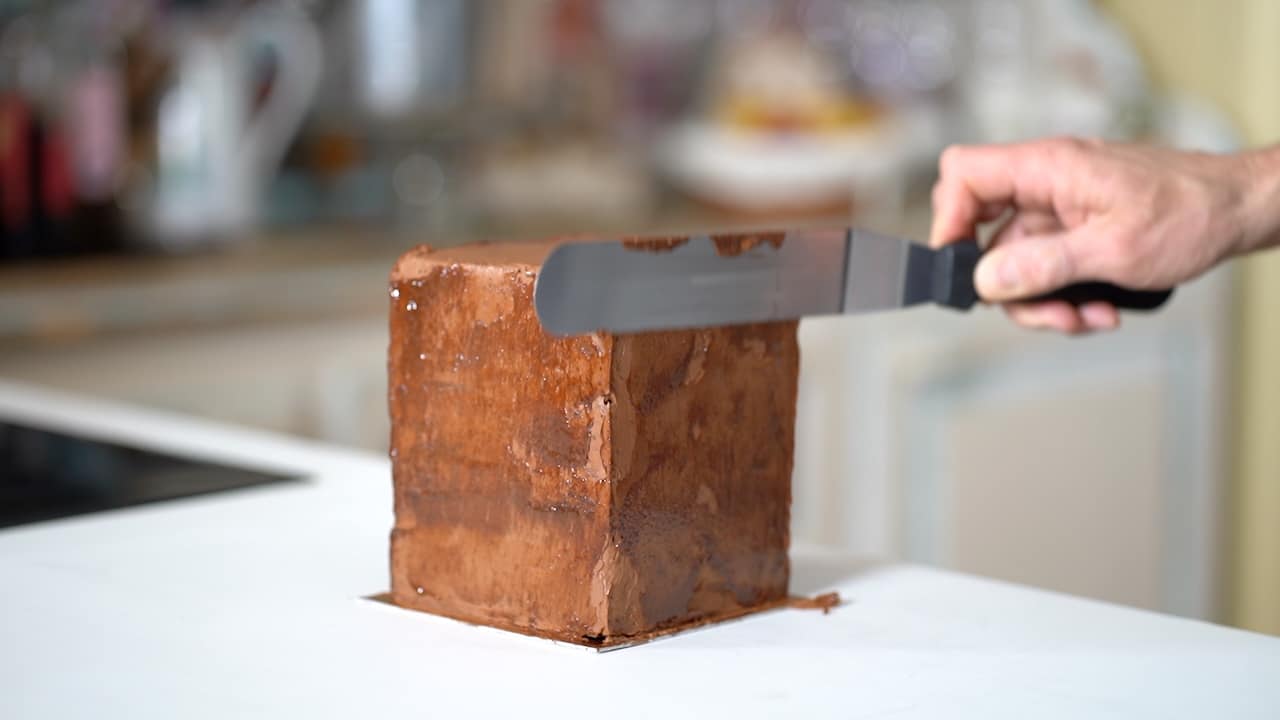
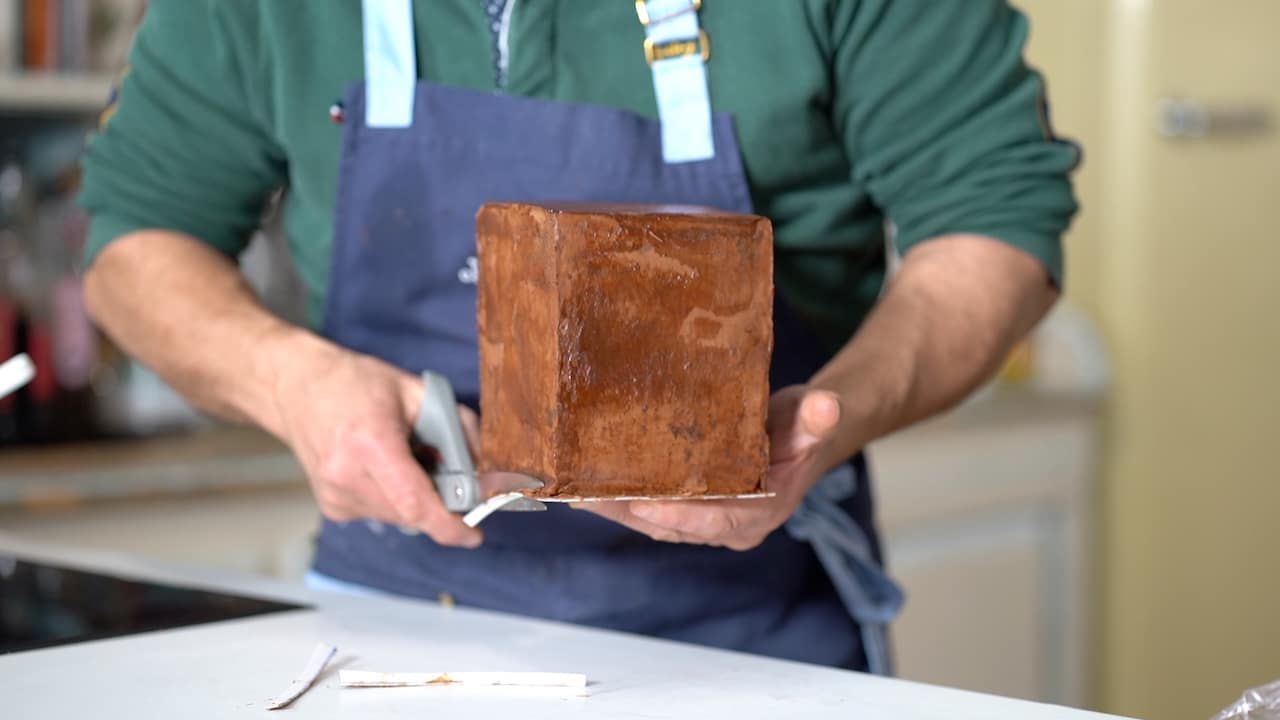
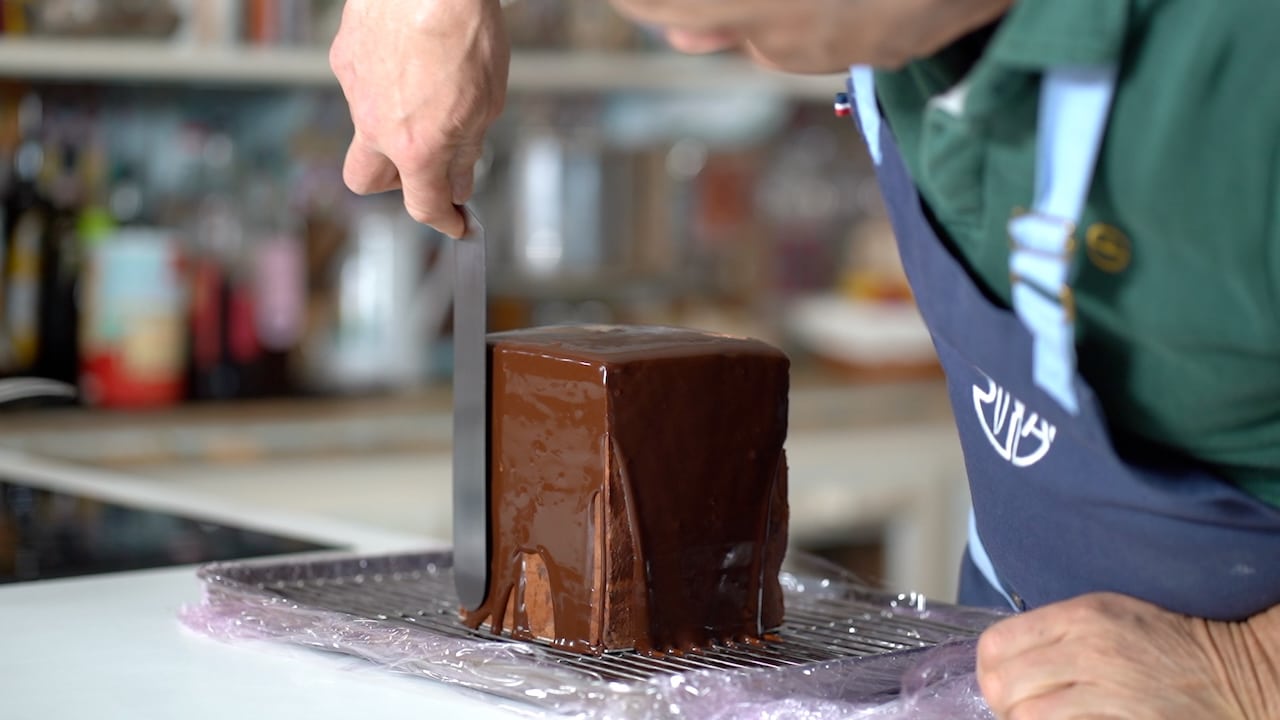
- Trim the edges of the cake flush with the board to ensure a smooth glazing process.


Chocolate Glaze
- Melt the chocolate with the oil (do not overheat the chocolate—melt it just until smooth, then remove it from the bain-marie). Transfer the melted chocolate to a narrow container and add the cocoa powder. Meanwhile, bring the heavy cream and honey to a light boil, then pour it over the chocolate mixture and mix using an immersion blender. Keep the nozzle submerged to prevent air bubbles from forming. Pass the glaze through a sieve and keep it at room temperature until ready to use.
Glaze the Chocolate Tower
- Prepare a rimmed baking tray lined with plastic wrap. Set the frozen cake on a cooling rack positioned over the tray to catch excess glaze. Heat the chocolate glaze to a precise 108°F/42°C. Starting from the edges, pour the glaze and work toward the center.
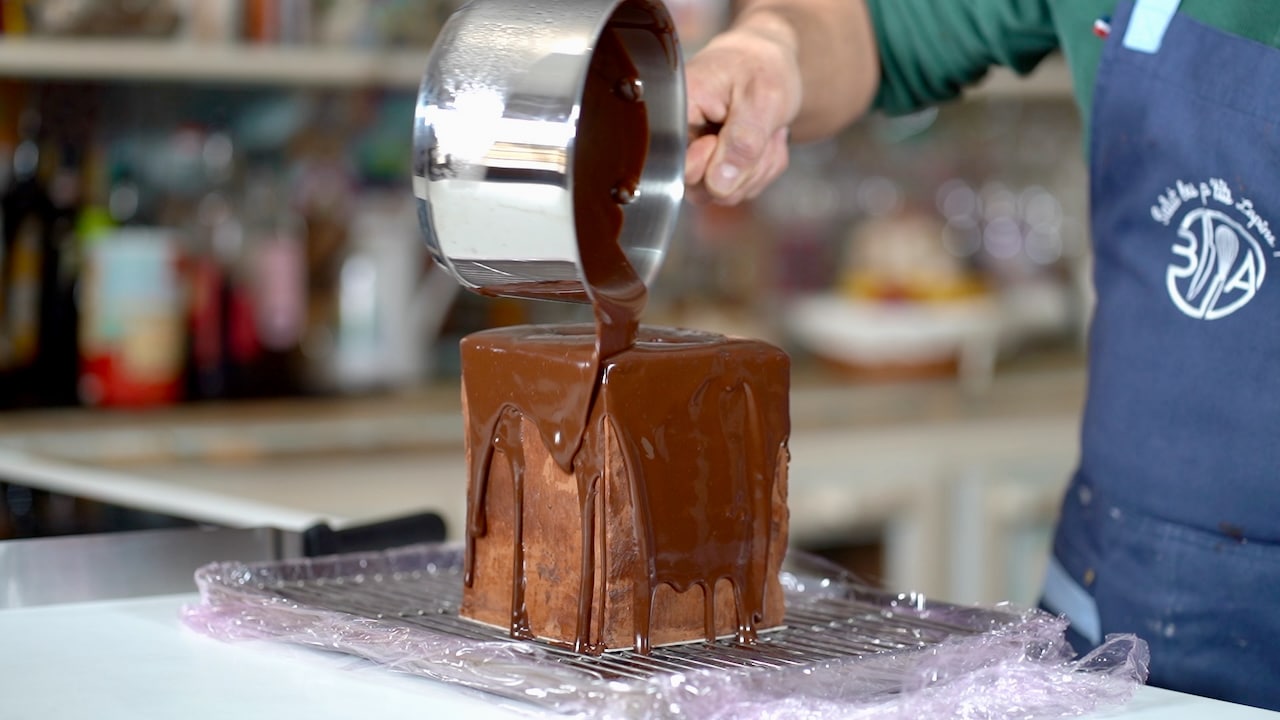
- Immediately smooth the surface and sides with a large offset spatula.
- Carefully, transfer cake onto a cake board or serving dish.


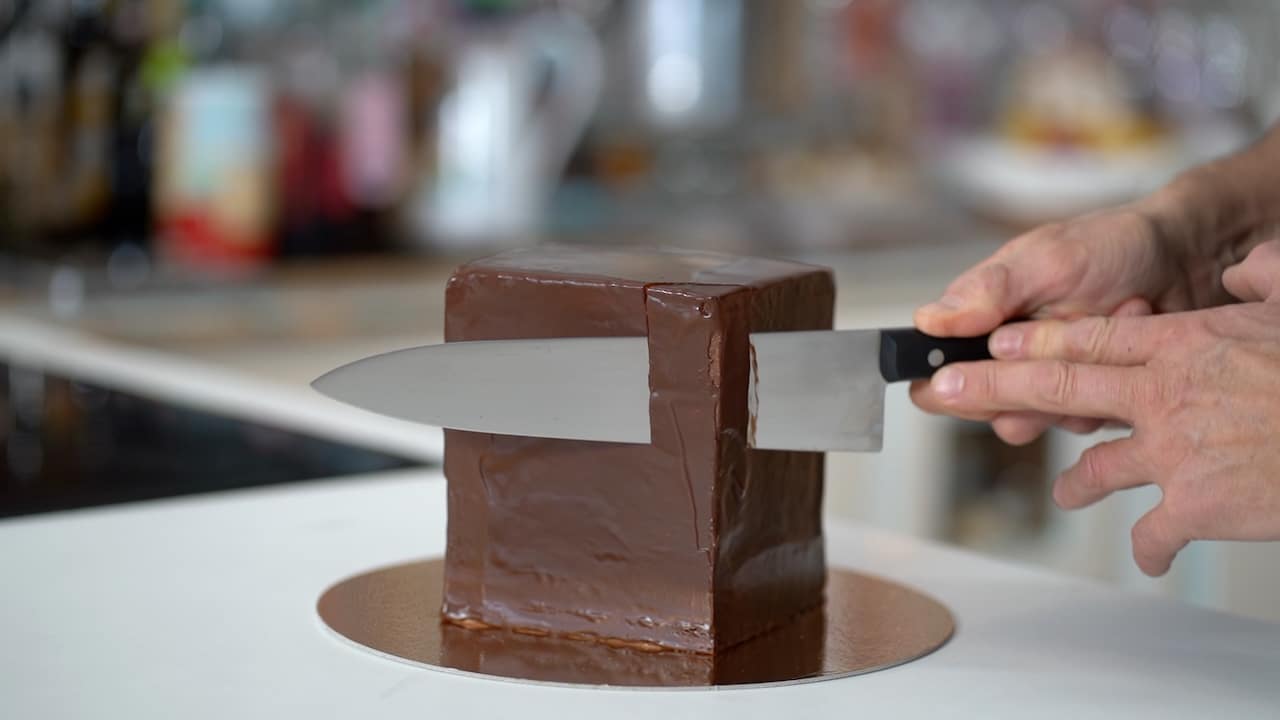
Cutting Cake
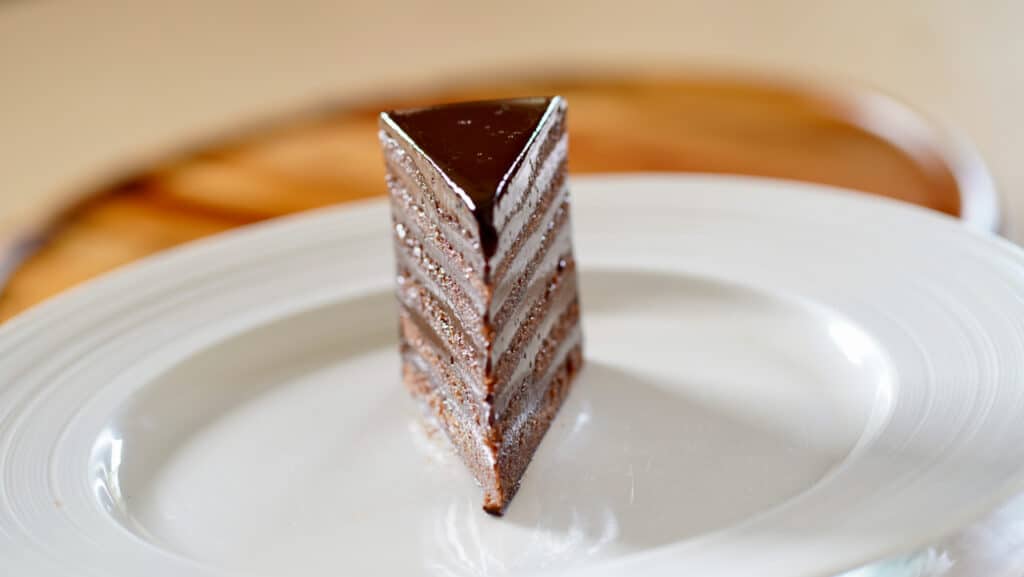
- Heat the knife blade in hot water or run it quickly over a flame. Slice off one corner of the chocolate cake tower.

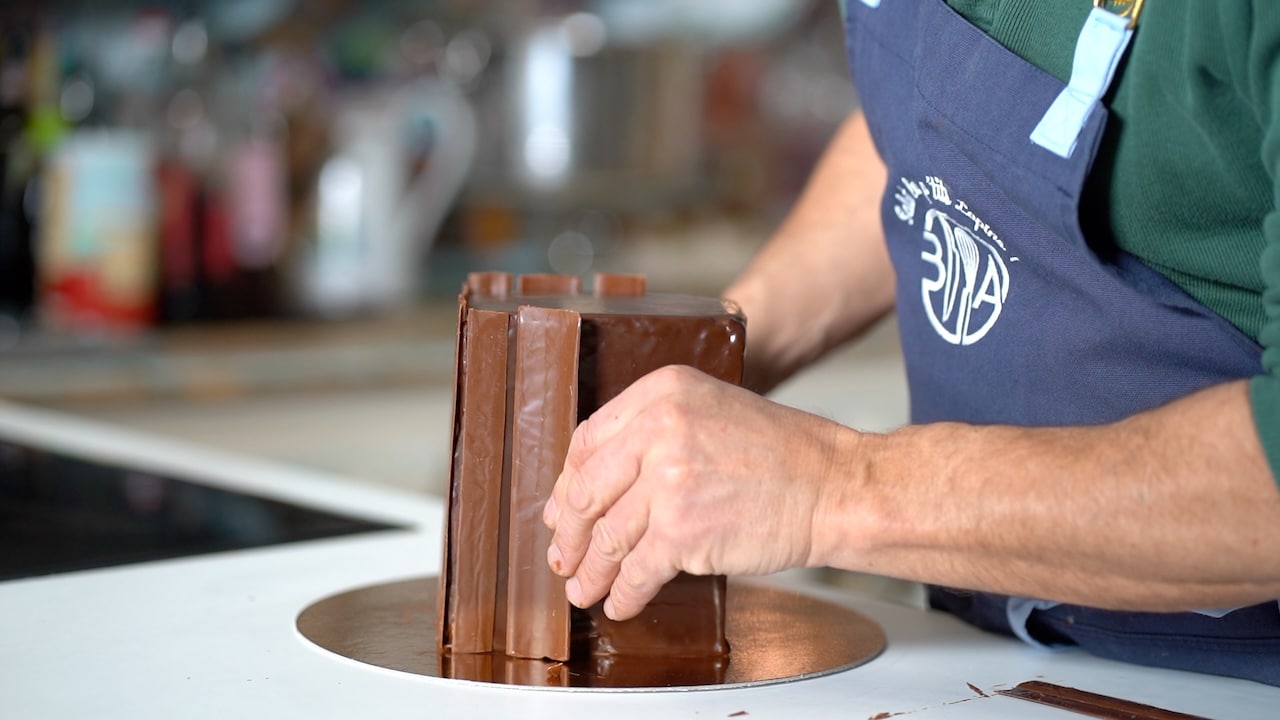
Decorate Cake
- Stick chocolate barks around the cake. Let the 24-layer chocolate cake tower to thaw completely before cutting.

Plating
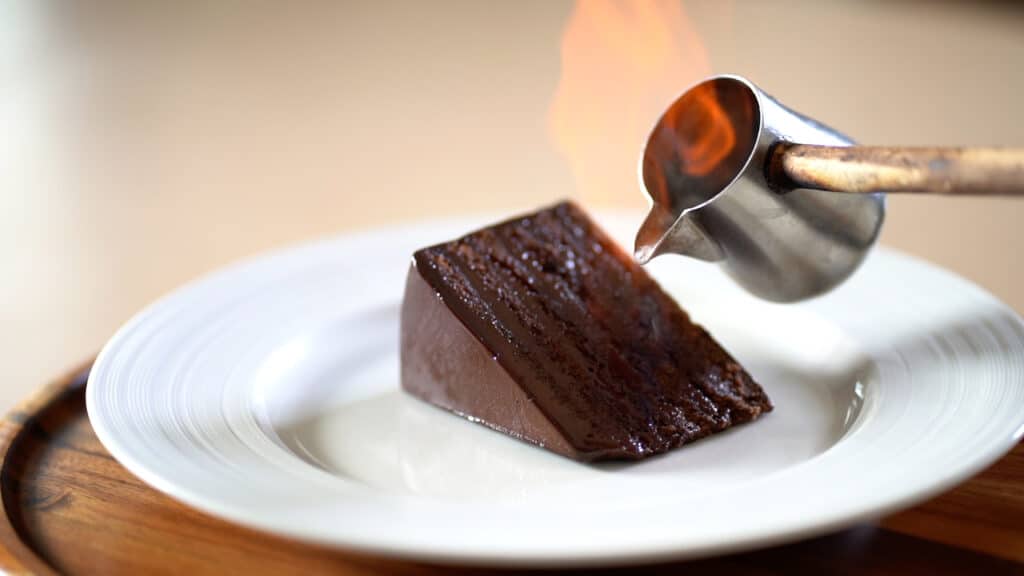
- This cake is best when served at room temperature. Slice cake into desired portions. Use a hair dryer to gently and briefly heat the surface of the cake layers; this will create a beautiful, glossy sheen. For an extra decadent touch, a slice can be microwaved (remove chocolate barks) for a few seconds to create a melt-in-your-mouth texture. Ultimately, serve each slice with a drizzle of flambéed Cointreau or Grand Marnier.

Storage
- If the room temperature is above 77°F/25°C, the cake can be kept out for up to 2 days. Otherwise, keep it in the fridge for up to a week. Ganache-based cakes can also be vacuum-sealed and kept frozen for up to 6 months. To do so, first cut the cake into desired portions and freeze them overnight. Then, vacuum-seal the portioned cake. When ready to serve, remove the frozen cake from the bag and let it thaw overnight in the refrigerator.


Ready to discover this recipe? You're only 1 step away.
This recipe is only accessible to registered members!
Create your account to access all recipes and content of my website.
Join us now and enjoy more 800 recipes (Mostly French with European Influences, American Classics and Asian fusion)
Already register? Sign in


Appetizers
Beetroot Red Cabbage Mango Salad

Free Recipes
How To Prepare Red Cabbage Raw


Free Recipes
Apple Pie Traybake

Cakes
Olive Oil Chocolate Cake

Desserts
Spicy Chocolate Bar

Entrees
Deboning A Poularde Leg
Free Recipes
Chanterelle

Bread
Panettone Perdu

Free Recipes
Mustard Fig Spread

Free Recipes
Poularde Demi-Glace
